


Replacing Alarm Relay Wires
67
CHAPTER 10: Replacing Hardware Components
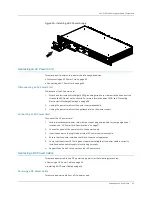
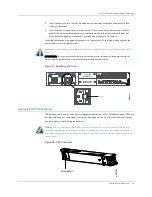
6.
Remove the rubber safety cap from the SFP and the end of the cable. Insert the cable into the
SFP.
7.
Verify that the status LEDs above the SFP slot indicate that the fiber-optic port is functioning
normally. For more information on LEDs on the fiber-optic port, see “Ethernet Ports” on
8.
After replacing the SFPs and connecting the cables, issue the following command to ensure
that the interface is operational:
cli@BX7000>
show interface
interface-name
Figure 29: Installing an SFP
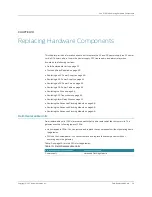
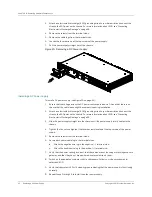
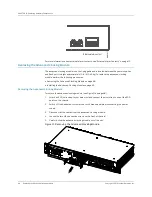
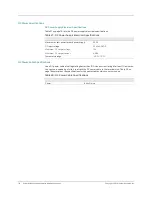
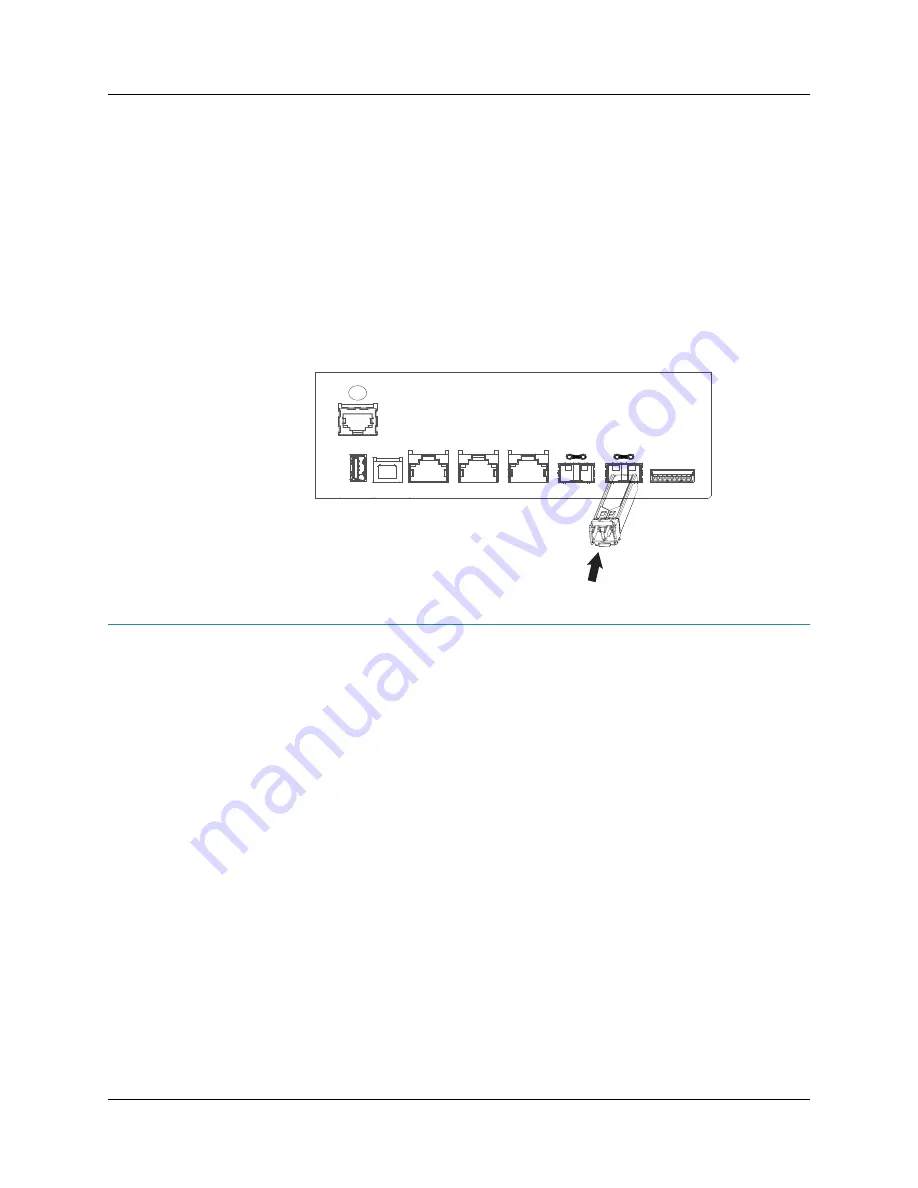
Replacing Alarm Relay Wires
To replace the wires connected to an external alarm device (see Figure 30 on page 67):
1.
Disconnect the existing wire at the external device.
2.
Prepare the required length of replacement wire.
3.
Using a screwdriver, push the body cover of the connector located on the top of the wire which
is to be disconnected from the wire-trap connector.
4.
Remove the wire from the ALARM slot and release the body cover of the connector.
5.
Push the replacement wire into the ALARM slot.
6.
Connect the other end of the wire to the external device.
Figure 30: Alarm Relay
FLASH
CONSOLE
COPPER
COPPER
COPPER
SFP
SFP
ALARM
ETHERNET 1
ETHERNET 1
ETHERNET 2
ETHERNET 2
ETHERNET 0
CONSOLE
g002913
Содержание BX7000
Страница 10: ... x Copyright 2010 Juniper Networks Inc ...
Страница 12: ... xii Copyright 2010 Juniper Networks Inc ...
Страница 18: ...About This Guide xviii Requesting Support Copyright 2010 Juniper Networks Inc ...
Страница 20: ... 2 Copyright 2010 Juniper Networks Inc ...
Страница 36: ...CHAPTER 1 BX7000 Multi Access Gateway Overview 18 Advanced Clocking Module Copyright 2010 Juniper Networks Inc ...
Страница 60: ...CHAPTER 6 Grounding and Powering the Gateway 42 Powering Off the Gateway Copyright 2010 Juniper Networks Inc ...
Страница 64: ...CHAPTER 7 Accessing and Configuring the Gateway 46 Initial Setup Copyright 2010 Juniper Networks Inc ...
Страница 66: ... 48 Copyright 2010 Juniper Networks Inc ...
Страница 76: ...CHAPTER 9 Troubleshooting 58 Troubleshooting the Advanced Clocking Module Copyright 2010 Juniper Networks Inc ...
Страница 90: ... 72 Copyright 2010 Juniper Networks Inc ...
Страница 122: ... 104 Hardware Compliance Copyright 2010 Juniper Networks Inc ...
Страница 131: ...Copyright 2010 Juniper Networks Inc 113 Appendix E Declaration of Conformity ...
Страница 132: ... 114 Copyright 2010 Juniper Networks Inc ...
Страница 133: ...Copyright 2011 Juniper Networks Inc 115 PART 4 Index z Index on page 117 ...
Страница 134: ... 116 Copyright 2010 Juniper Networks Inc ...