junger X*AP RM1 Скачать руководство пользователя страница 10


X*AP RM

1


    6 


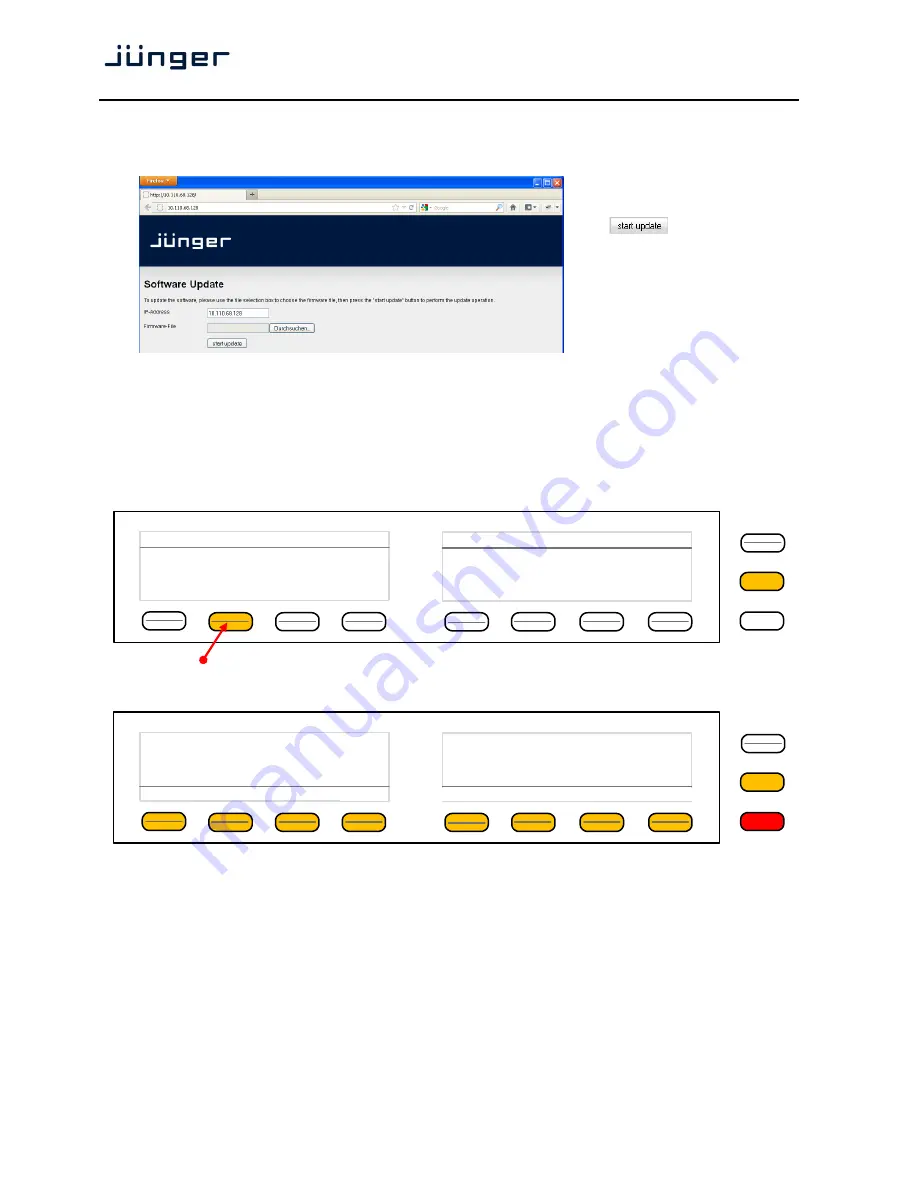
Browser based set up – 

firmware update of the X*AP RM

1

 remote panel


You must open a browser and enter the 

IP address

 of the 

X*AP RM

1

 remote panel into the 

URL

 field:  


You must select the respective 
file and press: 


After finishing the procedure 
the 

X*AP RM

1

 remote panel will 

reboot and you must manually 
reconnect the device you are 
about to control. 


Getting started – basic 

X*AP RM

1

 remote panel operation 

 
After power up and booting is finished, the 

X*AP RM

1

 remote panel


shows the remote units which are 

"attached" to it. The display shows the respective device 

"Name"

, its 

IP address

 and the connect 

"Status"

Options are "connect", "can't connect" and "unknown device". In case of "connect" you may press one of the 
highlighted buttons. 


If you press      the 

<F-Key>

 the 

X*AP RM

1

 remote panel will connect with that unit. 

(The above example has just one unit attached for remote control). Now the 

X*AP RM

1

 remote panel


will 

gather all necessary information from that unit (it may take a few seconds) and open up the 

main display


We assume here that the 

X*AP


RM

is controlling a 

TAP

 
Because this is the 

main operating display

, the 

<ESC>

 button lights 

red

 to indicate that the power up 

display is directly above the 

main display

. Pressing 

<ESC>

 returns you back to the device selection  

(power up display). 

MENU

ESC

Remote Panel   

select device to control

„Name“

10.110.1.55

„Status“

MENU

ESC

Hotkey 1

Hotkey 2

Hotkey 3

Hotkey 4

Hotkey 5

Hotkey 6

Hotkey 7

Hotkey 8

Program 1

Program 2

-21.0

LUFS

-21.5

LUFS

EBU
S

out

Содержание X*AP RM1

Страница 1: ......

Страница 2: ......

Страница 3: ......

Страница 4: ...tton initiates a bypass function of the attached base unit OLED display graphical display 8 LED bar graphs 16 segment multicolor bar graph display Status LED shows the device summary status provided b...

Страница 5: ...display 4 Getting started X AP RM1 remote panel Menu page 3 3 reboot factory default test 4 Browser based set up firmware update of the X AP RM1 remote panel 6 Getting started basic X AP RM1 remote p...

Страница 6: ...ntrol the 8 Hot Keys may be programmed by the administrator as part of the D AP events system Hardware concept The X AP RM1 remote panel is a stand alone unit In the past it was possible to mount it i...

Страница 7: ...ling a X AP RM1 into an IP network is as follows 1 Ask the system service people for a unique IP addresses of the network the netmask and the gateway address 2 Assign the X AP RM1 remote panel an IP a...

Страница 8: ...page 2 3 firmware display Via the upper right page button you reach the other pages of the Remote Panel Menu Page 2 3 shows permanent information of firmware versions and the device Getting started X...

Страница 9: ...the X AP RM1 by pressing Keys in the upper menu When you press a key of your choice the name of it will be displayed in the example above the BYPASS button You can also check the rotary encoder by eit...

Страница 10: ...nnect and unknown device In case of connect you may press one of the highlighted buttons If you press the F Key the X AP RM1 remote panel will connect with that unit The above example has just one uni...

Страница 11: ...ion and operates in ITU mode In this case you have two parameter sets for the first program ALL and LFE if the LFE is not linked Since the Dynamics have two subsections Expander and Compressor this me...

Страница 12: ...nd Max TPL dBTP the Maximum True Peak level The measure for the EBU Meter display is LUFS Loudness Units Full Scale as long as not defined differently For details pls refer to the EBU Tech 3341 docume...

Страница 13: ...display After connecting with a device the Main Display opens up Main Display ESC will jump back to power up display MENU opens Operating display F Key 1 Empty 2 Audio Processor 1 Input 2 Upmix page 1...

Страница 14: ...supply with approx 1m cable attached Consumption 12 W Dimensions 19 1RU depth 6 cm Environmental operating temperature 0 C to 50 C non operating temperature 20 C to 70 C humidity 90 non condensing Dim...

Страница 15: ...ct power To avoid electrical shock switch off the device power then disconnect the power cord from the mains power Do not block the power cord it must remain accessible to the user at all times To avo...

Страница 16: ...r Beijing Technology Ltd Sales Service Support Unit 068 2nd Floor No 38 GuangQu Road ChaoYang District 100021 Beijing China phone 86 137 0102 6664 china jungeraudio com J nger Audio USA Service Suppor...

Отзывы: