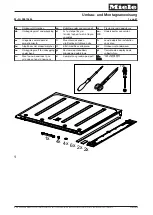
Assembly
–
Stringing/Threading Instructions
•
The Back Frame which hooks onto the
wall is lower than the front.
•
Thread the cord through both holes of
the small hook provided as shown in
Fig.1
•
On the side which you intend to
operate the Laundry Ladder, attach
the spindle (fig.2) to the outside
(this
is found inside the Laundry Ladder for
delivery ONLY, to protect it)
using the
hole at the bottom of the back frame.
•
With spindle now attached, follow the
instructions
for
Right
or
Left
operation.
For Video Instructions
‘How to string your Laundry Ladder’
plus
the latest printable instructions!
For LEFT side operation (see
Assembly first)
1.
Thread one end of the cord through A2
(from outside to inside)
2.
Take the same thread to B1 (inside to
outside) and thread back through B2,
knot and secure.
3.
Thread the other end of cord through
A1 (outside to inside).
4.
Thread through C1 (inside to outside)
and back through C2.
5.
Thread cord through D1 (inside to
outside) and back through D2, knot and
secure the end.
6.
Now pull all cord tight through arm A
and adjust it so that the hook is at the
furthest end of the cord and taut.
7.
Secure unit by guiding cord under
spindle and place hook over the highest
rod the cord will allow. Use this
position when not in use.
D
C
B
A
Back Frame
Fig.2
Spindle (Fig 2) is attached
to the inside of unit for
protection during delivery
only.
1. Thread one end of the cord through C2
(From outside to inside)
2. Take the same thread to D1 (inside to
outside) and thread back through D2,
knot and secure.
3. Thread the other end of cord through C1
(outside to inside).
4. Thread through A1 (inside to outside) and
back through A2.
5. Thread cord through B1 (inside to
outside) and back through B2, knot and
secure the end.
6. Now pull all cord tight through arm C and
adjust it so that the hook is at the furthest
end of the cord and taut.
7. Secure unit by guiding cord under spindle
and place hook over the highest rod the
cord will allow. Use this position when
not in use.
For RIGHT side operation (see
Assembly first)
Love your Laundry!
Please leave a review on
facebook or google, or email us
with a testimonial & picture!
Julu Ltd, Wharton Farm Cottage,
Ross-on-Wye, Herefordshire HR9 5SX
Email:
Tel:
033 022 32 855
Warning
Read
and
follow
these
instructions. Failure to properly
assemble, install and use the
Laundry Ladder could result in
unforeseen risk or injury.
Updated: 28.2.18
® This product is protected by EU
Design
Registration
Number
002220046-0001
The Trade Mark JULU is protected in
other countries as well as European
Union under trade mark number
012618674.
This product has been tested and
passed testing standards: BS EN 16121:
2013
ANSI BIFMA X5.9: 2012
Use this illustration to help
Threading the Laundry Ladder
right or left-handed


