background image

START

PRECAUTIONS

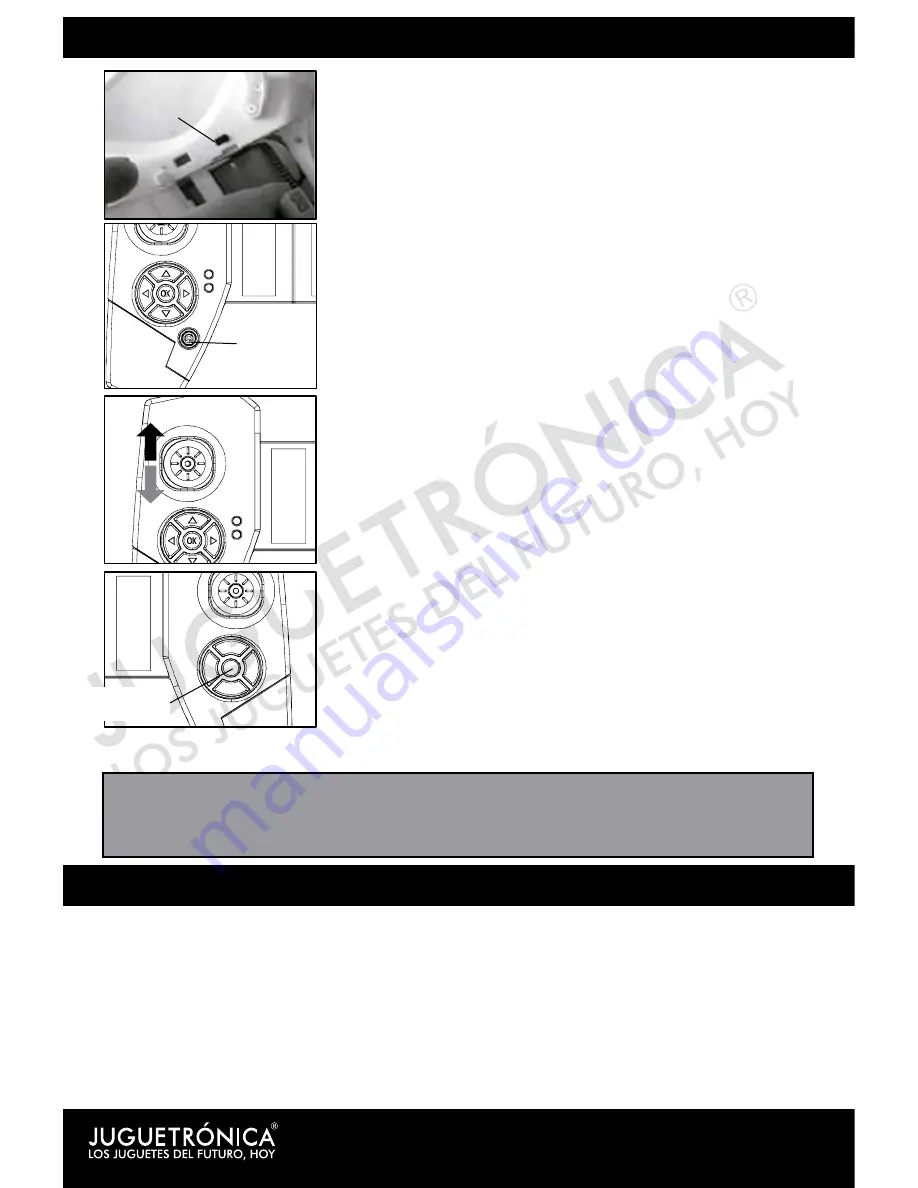
1. Turn your drone and turn off the switch you will find at the 
bottom right (“ON”).

2. Turn on the control by pressing the on / off.
The control  will sound 3 beeps and the red LED will light up 
will, getting flashing.

3. Push the power lever to the maximum and then lower it to 
the bottom position.
The control will sound a long beep, which is a sign that the 
control and the drone are synchronized.
Your VR Drone Power + is ready to fly.

4. Auto takeoff and auto landing:
The VR Drone Power + includes the option to take off and 
land with just one button. Once synchronized (up to step 3), 
press the START / STOP button and the drone takes off flight 
alone. Thus the control is activated high, which allows the 
drone manage and maintain a fixed flying height automati-
cally.
Press the button again to land the drone smoothly and 
easily.

1 When the control of the LED remains lit, but the drone LED flashes slowly, it is a sign that 
the synchronization was not properly executed. Turn off the control and the drone, and rerun 
the “start-up” from the beginning.
2. If, when you start to fly, the drone does not remain stably, land it, then turn off the control 
and the drone and re-synchronize it, paying particular attention whether the drone is placed 
on a flat, horizontal surface relative to ground.
3. When the drone LED blinks slowly, it means that the battery is running out. Land  the drone 
and put the battery charging with the  USB charger provided.

ADVICE:

When you synchronize your VR Drone Power +, ensure that it is on a flat, horizontal 
surface, so that the flight will be stable.

Switched on/
Off

ON/OFF

Take-off/
Landing

Содержание VR DRONE POWER +

Страница 1: ...ANUAL VR DRONE POWER Thank you for purchasing our VR DRONE POWER Please read the instructions carefully to know in detail the drone and thus be able to fly safely Keep this instruction manual for poss...

Страница 2: ...PRECAUTIONS AND WARNINGS BOX CONTENTS This drone has dangerous parts so it is important to take into account the following recommendations You should always have eye contact with your drone not excee...

Страница 3: ...Landing Emergency Stop You can extend the length of the handle of the control to better fit your hand Simply unscrew the extensor adjustment 1 The handle will be on going lengthening long as you go un...

Страница 4: ...the drone manage and maintain a fixed flying height automati cally Press the button again to land the drone smoothly and easily 1 When the control of the LED remains lit but the drone LED flashes slow...

Страница 5: ...tense heat sources or flammable products 2 During charging disconnect the battery drone It is important that the battery charging is supervised by an adult to prevent accidents 3 Do not charge the bat...

Страница 6: ...you can increase the difficulty level the VR Drone Power has a 3 speed selector low 40 1 beep medium 60 2 beeps and high 100 3 beeps This speed can be selected by pressing the speed button We recomme...

Страница 7: ...ment button as appropriate When the drone yurns out of control you can correct the flight by pressing the speed adjustment button to the left or right as appropriate When the drone moves sideways inco...

Страница 8: ...en when you are near the place of takeoff disable the return mode returning to press the button or using the lever of acceleration to return the manual control If you do not the drone will continue to...

Страница 9: ...ain thing is that the drone flies at a height greater than 3 meters since all the stunts involve a loss of height and thus avoids the danger of hitting the ground To perform acrobatics you must press...

Страница 10: ...one select the Application transfer option If you have not entered a microSD card your digital photos as videos will be downloaded to the smartphone NOTE ON CARDBOARD INTRODUCTION MICRO SD In order to...

Страница 11: ...omatic takeoff and landing FPV experience with VR Drone Glasses To use the drone with Drone VR Glasses included tap Settings of the App represented by the icon and select the icon in the menu that ope...

Страница 12: ...use of engines and propellers with your fingers or blowing 1 Load the drone 2 Switch batteries of the control 3 Perform a synchronization between the control and the drone TROUBLESHOOTING PROBLEM REAS...

Отзывы: