background image

RSP-Z2 Quick Start Guide                       


RSP-Z2 Quick Start Guide 

Page 6 of 8 

Interoperability Now 


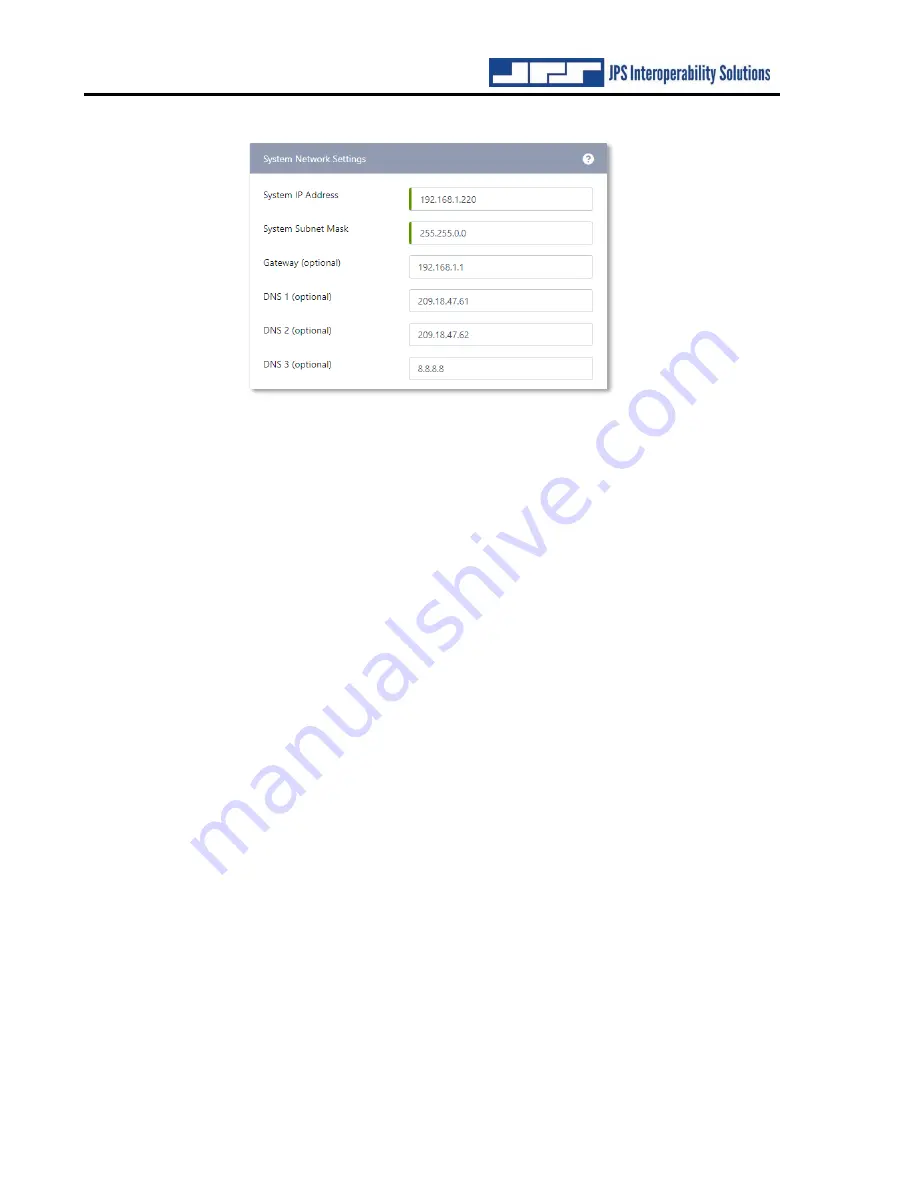
After entering the new IP address and subnet mask, 

write them down for safekeeping

. Once 

you have written the new IP address and subnet mask down, press 

Submit

. The unit will reboot 

to integrate the new settings. Once it has rebooted, log in again at the new IP address. 

If the IP address and subnet mask are ever misplaced or lost, the unit can be interrogated for its 
current settings. Refer to the 

Installation and Operation Manual

 for instructions. 


2.3


Using the RSP-Z2 

2.3.1


Summary: Radio Channel Setup on a local channel 

The  following  instructions  serve  as  a  simplified  outline  of  the  process.  Best  use  of  all 
communications technologies may require additional fine tuning. Refer to your JPS radio cable 

Applications  Notes

  as  well  as  the 

RSP-Z2  Installation  and  Operation  Manual

  for  additional 

valuable information. 

Choose an RSP-Z2 Configuration 

If  a  configuration  has  not  been  selected,  choose  one  from  the  RSP-Z2  Home  page  by 
either  clicking  on  one  of  the  three  configuration  options  or  choosing  one  from  the 
dropdown list at the top of the page. This will apply that configuration of channels to the 
RSP-Z2. 

Assign Channel Type 

Select  the 

Channel

  tab  from  Settings.  This  displays  all  of  the  RSP-Z2’s  channels.  A 

question mark means no channel type has been chosen. Click a channel to select it from 
the list along the top. In the Basic Settings box, select 

Radio

 from the channel 

Type

 pull-

down menu.  

Channel Profile 

The Default radio channel 

Profile

 information will populate to all the other configuration 

boxes  once  the  Radio  channel  Type  has  been  chosen.  Numerous  other  specific  radio 
profiles are pre-loaded and can save you time. Refer to the 

Installation and Operation 

Manual

 for additional information. 

Содержание RSP-Z2

Страница 1: ...nnel Interoperability Gateway Designed and Manufactured by JPS Interoperability Solutions 5800 Departure Drive Raleigh NC 27616 919 790 1011 sales jpsinterop com support jpsinterop com www jpsinterop...

Страница 2: ...RSP Z2 Quick Start Guide RSP Z2 Quick Start Guide Page 2 of 8 Interoperability Now Page intentionally left blank...

Страница 3: ...ices as well as many custom radio interface cables covering well over 300 different radio makes and models JPS interoperability devices are also known for simplicity and ease of use The RSP Z2 s brows...

Страница 4: ...to interface the system identically to all other radios in each system the RSP Z2 installation has minimal impact Cross Connected with Backhaul This is a combination of the Independent Passthrough an...

Страница 5: ...ccess and configure it Using your PC network settings options set the computer to a static IP address of 192 168 1 xxx where xxx is a number between 2 and 199 and a subnet mask of 255 255 255 0 This w...

Страница 6: ...ions Notes as well as the RSP Z2 Installation and Operation Manual for additional valuable information Choose an RSP Z2 Configuration If a configuration has not been selected choose one from the RSP Z...

Страница 7: ...irst red LED on the Level Meter will flash red on voice peaks for a person speaking at a normal volume for example a few times a second depending on speech cadence Click on the icon with the rising ba...

Страница 8: ...or downloaded from this unit Click the Help pull down menu to display a list of available documents The RSP Z2 Manual and Quick Start Manual are also available on the JPS website Context sensitive he...

Отзывы: