4
QUICK SET-UP
Journey Toilet Lift
STEP 1
Install The Handles
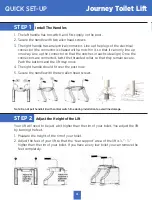
1. The left handle has no switch, and fits simply on the post.
2. Secure the handle with two allen head screws.
3. The right handle has an electrical connector. Line up the plugs of the electrical
connector (the connector is shaped with a notch in it, so that it can only line up
one way. Line up the connector so that the notches in each side align.) Once the
connectors are connected, twist the threaded collar so that they remain secure.
Push the buttons and the lift may move.
4. The right handle should fit over the post now.
5. Secure the handle with the two allen head screws.
Note: Do not pull handrail B with control switch line during installation to avoid line damage.
STEP 2
Adjust the Height of the Lift
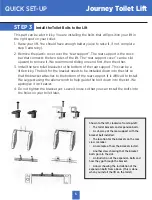
Your lift will need to be just a bit higher than the rim of your toilet. You adjust the lift
by turning the feet.
1. Measure the height of the rim of your toilet.
2. Adjust the feet of your lift so that the “rear support” area of the lift is ⅛” - ¼”
higher than the rim of your toilet. If you have a very low toilet you can remove the
feet completely.


