Jole brisk Скачать руководство пользователя страница 8

11

12

產  品  組  裝 

產品組件
及各部位名稱

圖 1.1


主 體  

圖 2.6 

腳 踏 板


圖 1.2


遮 陽 篷  

圖 2.7 

小 腿 靠

圖 1.3


前 輪 ( 2 個 )  

圖 2.8 

安 全 扣


圖 1.4


後 輪 組  

圖 2.9 

安 全 帶

圖 1.5


雨 篷  

圖 2.10 

遮 陽 篷

圖 1.6


睡 袋  

圖 2.11 

支 撐 架

圖 1.7 

說 明 書  

圖 2.12 

置 物 籃

圖 2.1 

車 手


圖 2.13 

剎 車 踏 板

圖 2.2 

收 合 鉤


圖 2.14 

腳 踏 片  

圖 2.3 

提 把


圖 2.15 

收 合 握 把

圖 2.4 

後 輪                                        

圖 2.16 

收 合 按 鈕

圖 2.5 

前 輪


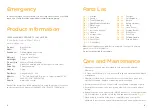
因產品型號 的不同,並非所有手 推車均附以上配件。組裝前請確認所有部

件已經 齊全,如有遺漏,請與 進口商聯繫。本產品無需工 具進行組裝。

保 養 常 識

1. 清洗座布時,請使用30度以下水溫清洗,請勿漂白。

2. 清洗車架︰僅能使用中性清潔劑及溫水洗滌,請勿使用漂白劑 。

3. 隨時檢查您的手推車,並隨時更換修理鬆弛磨損的零件、脫落的材料或 
  車縫線。

4. 過度曝曬於陽光下,可導致手推車老化或變形。

5. 手推車潮濕時,請打開手推車及遮陽篷,待乾燥後再收合起來。

6. 如果輪子發出“吱吱”聲,可加油(WD-40,防鏽油或縫紉機油)潤滑。請將 
  潤滑油點入輪軸及軸孔

(圖3)

之間,此步驟為重要的保養須知。

7. 在海邊使用手推車時,務必於使用過後清除沙粒,以做好完善的清洗。

產 品 組 裝

組裝及使用手推車前,請先閱讀說明書全文,並按照說明書指示進行操作 。

打開手推車


推開收合鉤

(圖4.1)

,將車手向後上方向拉起

(圖4.2)

,然後向下踩腳踏片

(圖4.3)

聽到“咔噠 ”聲表示車架已打開到位。

!


使用手推車前務必確保車架已打開到位。

安裝前輪

將前輪套入前腳,聽到“咔噠”聲表示前輪已安裝到位

(圖5)

將前輪釋鎖按鈕向後拉即可拔出前輪

(圖6)

安裝後輪

1.先將後輪組套入後腳管

(圖7)

,聽到“咔噠”聲表示後輪已安裝到位。

2.將剎車線卡入後叉方形管下方的固定塑膠中,以固定剎車線

(圖8)

安裝遮陽篷

1.將遮陽篷底座卡入遮陽篷卡座內

(圖9)

2.用黏扣帶固定遮陽篷後擋片和背靠

(圖10)

手推車組裝完成後如

(圖11)

所示。

Содержание brisk

Страница 1: ...birth to 15kg 0 36 months brisk...

Страница 2: ...2 1 7 8 8 9 11 11 12 12 12 12 12 13 13 13 13 14 14 14 14 14 15 15 15 15 English 1 8 2 8 CNS 12940 2 0 1 3 EN 1888 201 2 1 5 0 3 6...

Страница 3: ...1 2 FIGURE 1 2 FIGURE 3 7 1 4 2 5 3 1 6 2 3 4 5 8 7 6 13 14 16 15 9 12 11 10 x2 5 4 3 NOISE 6 7 1 3 2 1 2 7...

Страница 4: ...3 4 FIGURE 8 13 FIGURE 14 18 10 11 9 8 12 13 1 2 16 15 3 1 A 2 B 14 1 2 3 17 1 3 2 18 1 2...

Страница 5: ...5 6 FIGURE 19 22 FIGURE 23 24 20 19 21 22 3 1 1 2 24 23 1...

Страница 6: ...HILDREN S PRODUCTS UK LIMITED 16 Old Bailey London EC4M 7EG UK www joiebaby com Brisk 1102 15 0 36 8 6 940mmx500mmx1030mm 431 2 02 27973000 Chickabiddy Co Ltd 186 5 0800 001 256 02 25781188 04222671 w...

Страница 7: ...9 10 PE 15 4 5...

Страница 8: ...11 12 1 1 2 6 1 2 2 7 1 3 2 2 8 1 4 2 9 1 5 2 10 1 6 2 11 1 7 2 12 2 1 2 13 2 2 2 14 2 3 2 15 2 4 2 16 2 5 1 30 2 3 4 5 6 WD 40 3 7 4 1 4 2 4 3 5 6 1 7 2 8 1 9 2 10 11...

Страница 9: ...13 14 5 1 12 1 12 2 10 2 13 14 1 14 2 14 3 15 1 15 2 15 3 A B 16 17 1 17 2 17 3 3 18 1 18 2 19 20 21 21 1...

Страница 10: ...15 22 1 22 2 22 3 23 1 23 24 25 26 27 1 2 28 3 4 29 5 30 Note...

Страница 11: ...birth to 15kg 0 36 months stroller Please read all the instructions in this manual before installing and using the product Instruction Manual brisk...

Страница 12: ...The figures are just for reference Stroller Features One Hand Fold Adjustable Backrest Fully Reclined Seat Adjustable Calf Support Extra Big Storage Basket Extra Soft Harnesses 5 point Safety Buckle...

Страница 13: ...re assembled and fastened properly before using the stroller Never use it along with component parts from other manufacturers Avoid strangulation do not place items with a string around your child s n...

Страница 14: ...Cover Fig 2 10 Hood Fig 1 6 Footmuff Fig 2 11 Hood Mount Fig 1 7 Instruction Manual Fig 2 12 Storage Basket Fig 2 1 Handle Fig 2 13 Brake Lever Fig 2 2 Storage Latch Fig 2 14 Foot Plate Fig 2 3 Carry...

Страница 15: ...rest has 5 angles Recline Backrest Squeeze the adjust button Fig 12 1 and then adjust the backrest to a desired angle Fig 12 2 Hold the backrest with the other hand if a child is already seated in the...

Страница 16: ...1 and rotate the folding handle upwards Fig 22 2 push the stroller forward to fold Fig 22 3 Lock the stroller by tucking storage latch onto the storage mount Fig 23 1 then the stroller is folded and...

Страница 17: ...JK041_S1102 A Share the joy at joiebaby com...

Отзывы: