background image


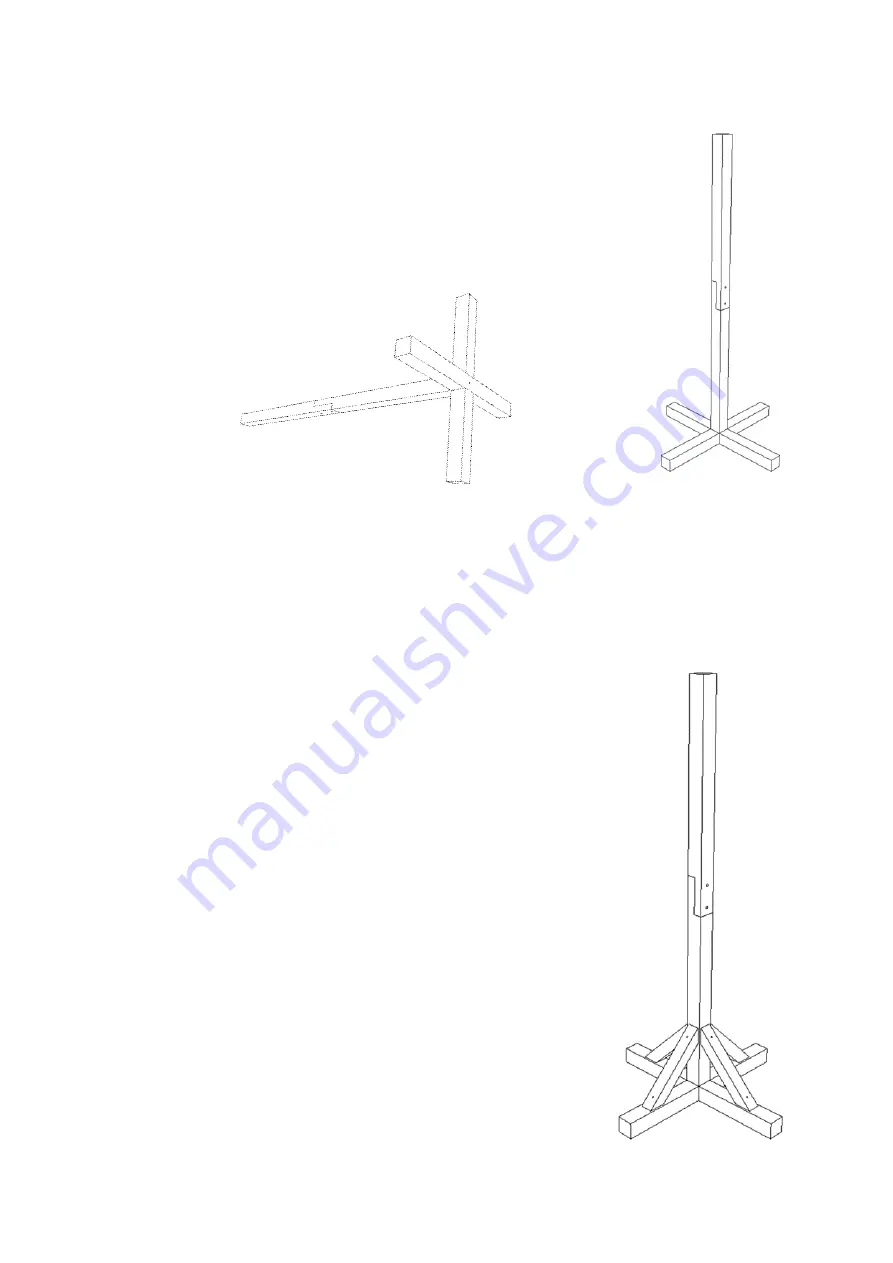
Step 3 

 Joining the Pole to the Feet. 

You will need: 

-


1x 80mm Screw (C) 

Turning the foot and the post gently on its side, align the two together. This can be 
done more easily over the end of a table or workbench.  

Through the central hole in the foot (1 & 2) tighten the two sections together using 
screw (C). 


Step 4 

 Fixing the Stays. 

You will need:  

-


4x Stays (4) 

-


8x 40mm Screws (D) 

Place the stay on the foot and align it with the post. 

IMPORTANT: ensure the two ends of the stay are central and flat against the 
post and the foot, before tightening. 

Tighten the stay on using 2x screws (D), one into the post and one into the 
foot.  

Repeat this with each stay, replicating the diagram. 


Содержание The Dalby

Страница 1: ...sembly Instructions To get the best from this product please read these instructions fully before assembly Please see the back of the instructions for places to find a video on how to assemble The Dal...

Страница 2: ...e to lay out all the parts prior to assembly Assemble on a soft level surface preferably covered with a towel to avoid damaging the table or your floor This product has been dipped using water based a...

Страница 3: ...has three holes in the half lap joint These pieces have a rebate along the edge These pieces have a flat edge 1 The Foot 2 The Foot 3 Post x2 4 Stays x4 5 The Post top 6 The Table top Base 7 Pillars x...

Страница 4: ...Fittings A 30mm Screw x21 B Connecting Screw x2 C 80mm Screw x1 D 40mm Screw x10 E Bolts x2 F Washer x2 G Wingnut x2...

Страница 5: ...holes IMPORTANT Do not fix together using the central hole at this point Step 2 The Post You will need The post sections 3 2x Connecting Screws B The post is made up of two sections 3 each with a half...

Страница 6: ...le in the foot 1 2 tighten the two sections together using screw C Step 4 Fixing the Stays You will need 4x Stays 4 8x 40mm Screws D Place the stay on the foot and align it with the post IMPORTANT ens...

Страница 7: ...ws A Each pillar has a small rebate which must be placed at the top as shown in the diagram Firstly layout the pillars to determine where and how they are placed prior to fixing IMPORTANT It is not es...

Страница 8: ...7 and will easily slide on to match Tighten together with 2x screws A at either side using the pre drilled holes in the gable ends 8 as a guide Step 8 The Roof Ridge You will need The Roof Ridge 9 2x...

Страница 9: ...e fix the upper roof panels on to the gable ends with screw A at each side Step 10 The Roof Part 2 You will need 2x Lower Roof Panels 11 4x 30mm Screws A Slide the lower roof panels 11 underneath the...

Страница 10: ...s F 2x Wing Nuts G Line up the two larger holes in table top base 6 to the holes on the post top 5 Place a bolt E through each of the holes and then fasten together from underneath with the washer F a...

Страница 11: ...and no husks no waste High Energy No Mess This blend will give wild birds everything they need and want A balanced high protein and high energy feed Perfect for when they are pushed to their limits E...

Страница 12: ...ch The Dalby on YouTube Follow this link Or scan this QR Code Johnston Jeff Ltd Baltic Buildings Gateway Business Park Gilberdyke Yorkshire HU15 2TD T 01430 449444 E mail johnstonandjeff co uk www joh...

Отзывы: