


W
O
ma
NER'S
nual
ROWER
JAR
5100
Owner's
Manual
ROWER
JAR
5100
JAR
5100
Owner
'
s
Manu
OWNER'S
MANU
AL
M
K
M
K
14
15
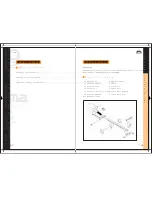
ROWER
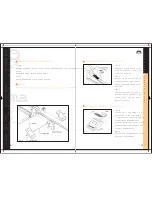
Feature:
★
CALORIES
Automatically calculates calories consumption
burned by per rowing action.
Spec:
There are 5 positions could be chosen according
to owner's different tension of Shock Absorb
(Hydraulic).
Operation: 1.
2.
To have the '
' indicator flashed by pushing MODE
button before the desired postion to be set by
pressing UP button.
Push RESET button to return the value to zero, then
press START/STOP key before exercise.
If any value is needed renewing, push START/STOP button and have '
'
indicator lined up with the very function by pushing MODE button.
NOTE
To reduce the risk of serious injury, read the important safety precauti
before using this equipment.
WARNING
I M P O R TA N T S A F E T Y P R E C A U T I O N S
Before beginning any exercise program, always consult your physician.
you experience chest pains, nausea, dizziness or shortness of breath, s
exercising and consult your physician before continuing.
WARNING
Read all instructions in this manual before using this equipment.
Use this equipment only as described in this Owner's Manual.
Position the Rower on a level surface. The electric monitor must be o
of direct sunlight or the LCD display may be damaged.
Inspect and tighten all parts before using this equipment. Replace any w
parts immediately.
Keep hands away from moving parts.
Keep small children away from this equipment during use.
Wear appropriate workout attire, including running or aerobic shoes, w
using the rower.
1.
2.
3.
4.
5.
6.
7.
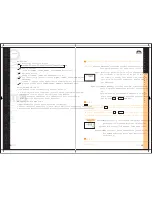
Feature:
★
SCAN
Automatically scans the values of COUNT, TOTAL,
TEMPO and CALORIES. To update your progress
without pressing MODE button each time.
Spec:
Values display in turn 4 seconds.
Operation:
When TIMER function is performing, press MODE
key to have the "SCAN" symbol appeared.


