background image

11

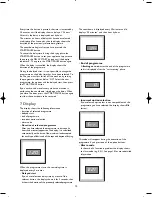
8 Start/Pause button

Press this button to start the dryer after having selected
the programme and the options. 
The relevant light will stop flashing. If you have chosen a
delayed start, the machine will begin the countdown.

If the door of the appliance or the small door at
the bottom is opened while the programme is
running, this button must be pressed again after
closing the door in order to restart the
programme from the point at which it was
interrupted.

This button must also be depressed after a power failure
and after having re-inserted the water reservoir, if it has
been emptied in the middle of a programme after the
“FULL TANK” light has illuminated.
In both cases the light of the Start/Pause button flashes to
remind you that the start button needs to be pressed
again.

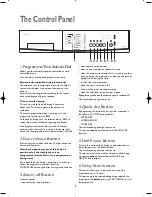
9 Indicator Lights

These lights indicate the following functions:

Drying

” light 

This light indicates that the appliance is in the drying
phase

.

Cooling

” light 

This light indicates that the appliance is in the cooling
phase. At the end of drying, there is a 10 minute cooling
phase to cool the laundry

.

End

” light

This light illuminates at the end of the cooling phase,
during the anti-creasing phase and at the end of the
programme

.

Filter

” light

This light illuminates at the end of the programme to
remind you that the filters must be cleaned.

Full Tank

” light

This light illuminates at the end of the programme to
remind you that the water reservoir must be emptied
out. If this light illuminates during a programme this
means that the water reservoir is full. The buzzer sounds,
the programme stops, the light of the Start/Pause button
flashes

.

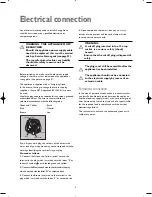
Condenser

” light

It comes on every 80 cycles to remind you that the
condenser must be cleaned.

125983041.qxp  2006-09-18  13:55  Page 11

Содержание JLTDC 06

Страница 1: ...k Start Pause Drying Cooling End Filter Full tank Condenser Dry time Extra dry Off Store dry Cupboard dry Damp dry Iron dry Extra dry Cupboard dry Cottons Iron dry Half power Alarm off Extra damp Easy iron 30 minutes Refresh Rack dry Wool Extra delicate Instruction manual 1 ...

Страница 2: ...hich are dripping wet should not be placed in the dryer Risk of fire items that have been spotted or soaked with vegetable or cooking oil constitute a fire hazard and should not be placed in the tumble dryer If you have washed your laundry with stain remover you must execute an extra rinse cycle before loading your tumble dryer As some bulky items such as duvets and eiderdowns should be dried in l...

Страница 3: ...ce When the appliance is to be scrapped cut off the power supply cable and make the door closing device unusable to prevent young children from being trapped inside Check with your local Council or Environmental Health Office to see if there are facilities in your area for re cycling this appliance Warning A cut off plug inserted into a 13amp socket is a serious safety shock hazard Ensure that the...

Страница 4: ...he water reservoir 18 Cleaning the air intake grill 18 Cleaning the drum 18 Adjusting the level of conductivity 19 Something Not Working 20 Repairs After Sales Service 21 Spare parts 21 For the Installer Installation 6 Technical Specifications 6 6 Unpacking 7 Positioning 7 Stacking kit optional accessory 7 Door reversal 7 Electrical connection 8 Guide to using the Instruction Manual The following ...

Страница 5: ...5 Description of the Appliance 01 Control panel 02 Water reservoir 3 Drum Light 04 Fluff filters 05 Rating Plate 06 Condenser unit 07 Adjustable feet 08 Drying rack 1 2 6 7 4 5 4 3 8 ...

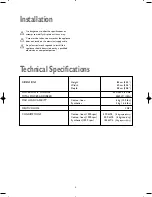
Страница 6: ... Cotton linen 1000 rpm 3 70 kWh 6 kg cupboard dry Cotton linen 1000 rpm 3 00 kWh 6 kg iron dry Synthetics 1200 rpm 1 35 kWh 3 kg cupboard dry Installation It is dangerous to alter the specifications or attempt to modify this product in any way Care must be taken to ensure that the appliance does not stand on the electrical supply cable Any electrical work required to install this appliance should ...

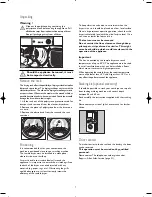
Страница 7: ...d personnel Please contact The telephone number given under Repairs After Sales Service page 21 P1148 Unpacking Warning Slide out the polythene bag containing the polystyrene block before using the appliance Pull off adhesive strips from inside machine on top of drum Keep all packaging away from children Should the appliance be moved it must be transported vertically Remove the rack The drying rac...

Страница 8: ...Connect the Green and Yellow earth wire to the terminal in the plug which is marked with the letter E or the earth symbol or coloured green and yellow 2 Connect the Blue neutral wire to the terminal in the plug which is marked with the letter N or coloured black 3 Connect the Brown live wire to the terminal in the plug which is marked with the letter L or coloured red GREEN YELLOW BROWN CORD CLAMP...

Страница 9: ...ds when selecting the programme when depressing the buttons when an incorrect option selection is made when the programme selector dial is turned to another position during the programme or when you depress an option button during the cycle at the end of the programme when the water reservoir is full if the machine is not working correctly when the small door at the bottom is open By depressing th...

Страница 10: ...E button again to allow the countdown to be resumed 7 Display The display shows the following information duration of selected programme delayed start end of programme incorrect option selection alarm code Duration of selected programme After you have selected the programme its duration in hours and minutes appears on the display It is calculated automatically on the basis of the maximum load acce...

Страница 11: ...on needs to be pressed again 9 Indicator Lights These lights indicate the following functions Drying light This light indicates that the appliance is in the drying phase Cooling light This light indicates that the appliance is in the cooling phase At the end of drying there is a 10 minute cooling phase to cool the laundry End light This light illuminates at the end of the cooling phase during the ...

Страница 12: ...recommend that you adopt the following guidelines cotton linen drum full but not too tightly packed synthetics drum no more than half full delicate fabrics drum no more than one third full Type of laundry Drying time Max load 1 Programme selector dial position SYNTHETICS 30 min 3 kg 30 minutes Synthetics Extra dry Cupboard dry Iron dry 3 kg 3 kg 3 kg Sweaters wollen pullover Wool 1 kg Sport shoes ...

Страница 13: ... minute cooling phase COOLING light illuminates You may remove the laundry after this phase The lights END FILTER and FULL TANK illuminate and the buzzer sounds The display shows a static zero 9 If the laundry is not removed at the end of the cycle the dryer performs an anti creasing phase duration 30 minutes maximum If you do not remove the laundry the dryer will stop automatically at the end of ...

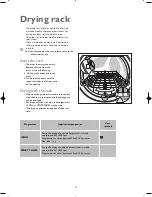
Страница 14: ...ly in the drum 2 Guide the rack down until the support bracket at the front rests on the opening Drying with the rack No part of the garment must come into contact with the drum otherwise it could get caught up and be damaged For drying with the rack only the programmes WOOL or SPORTSHOES may be used Only dry one garment or one pair of shoes at a time Drying rack Programme Application properties C...

Страница 15: ... 5 Select the required programme run time settable with an interval of 10 min from 30 min up to 180 minutes Press the DELAY TIMER button as many times as necessary until the required programme running time is shown in the display 6 Press the START PAUSE button The programme is startet 7 At the end of the drying programme open the loading door and remove the garments or shoes 8 Turn the programme s...

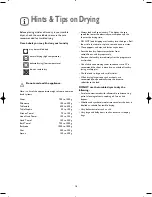
Страница 16: ...ying time DO NOT load dripping wet laundry into the dryer Roll the article in a towel or spin to remove excess water Close poppers and zips and fasten any buttons Sort the laundry Separate synthetics from cotton linens and dry separately Remove the laundry immediately after the programme has finished Use a fabric conditioning sheet to reduce static We recommend the sheet is pinned to an article of...

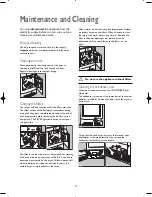
Страница 17: ...in the filter A U T O R E V E R S E kg 5 kg 2 5 800 900 70 90 35 50 1000 1200 65 85 30 45 800 900 80 100 55 70 1000 1200 75 95 50 65 650 50 60 30 35 kg 2 5 kg 1 P1151 P1110 A U T O R E V E R S E kg 5 kg 2 5 800 900 70 90 35 50 1000 1200 65 85 30 45 800 900 80 100 55 70 1000 1200 75 95 50 65 650 50 60 30 35 kg 2 5 kg 1 P1150 Maintenance and Cleaning After a while a whitish coating due to detergent ...

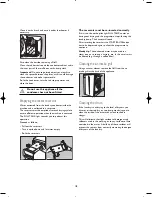
Страница 18: ...empty Re fit the reservoir P1157 P1156 P0639 The reservoir must be re inserted correctly If this is not done the pilot light FULL TANK comes on during next drying and the programme stops leaving the laundry damp The buzzer will sound After inserting the reservoir the START PAUSE button has to be depressed again to allow the programme to continue Handy tip The condensed water may be used in a steam...

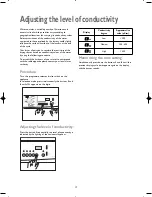
Страница 19: ...mode press simultaneously the buttons 3 and 6 until C0 appears on the digits Adjusting the level of conductivity Press the button 5 sequentially the level of conductivity is indicated by the lighting of the horizontal hyphens 1 2 3 4 5 6 Delay start Door Quick Start Pause Drying Cooling End Filter Full tank Condenser Dry time JLTDC06 Half power Alarm off 1 2 3 4 5 6 1 25 Delay start Door Quick Sta...

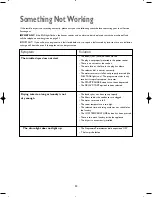
Страница 20: ... The room temperature is too high The selected time or drying cycle was not suitable for the laundry The LOW TEMPERATURE button has been pressed There is too much laundry inside the appliance The dryer is not correctly installed Something Not Working Symptom Solution If the tumble dryer is not working correctly please carry out the following checks before contacting your local Service Force agent ...

Страница 21: ...l number of the appliance found on the rating plate see picture on page 5 So that you always have these numbers at hand we recommend you to make a note of them here Mod PNC S N Your dryer is covered by a 3 year parts and labour guarantee see separate details given at point of sale Please retain your purchase receipt safely for the service engineer to verify the purchase details Spare parts Always ...

Страница 22: ...John Lewis Partnership 171 Victoria Street London SW1E 5NN www johnlewis com 125983041 03 06 ...

Отзывы: