0
5
0
6
3.
Mark
b
racket
l
ocations
2.
Prepare
b
rackets
1.
Drilling holes
for brackets
4.
Installing the
b
rackets
5.
Valance
i
nstallation
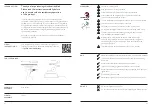
Screw the brackets into place face fitting or top recess as step 1 images,
then
Install the blind into the brackets
and clip bracket into place.
2
2
1
1
PRODUCT ASSEMBLY
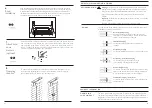
Use the brackets as templates and mark the hole positions with a pencil.
Pre-drill the holes. (For more information on wall types and fixings, see page 0
8
).
Please note:
Additional fasteners other than those sent with your blind may be required depending on the
mounting surface. Wallboard and plaster require the use of anchors such as expansion or toggle bolts. Brick,
tile or stone need special plugs and drill bits. Remember to always pre-drill holes in wood to avoid splitting.
Face
f
itting
Top
r
ecess
Open the fro
nt
of the bracket by
pressing on the bottom of the bracket to release the
locking tab while lifting the front gate
.
Side
bracket
Centre
bracket
Outside
m
ount
Position the box brackets at each end of the headrail.
When using a single cent
r
e
support bracket, center it between the box brackets. For more than one center
support bracket, space the support brackets evenly, n
o
more than
30" apart
a
part.
Make sure the brackets will not
interfere with. the cord or any other internal parts.
Mark
the bracket for mount
in
g
h
ole
locations, making sure they are square and equally
spaced.
Inside
m
ount
Position the box brackets at each end of the head rail. Depending on the installation location, box brackets can be
attached using the top; back, or side holes. When using a single center support bracket, center it between the box
brackets. For more than one center support bracket, space the support brackets evenly, not more than 30" apart.
Make sure the brackets will not interfere with the cord or any other parts. Mark the location. of the desired
bracket mounting holes, making sure,that they are square and equally spaced.
Attach the plastic valance clips to the rear of the headrail, one at each end, then space
any remaining clips evenly. Then clip the valance onto the headrail using the valance clips
and ensure it is clipped on firmly.
2
1
2
1
B
4
3
2
1
2
C


