background image

3901726 

 JobSmart 4 Gallon Air Compressor Assembly & Operating Instructions 

10


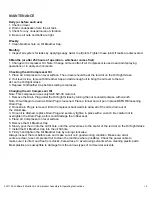
MAINTENANCE


Daily (or before each use) 

1. Check oil level 
2. Drain condensation from the air tank. 
3. Check for any unusual noise or vibration. 
4. Be sure all nuts and bolts are tight. 

 
Weekly 

1. Clean breather hole on Oil Breather Cap. 

 
Monthly 

1. Inspect air system for leaks by applying soapy water to all joints. Tighten these joints if leaks are discovered. 
 

6 Months (or after 250 hours of operation - whichever comes first)


1. Change Air Compressor Oil. Note: Change oil more often if Air Compressor is used near paint spraying 
operations or in dusty environments. 
 

Checking the Air Compressor Oil 

1. Place Air Compressor on level surface. The oil level should be at the red dot on the Oil Sight Glass. 
2. If oil level is low, remove Oil Breather Cap and add enough oil to bring the oil level to the red 
dot on the Oil Sight Glass.  
3. Replace Oil Breather Cap before starting compressor. 

 
Changing the Air Compressor Oil 

Note: This compressor uses only SAE 5W-30 motor oil. 
1. Remove the Drain Plug under the Oil Sight Glass by turning the nut counterclockwise with wrench. 
Note: Oil will begin to drain as Drain Plug is loosened. Place a funnel and oil pan in place BEFORE loosening 
Drain Plug. 
2. Once Drain Plug is removed, tilt Air Compressor backwards to allow all of the oil to drain out of 
the crankcase. 
3. Once oil is drained, replace Drain Plug and securely tighten in place with a wrench. Be careful not to 
overtighten the Drain Plug, as this could damage the rubber seal. 
4. Place Air Compressor on level surface. 
5. Remove the Oil Breather Cap. 
6. Slowly pour the oil into the oil fill hole, until the oil level rises to the center of the red dot on the Oil Sight Glass. 
7. Install the Oil Breather Cap into the oil fill hole. 
8. Firmly hand tighten the Oil Breather Cap by turning clockwise. 
Always inspect the tool before use, and make sure it is in good working condition. Make sure all air 
vents are clear, (use compressed air to clean the machine where possible). Check the power cable to 
make sure it is intact and free from cracks, bare wires etc. Avoid using solvents when cleaning plastic parts. 
Most plastics are susceptible to damage from the various types of commercial solvents. 


Содержание 3901726

Страница 1: ...hange this product at any time without prior notice IF THERE IS ANY QUESTION ABOUT A CONDITION BEING SAFE OR UNSAFE DO NOT OPERATE THIS PRODUCT HAVE QUESTIONS OR PROBLEMS DO NOT RETURN THIS PRODUCT TO...

Страница 2: ...to cover all possible conditions and situations that may occur Common sense caution and care must be exercised when assembling or using this product Always contact your dealer distributor service age...

Страница 3: ...ater Drain Valve Rubber Feet SPECIFICATIONS 5 CFM 90 PSI 13 8 AMP 2 HP MOTOR 120V 60 Hz 115 PSI Requires SAE 5W 30 motor oil KEEP THIS MANUAL SALES RECEIPT APPLICABLE WARRANTY FOR FUTURE REFERENCE REA...

Страница 4: ...erious injury Wear the proper safety equipment such as safety goggles dust masks non skid shoes etc Check to be sure all adjusting keys or wrenches have been removed before use Safety glasses and ear...

Страница 5: ...maintained tools with sharp cutting edges are less likely to bind and are easier to control Never exceed the pressure rating of any component in system Protect material and air lines from damage or p...

Страница 6: ...o so could result in serious personal injury property damage or even death IMPORTANT SAFETY INSTRUCTIONS Before using this tool you need to become familiar with its operation If you are unsure about t...

Страница 7: ...make any adjustments to the Safety Valve Periodically pull ring on the Safety Valve end to check that it is working properly Air Filter Heavy duty metal air filter keeps your compressor running clean...

Страница 8: ...mpressor Installation and Location Locate the compressor in a clean dry and well ventilated area The compressor should be located 12 to 18 inches from walls or any other obstruction which would interf...

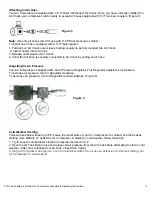
Страница 9: ...Adjusting the Air Pressure Your Air Compressor is supplied with an Air Pressure Regulator This Regulator adjusts the air pressure To increase air pressure turn Air Regulator clockwise To decrease air...

Страница 10: ...0 motor oil 1 Remove the Drain Plug under the Oil Sight Glass by turning the nut counterclockwise with wrench Note Oil will begin to drain as Drain Plug is loosened Place a funnel and oil pan in place...

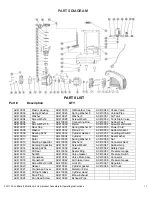
Страница 11: ...fugal Switch AC410010 Stator AC410034 Cylinder AC410058 Seal Washer AC410011 Rotor AC410035 Spring Washer 6 AC410059 Nut AC410012 Starting Capacitor AC410036 Washer 6 AC410060 Connector Seat AC410013...

Страница 12: ...check valve Replace check valve 3 Air Leak in safety valve Check valve by pulling on ring If condition persists replace valve Safety valve releasing 1 Defective pressure switch Replace pressure Switch...

Отзывы: