SECTION 2 - SERVICE PROCEDURES
2-12
31215808
2.7
BUCHER BRAND PUMP - BRUSH REPLACEMENT
Motor Assembly - Remove/Install - Reference Marks
Motor/Brush Cover - Remove/Install
Pump Motor - Removal/Installation - Reference Marks
• For reference when reassembling, mark motor cover, housing
and valve body position before disassembling.
1.
Motor Top Cover
4.
Housing/Motor Valve Body
2.
Cover/Housing
Reference Mark
Reference Mark
5.
Motor Valve Body
3.
Motor Housing
5
3
1
4
2
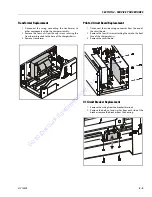
Motor/Brush Cover - Removal/Installation
1.
Motor/Brush Cover (a)
2.
Cover Screws (b)
3.
Washers
4.
Power Leads to Lead Clips (Soldered)
5.
Power Lead Clip Attach Screws
REMOVE THE MOTOR COVER CAREFULLY, THE (SHORT) POWER LEADS INSIDE THE COVER FROM THE (+/–) POSTS ARE SOLDERED TO ATTACH CLIPS WHICH ARE
FASTENED TO THE BRUSH CARRIER ASSEMBLY WITH SCREWS (ITEM-5). RAISE THE COVER STRAIGHT UP - REMOVE THE SCREWS - THEN HINGE THE COVER UP
(SEE CENTER ILLUSTRATION) AND PRY THE CLIPS OFF OF THE BRUSH CARRIER ASSEMBLY TO COMPLETELY REMOVE THE MOTOR COVER.
NOTE:
(a) Once cover screws are removed, you may need to tap lightly around the edge of the top cover to separate it from the motor housing.
Read the important note above before attempting to remove the cover.
(b) These steel screws are threaded into the aluminum valve body, do not overtighten.
2
3
1
4
5
5
IMPORTANT
Go
to
Discount-Equipment.com
to
order
your
parts

