17.0 TFT Active Matrix LCD Panel User Manual
English 15
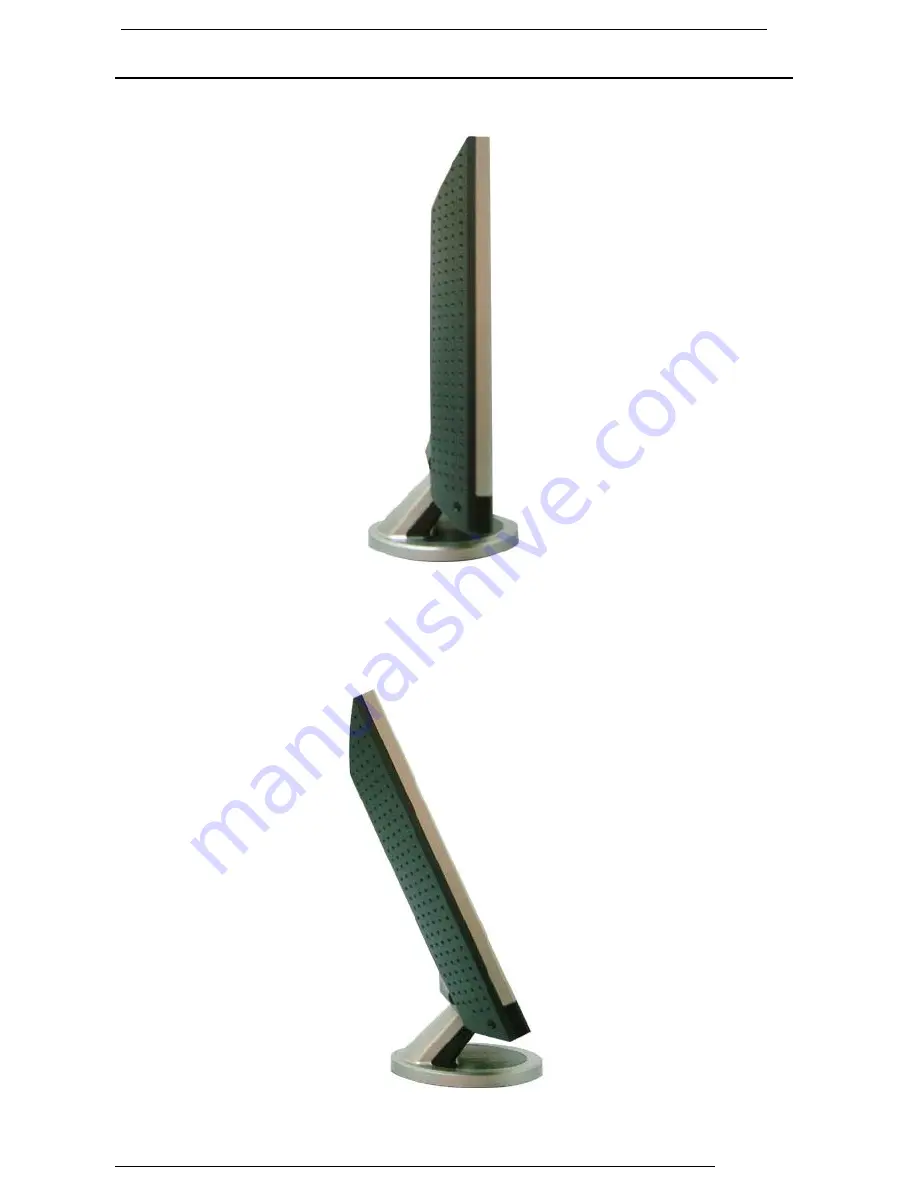
Angle of Inclination
In normal condition
LCD lay back 0
˚
~ 15
(positive and negative 2
)
Страница 1: ...All Information in this manual may change from time to time without prior notice LCD Monitor Series 17 0 TFT Active Matrix LCD Panel User s Manual...
Страница 2: ...Warning 6 Optional TV Tuner 7 Remote Control Option 7 Cleaning Notes 8 Precaution 8 Features 8 Hardware Installation 9 Hardware Installation Step by Step 10 Hardware Installation TV Tuner Option 11 A...
Страница 3: ...his could cause fire or electrical shock 7 Never open the equipment For safety reason the equipment should only be opened by qualified service personnel 8 If one of the following situations arises get...
Страница 4: ...17 0 TFT Active Matrix LCD Panel User Manual English 4 View of Monitor Front View 1 Back View 2...
Страница 5: ...17 0 TFT Active Matrix LCD Panel User Manual English 5 View of Monitor Side View 3 15...
Страница 6: ...ional Power Cord AD DC Adpter External Universal DC 12V 50 60Hz AC 100 240V Audio Cable with Stereo Phone Jack CD User s Manual Quick Start Guide Warning 1 Make sure that the system power is turned of...
Страница 7: ...S NTSC System PH to F Dungle RCA to Phone Jack Cable Remote Control Remote Control Option Use the remote control by point toward the IR sensor window Notice 1 The remote may not work properly during t...
Страница 8: ...an soft clothes applied with mild solution 6 Do not place anything on your monitor Bad ventilation may elevate temperature in the monitor 7 Don t use your fingers to touch the LCD screen directly Fing...
Страница 9: ...s power before installation Follow the installation step by step described below Input 1 DC IN This is for connecting the power cable 2 AUDIO IN This can be connected to the audio out connector of an...
Страница 10: ...This can be connected with the S Video signal cable option 6 TV This can be connected with the TV signal cable option 7 Audio Out This is for connection of headphone or external speaker 8 DVI D This...
Страница 11: ...Step 1 Turn your monitor upside down carefully with panel facing you to locate all connector port 2 Plug in signal cable to VGA IN of the monitor and the other side of the cable to the computer 3 Conn...
Страница 12: ...Plug power cord onto DC adapter 5 Plug the DC cable from power adapter onto the DC IN on monitor 6 Congratulations You have just completed the hardware installation Hardware Installation TV Tuner Opti...
Страница 13: ...ove the plastic back cover by pushing clips in two sides 3 Locate pin connector on the TV tuner and the pin connector on monitor indicated 4 Slide the TV tuner module into the right side of the spare...
Страница 14: ...sert the RCA video signal cable into VIDEO port and the other side to RCA Video output on sources such as DVD player 7 Insert the S Video signal cable into S IN port and the other side to S Video outp...
Страница 15: ...17 0 TFT Active Matrix LCD Panel User Manual English 15 Angle of Inclination In normal condition LCD lay back 0 15 positive and negative 2...
Страница 16: ...wer is on the light turns green and standby in the color of orange 2 AUTO Exit and save the setting Hot key for auto adjustment 3 MENU Press the button to display OSD main menu and select OSD Option 4...
Страница 17: ...ed the monitor Characters look too dark or too bright Check 1 Using OSD Menu to adjust the Contrast When shall your monitor be adjusted Check 1 After reset 2 If the resolution of frequency is being ch...
Страница 18: ...de BRIGHTNESS Adjust the difference between light and dark area BRIGHTNESS COLOR ADJUST Adjust the RED GREEN and BLUE colors of the display Click ENTER to adjust the R G B color separately COLOR ADJUS...
Страница 19: ...isplay Menu Mode PC Mode COLOR TEMP Adjust the color temperature of the display COLOR TEMP BACK Return to the Main Menu Screen BACK COLOCK Adjust the re flash ratio of the vertical scanning area CLOCK...
Страница 20: ...DJUST Automatically adjust the re flash ratio of both vertical and horizontal scanning areas of the display AUTO ADJUST H POSITION Adjust the horizontal viewing area of the display H POSITION V POSITI...
Страница 21: ...een Display Menu Mode PC Mode OSD H POS Adjust the Horizontal position of the OSD OSD H POS OSD V POS Adjust the Vertical position of the OSD OSD V POS OSD TIME Adjust the displaying time of the OSD O...
Страница 22: ...lay Menu Mode PC Mode OSD ALPHA Adjust the Alpha volume of the OSD displaying OSD ALPHA BACK Return to the Main Menu Screen BACK LANGUAGE Change the language support to the language displaying of the...
Страница 23: ...en Display Menu Mode PC Mode VOLUME Adjust the sound volume of the embedded speaker of the display VOLUME MUTE Silence the embedded speaker of the display MUTE BACK Return to the Main Menu Screen BACK...
Страница 24: ...X624 75Hz 49 7KHz 75 0Hz 1024X768 60Hz 48 3KHz 60 0Hz 1024X768 70Hz 56 5KHz 70 1Hz 1024X768 72Hz 57 7KHz 72 1Hz 1024X768 75Hz 60 0KHz 75 0Hz 1152X864 75Hz 67 5KHz 75 0Hz 1280X960 60Hz 60 0KHz 60 0Hz 1...
Страница 25: ...d Connector RGB Analog Audio In Audio Out Power DVI D D sub 15 pins Stereo Phone Jack RCA Jack L R Stereo Phone Jack RCA Jack L R 12V DC Power Jack DVI D Connector for Signal input Power AC input Volt...