background image

4

Safety Warnings

• Before use, please read the user manual and safety warnings carefully, and make sure you understand and accept all the safety 

instructions. The user will be responsible for any loss or damage caused by improper use.

• Before each cycle of operation, the operator shall perform the preoperation checks specified by the manufacturer: That all guards and 

pads originally supplied by the manufacturer are in proper place and in serviceable condition; That the braking system is functioning 

properly; That any and all axle guards, chain guards, or other covers or guards supplied by the manufacturer are in place and in serviceable 

condition; That tires are in good condition, inflated properly, and have sufficient tread remaining; The area that the product is to be 

operated should be safe and suitable for safe operation.

• Components shall be maintained and repaired in accordance with the manufacturer’s specifications and using only the manufacturer’s 

authorized replacement parts with installation performed by dealers or other skilled persons.

• Warning against recharging non-rechargeable batteries.

• Don’t allow hands, feet, hair, body parts, clothing, or similar articles to come in contact with moving parts, wheels, or drive train, while the 

motor is running.

• This product should not be used by children or persons with reduced physical, sensory or mental capabilities, or lack of experience and 

knowledge, unless they have been given supervision or instruction (IEC 60335-1/A2:2006).

• Unsupervised children should not play with the product (IEC 60335-1/A2:2006).

• Adult supervision is required.

• The rider should not exceed 220 lb.

• Units shall not be operated to perform racing, stunt riding, or other maneuvers, which may cause loss of control, or may cause 

uncontrolled operator/passenger actions or reactions.

• Never use near motor vehicles.

• Avoid sharp bumps, drainage grates, and sudden surface changes. Scooter may suddenly stop.

• Avoid streets and surfaces with water, sand, gravel, dirt, leaves, and other debris. Wet weather impairs traction, braking, and visibility.

• Avoid riding around flammable gas, steam, liquid, or dust that could cause fire.

• Operators shall adhere to all of the manufacturer’s recommendations and instructions, as well as comply with all laws and ordinances: 

Units without headlights shall be operated only with adequate daylight conditions of visibility, and; Owners shall be encouraged to highlight 

(for conspicuity) using lighting, reflectors, and for low-riding units, signal flags on flexible poles.

• Persons with the following conditions shall be cautioned not to operate: Those with heart conditions; Pregnant women; Persons with head, 

back, or neck ailments, or prior surgeries to those areas of the body; and persons with any mental or physical conditions that may make 

them susceptible to injury or impair their physical dexterity or mental capabilities to recognize, understand, and perform all of the safety 

instructions and to be able to assume the hazards inherent in unit use.

• Do not ride at night.

• Do not ride after drinking or taking prescription medication.

• Do not carry items when riding.

• Never operate the product barefooted. 

• Always wear shoes and keep shoelaces tied.

• Make sure your feet are always placed securely on the deck.

• Operators always shall use appropriate protective clothing, including but not limited to a helmet, with appropriate certification, and any 

other equipment recommended by the manufacturer: Always wear protective equipment such as helmet, knee pads, and elbow pads.

• Always give way to pedestrians.

• Be alert to things in front and far away from you.

• Do not allow distractions when riding, such as answering the phone or engaging in any other activities.

• The product cannot be ridden by more than one person.

Содержание JREMIX-BB

Страница 1: ...RemixJetkart All TerrainHoverboard Aguideforyourride IMPORTANT RETAIN FOR FUTURE REFERENCE READ CAREFULLY MODEL JREMIX BLK JREMIX BB Designed in Brooklyn Made in China...

Страница 2: ......

Страница 3: ...Remembertobesafeand mostimportantly havefun...

Страница 4: ......

Страница 5: ...nserting the Footrests Adjusting the Footrest Attaching the Hoverboard Charging the Hoverboard Indicator Lights Connecting to Bluetooth Recalibrating the Hoverboard Turning the Lights On Getting on th...

Страница 6: ...ator passenger actions or reactions Never use near motor vehicles Avoid sharp bumps drainage grates and sudden surface changes Scooter may suddenly stop Avoid streets and surfaces with water sand grav...

Страница 7: ...le it is on and the wheels are in motion This can result in freely spinning wheels which may cause injury to yourself or others nearby Do not jump on or off the product and do not jump while using it...

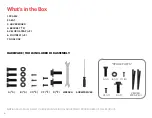
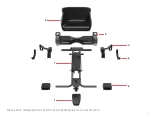
Страница 8: ...E INITIAL ADJUSTMENT PROCEDURES OF THE PRODUCT A 4 B 4 C1 3 C2 2 D 2 A 1 B 1 C1 1 C2 1 D 1 WRENCH SCREWDRIVER VELCRO STRAP 4 1 FRAME 2 SEAT 3 HOVERBOARD 4 BRACKET 2 5 VELCRO STRAP 2 6 FOOTREST 2 7 NOS...

Страница 9: ...7 1 7 5 6 4 3 2 PLEASE NOTE IMAGES MAY NOT REFLECT EXACT APPEARANCE OF ACTUAL PRODUCT...

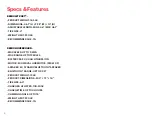
Страница 10: ...X HOVERBOARD MAX SPEED UP TO 9 MPH MAX RANGE UP TO 12 MILES BATTERY 25 2V 4 0AH LITHIUM ION MOTOR 500W DUAL HUB MOTOR 250W X 2 SPEAKER 5 0 DYNAMIC BLUETOOTH SPEAKER BLUETOOTH RANGE UP TO 33 FT PRODUCT...

Страница 11: ......

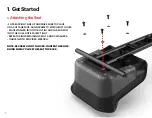
Страница 12: ...RFACE ALIGN FRAME TO MATCH BOLT HOLES PLACE WASHER B ONTO BOLT A AND THREAD BOLT INTO THE HOLE UNTIL FAIRLY TIGHT REPEAT USING REMAINING 3 BOLTS AND 3 WASHERS TIGHTEN WITH PROVIDED WRENCH NOTE BE CARE...

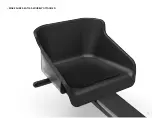
Страница 13: ...11 MAKE SURE SEAT IS SECURELY ATTACHED...

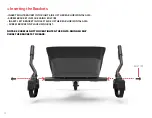
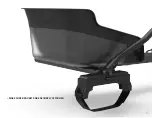
Страница 14: ...AL AXIS SCREW BRACKET IN PLACE USING BOLT D INSERT LEFT BRACKET INTO LEFT SIDE OF THE REAR HORIZONTAL AXIS SCREW BRACKET IN PLACE USING BOLT NOTE BE CAREFUL NOT TO OVER TIGHTEN THE BOLTS DOING SO MAY...

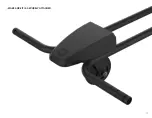
Страница 15: ...13 MAKE SURE BRACKETS ARE SECURELY ATTACHED...

Страница 16: ...NOSE CAP ONTO FRONT PLATE OF REMIX SCREW C1 NOSE CAP INTO PLACE VIA THE UNDERSIDE OF THE FRAME NOTE DO NOT OVER TIGHTEN THE NOSE CAP DOING SO MAY CAUSE THE NOSE CAP TO CRACK 1 3 AttachingtheNoseCap N...

Страница 17: ...15 MAKE SURE IT IS SECURELY ATTACHED...

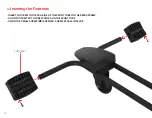
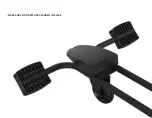
Страница 18: ...ERT FOOTREST INTO EACH SIDE OF THE FRONT TUBE ON THE REMIX FRAME ALIGN FOOTREST WITH SCREW HOLES ON THE FRONT TUBE USING THE SMALL SCREW C2 SUPPLIED SCREW PEDALS IN PLACE 1 4 InsertingtheFootrests FOO...

Страница 19: ...17 MAKE SURE FOOTREST ARE SECURELY IN PLACE...

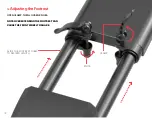
Страница 20: ...18 SLIDE THE FOOTREST TUBES TO DESIRED LENGTH OPEN CLAMP THEN LOOSEN KNOBS NOTE OVEREXTENDING THE FOOTREST CAN CAUSE THE FRONT WHEEL TO SHAKE 1 5 AdjustingtheFootrest KNOB CLAMP...

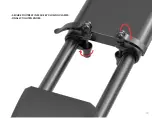
Страница 21: ...19 SECURE FOOTREST IN PLACE BY CLOSING CLAMPS FINALLY TIGHTEN KNOBS...

Страница 22: ...20 MAKE SURE SIDE OF HOVERBOARD WITH CHARGING PORT IS FACING OUT HOVERBOARD MUST BE TURNED OFF BEFORE PLACING REMIX ON TOP OF IT 1 6 AttachingtheHoverboard HOVERBOARD VELCRO STRAPS...

Страница 23: ...21 PULL THE VELCRO STRAPS TIGHT AND FOLD...

Страница 24: ...22 MAKE SURE HOVERBOARD IS SECURELY IN PLACE...

Страница 25: ...SE THE INCLUDED CHARGER PLUG THE CHARGER INTO THE WALL BEFORE THE CHARGING PORT DON T TURN ON THE REMIX HOVERBOARD WHILE IT S CHARGING CHARGE THE BATTERY UNTIL IT IS FULLY CHARGED UP TO 4 HOURS CHARGI...

Страница 26: ...AND TILT UP ONCE THE BATTERY POWER GOES BELOW 10 AS A SAFETY PRECAUTION 1 8 IndicatorLights 20 20 49 50 PERCENTAGE BATTERY INDICATOR LIGHT BATTERY INDICATOR LIGHT STATUS INDICATOR LIGHT LIGHTS UP BLU...

Страница 27: ...UR HANDHELD DEVICE S SETTINGS FIND THE HOVERBOARD IN YOUR HANDHELD DEVICE S LIST AND SELECT IT NOW YOU CAN PLAY YOUR MUSIC THROUGH THE HOVERBOARD 1 9 ConnectingtoBluetooth THE BLUETOOTH WORD MARK AND...

Страница 28: ...IS COMPLETED LET GO OF POWER BUTTON AND THEN PRESS IT AGAIN TO TURN HOVERBOARD OFF TURN HOVERBOARD BACK ON RECALIBRATION IS NOW COMPLETE 1 10 RecalibratingtheHoverboard HOLD POWER BUTTON FOR 5 SECOND...

Страница 29: ...HARGING PORT POWER ON THE HOVERBOARD THE LIGHTS WILL TURN ON ONCE THE HOVERBOARD AND THE SEAT WIRE ARE PLUGGED IN THE DEFAULT LIGHTING MODE WILL DISPLAY WHEN THE REMIX AND HOVERBOARD ARE BOTH CONNECTE...

Страница 30: ......

Страница 31: ...EMIX PLACING YOUR FEET ON THE FOOTREST MAKE SURE THE HOVERBOARD IS LEVELED TURN ON HOVERBOARD 2 1 GettingontheRemix 2 MakeMoves NOTE DO NOT TURN ON THE HOVERBOARD BEFORE YOU SIT DOWN IF THE HOVERBOARD...

Страница 32: ...ONING THE FOREHEAD IS COVERED BY THE HELMET WEAR A HELMET APPROPRIATE CLOTHING SHOES AND SAFETY GEAR AVOID CLOTHING THAT CAN GET CAUGHT INTO OR UNDER THE WHEELS CLOSED TOE FLAT SHOES ARE RECOMMENDED W...

Страница 33: ...ALL SCREWS AND LOCKING NUTS BEFORE EACH RIDE TO GO FORWARD PUSH DOWN BOTH HANDLES TO BRAKE REVERSE PULL UP BOTH HANDLES TO TURN RIGHT PUSH DOWN LEFT HANDLE PULL UP RIGHT HANDLE TO TURN LEFT PULL UP L...

Страница 34: ...32 NOTE DON T PULL UP OR DOWN ON THE HANDLES TOO HARD AS IT MAY CAUSE DAMAGE TO LOCK THE HANDLES WILL LOCK IN PLACE WHEN PULLED 22 UP AND 22 DOWN BASED ON NETURAL POSITION OF BRACKETS 22 22...

Страница 35: ...33 2 4 RidingtheHoverboard NEUTRAL TURN RIGHT TURN LEFT...

Страница 36: ......

Страница 37: ...TOMER CARE FOR ASSISTANCE BATTERY KEEP AWAY FROM FIRE AND EXCESSIVE HEAT AVOID INTENSE PHYSICAL SHOCK SEVERE VIBRATION OR IMPACT PROTECT FROM WATER OR MOISTURE DO NOT DISASSEMBLE THE REMIX OR ITS BATT...

Страница 38: ...sure to leave a review at ridejetson com reviews We can t wait to hear from you Stayconnected Be sure to follow ridejetson on social media to learn about fantastic offers giveaways and all the latest...

Страница 39: ......
Страница 40: ...ct s 1 year limited warranty or inquire about warranty coverage contact us directly US CANADA 1 888 976 9904 UK 44 0 33 0838 2551 Mex 001 888 976 9904 Hours of Operation 7 Days a Week 10am 6pm Importe...

Отзывы:

Похожие инструкции для JREMIX-BB