background image

7

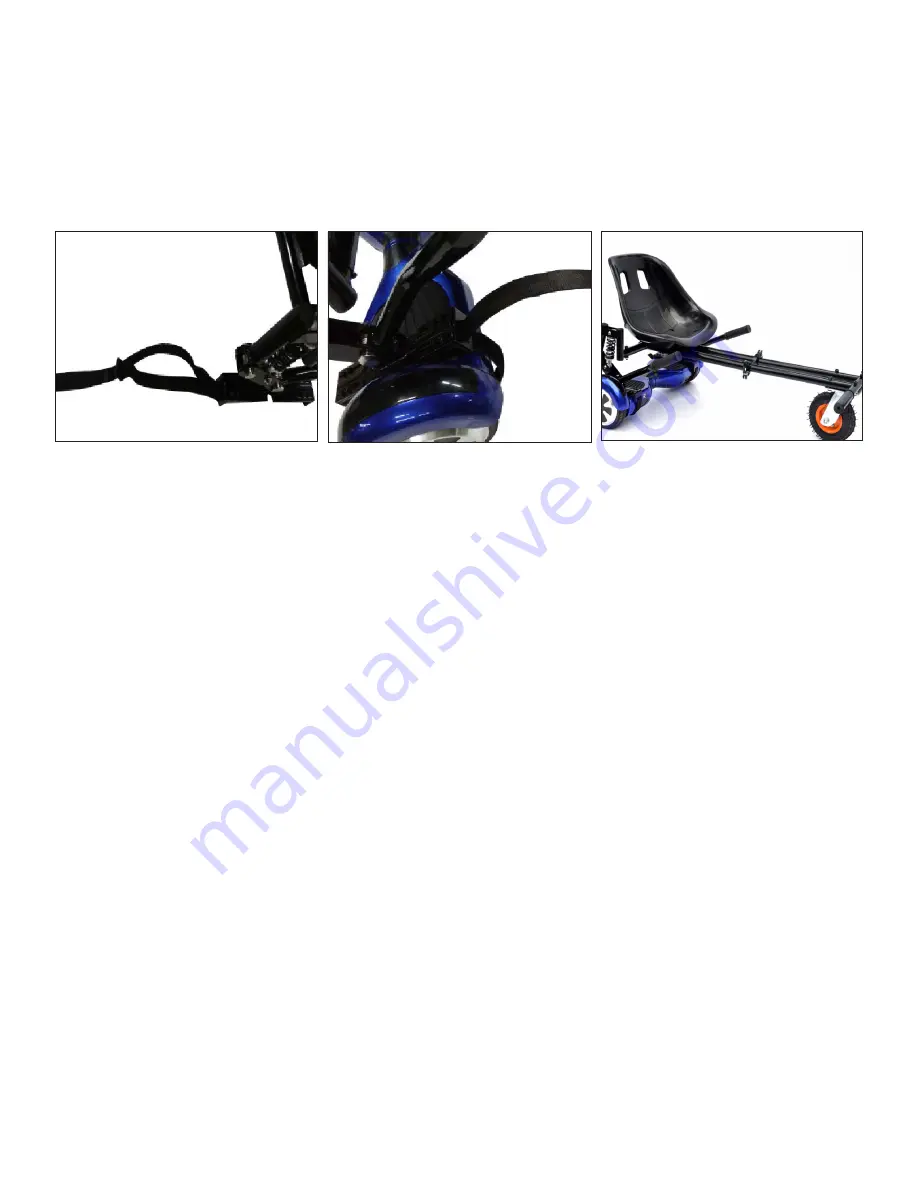
7.  Hook one end of the velcro strap to the front of the bracket at the base. Then pull the strap 

underneath the hoverboard and attach the other end of the velcro strap to the back of the bracket 

at the base. Pull the strap ensuring it is as tight and secure around the hoverboard as possible. 

Repeat this step with the other bracket, making sure that both velcro straps are securely connected 

to the brackets and snug around the bottom of the hoverboard.

GETTING ON THE JETKART 2.0


1. Before taking your seat, make sure your hoverboard is charged. Then place it on a leveled 


surface, facing up and turned off.


2. Carefully lower yourself into the seat. Then place your feet, first one then the other, on 


the footrests. That way your weight can balance out the JetKart 2.0 and keep you from falling 

 backwards.


3. Once you’re seated, look down and make sure the hoverboard is horizontal and facing 


up. After you’ve followed all these steps, you can turn on the hoverboard. (Please note: if the 


hoverboard is not horizontal, and you turn on the device, it will go forward or backwards 


instantly upon turning on.)

Содержание JETKART 2.0

Страница 1: ...JETKART 2 0 MANUAL...

Страница 2: ...2 TABLE OF CONTENTS Introduction 3 In the Box 4 Assembly 5 Attaching to Hoverboard 6 Getting On 7 How to Ride 8 Safety Warnings 9 Warranty 10 Product Registration 11...

Страница 3: ...art 2 0 Also before you get going be sure to check for damaged wheels loose parts and anything else you think might be a problem If something doesn t look right to you please contact Jetson Cus tomer...

Страница 4: ...4 IN THE BOX Adjustable Foot Rest Frame Seat Frame Tubes Tire Bracket Right Joystick Seat Seat Frame Left Joystick Velcro Strap Adjustable Bracket x10 Bolts x10 Nuts x10 Washers...

Страница 5: ...ugh each hole in the Tire Bracket and attach a nut to the other side Attach the Tire to the Foot Rest Frame by tightening the nut using the included Wrench and Allen Key 3 Slide the Left Joystick onto...

Страница 6: ...ubes into the Seat Frame tubes Attach the Foot Rest Frame to the Seat Frame by fastening the clamps 6 Place the JetKart 2 0 parallel to the hoverboard resting the adjustable brackets on the top pads o...

Страница 7: ...verboard GETTING ON THE JETKART 2 0 1 Before taking your seat make sure your hoverboard is charged Then place it on a leveled surface facing up and turned off 2 Carefully lower yourself into the seat...

Страница 8: ...pushing the handlebars down to accelerate and pull the handlebars up to slow down Remember when first using your JetKart 2 0 be sure to start slow and put very light pressure on the handle bars Applyi...

Страница 9: ...er hoverboard users always keep a safe distance to avoid a collision When turning be sure to maintain your balance Do not allow distractions when riding such as answering the phone or engaging in any...

Страница 10: ...use or other intentional or unintentional damage to the product This Limited 1 Year Warranty will not cover any damage which results from the application of improper cleaners solvents or chemicals to...

Страница 11: ...________________ Purchase Date _________________________ Purchased From __________________________ Serial Number ______________________________________________________________________ Gender _________...

Страница 12: ...12 JETKART 2 0...

Отзывы: