11
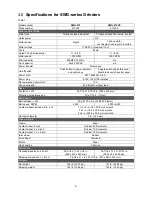
5. Raise belt tension lever to tighten belt against
the wheels. Tighten belt until it is just taut. Do
not over-tension the abrasive belt. A moderate
tension will provide faster cutting, longer belt
life, and better tracking.
Excessive belt tension will
reduce belt life and cause excessive wear of
contact wheel bearings.
Belt tension should
only be sufficient to allow proper tracking.
6. Check belt tracking; see
sect. 7.4
.
Figure 7-2: belt replacement
7.4
Belt tracking
Do not operate machine with
side panel open.
1. Loosen knob and raise upper guard. Open side
panel by turning its knob.
2. Spin drive wheel by hand and check tracking of
belt. If belt tracks to right or left, adjustment is
required.
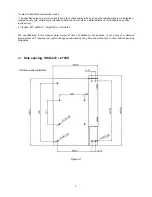
3. Turn idler adjust screw (Figure 7-3) clockwise to
cause belt to track right. Turn idler screw
counterclockwise to cause belt to track left.
Perform this in small increments and allow belt
to respond to the changes.
4. Close side panel and secure by turning knob on
panel. Lower upper belt guard and secure with
knob.
5. Turn on grinder. Check belt tracking; belt should
remain centered on contact wheel. Make further
adjustments as needed according to step #3.
6. If belt still does not track properly, increase belt
tension and repeat steps 1 through 5.
Figure 7-3: Belt tracking
8.0
Operation
8.1
Controls
8.1.1
Variable speed model (SWG-272VS)
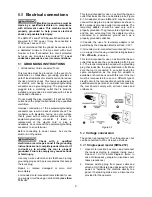
To activate machine, lift the red switch cover and
pull up the toggle switch to start the machine. To
stop, simply push down the red cover.
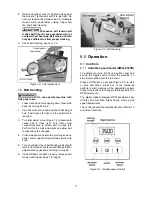
Press on/off button on keypad (Figure 8-1) to start
or stop belt action. Press any of the numbered
buttons to start machine at the designated speed.
Press arrow buttons to change rotation speed in 100
RPM increments.
The digital readout displays RPM (revolutions per
minute), and will flash briefly during start up and
speed adjustments.
The control panel will automatically shut off after 10
minutes of inactivity.
Figure 8-1: variable speed control


