


14
Adjustments
Unplug the machine from the
power source before making any repairs or
adjustments. Failure to comply may cause
serious injury.
Tilting the Table
1. Loosen the front and rear lock knobs
(Figure 14).
2. Tilt table up to 45 degrees to the right or up to
10 degrees to the left. The angle can be read
on the scale mounted to the trunnion.
3. Tighten two lock knobs (Figure 14).
Note:
Table stop (Figure 14) must be adjusted
downward to allow the table tilt to the left.
Adjusting 90
°
Table Stop
1. Disconnect machine from power source.
2. Loosen lock knobs (Figure 14) and tilt table left
until it rests against the table stop.
3. Use a square placed on the table and against
the blade (Figure 15) to see if the table is 90
degrees to the blade.
4. If an adjustment is necessary, loosen lock
knobs, tilt table to the right, and lock in place.
5. Loosen jam nut and turn table stop (Figure 14)
left or right to raise or lower the stop. Tighten
jam nut to hold table stop in place.
6. Unlock table, tilt back onto table rest and
confirm table is 90 degrees with the blade.
7. If necessary, adjust scale pointer to zero.
Changing Blades
Blade teeth are sharp! Use care
when handling the saw blade. Failure to comply
may cause serious injury.
Referring to Figure 16:
1. Disconnect machine from power source.
2. Loosen blade tension by turning the tension
knob counterclockwise (A).
3. Remove the table insert (B) and table pin (C).
4. Open both wheel covers (D, E).
5. Remove the blade from between upper (F) and
lower blade guides (G). Remove blade from
upper and lower wheels.
6. Turn the blade to direct it through the slot in
table.
Front
Figure 14
Figure 15
Figure 16
Содержание JWBS-14OS
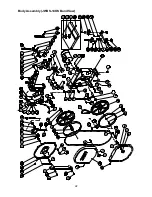
Страница 22: ...22 Body Assembly JWBS 14OS Band Saw ...
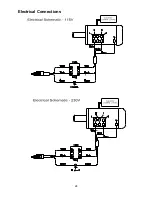
Страница 24: ...24 Electrical Connections ...