


9
10.0
Adjustments
Disconnect machine from
power source before making any adjustments.
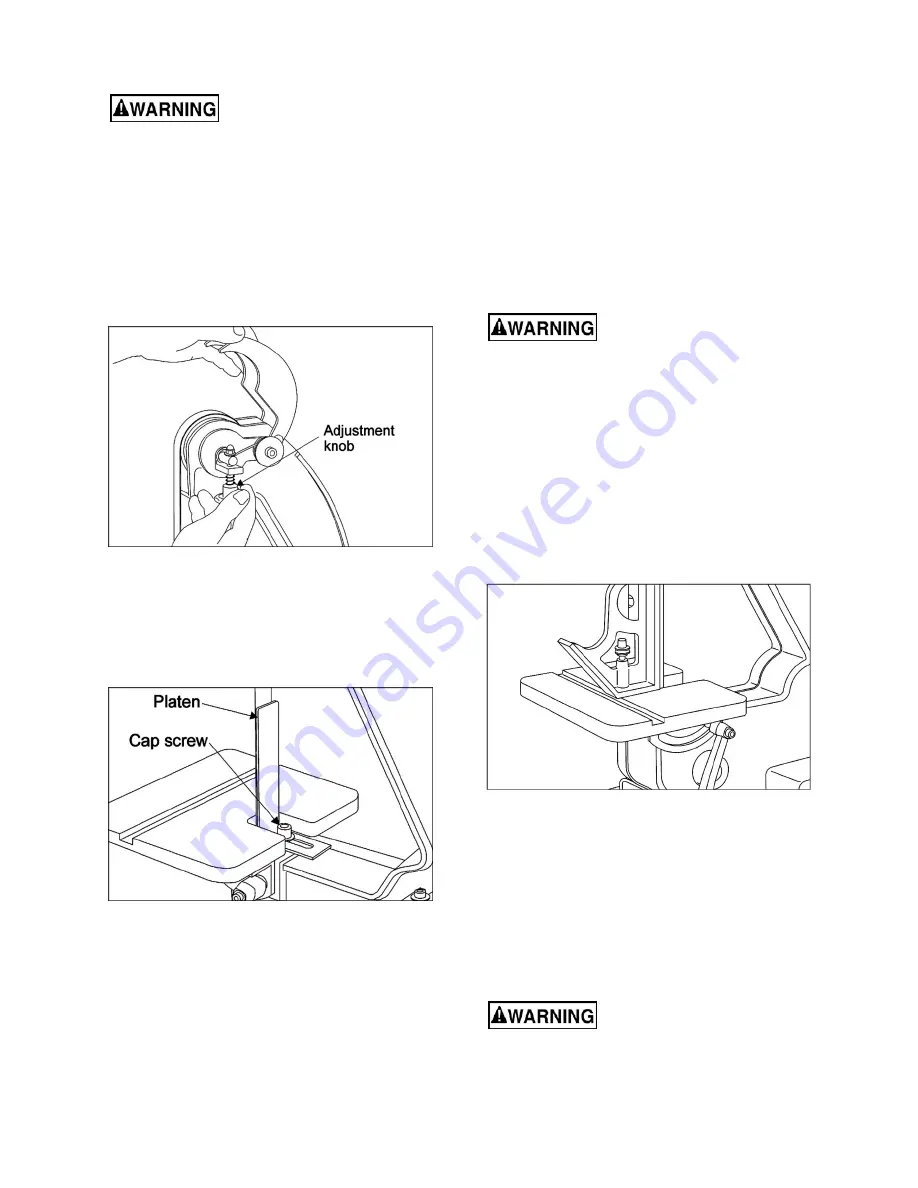
10.1
Sanding belt tracking
The belt tracking adjustment is set at the factory so
the belt runs true on the pulleys. However, if belt
tracks to one side of pulleys, tracking can be
adjusted by turning tracking knob. Turning knob
clockwise moves belt to the right when facing the
sander. Turning knob counterclockwise will move
the belt to the left.
Avoid turning the knob too far.
The amount of adjustment is usually very slight.
Figure 10: Adjusting belt tracking
10.2
Platen
The platen (see Figure 11) is used to properly
support the work when sanding. The platen is
constructed of heavy steel to provide adequate
support.
Figure 11: Platen
Disconnect machine from power source.
The platen should be adjusted so it is almost
touching the back of sanding belt. Loosen cap
screw and adjust platen to desired position.
Tighten screw to secure platen.
The platen can be removed for operations such as
stripping, contour sanding, polishing or other
special operations. To remove platen, remove cap
screw. Be sure to reinstall platen before performing
operations where support of the belt is required.
10.3
Belt table adjustments
The belt sander table can be tilted or moved in or
out to accommodate the operation being
performed. Loosen locking handle to change
position of table. Move table to desired position
and tighten locking handle.
NOTE:
The locking handle is spring-loaded.
Reposition the handle by pulling out on handle and
turning handle on the serrated locking stud.
Release handle and turn locking handle to tighten
or loosen table.
To avoid trapping the work or
fingers between table and sanding belt, the
table edge should be positioned a maximum of
1/16-inch from sanding belt.
10.3.1
Setting belt table to 90-degrees
Disconnect machine from power source.
For most sanding operations, the table is set at 90-
degree angle to sanding belt. Loosen table locking
handle (see Figure 12) and tilt table to rear as far
as possible. Use a combination square. Put one
end of square on table with other end against
sanding belt. Adjust table as needed until it is 90
degrees to belt. Re-tighten locking handle.
Figure 12: Setting belt table to 90-degree angle
10.3.2
Setting belt table to 45-degrees
Disconnect machine from power source.
The table can be tilted to a 45-degree angle (see
Figure 13). To change angle, loosen locking
handle. Use a combination square to set table to
45 degrees to belt. Tighten locking handle to
secure table.
To avoid trapping the work or
fingers between table and sanding belt, the
table edge should be positioned a maximum of
1/16-inch from sanding belt.


