background image


OWNER'S MANUAL


BDB-1340A Belt Drive Lathe 


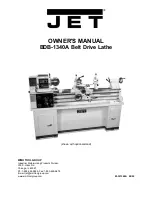
(shown with optional stand) 


WMH TOOL GROUP 

Industrial Metalworking Products Division 
300 S. Hicks Rd. 
Chicago, IL 60067 
Ph: 1-888-594-5866

 Fax: 1-800-626-9676 

E-mail: [email protected] 
www.wmhtoolgroup.com 

M-321360A   08/02 

Содержание BDB-1340A

Страница 1: ...Drive Lathe shown with optional stand WMH TOOL GROUP Industrial Metalworking Products Division 300 S Hicks Rd Chicago IL 60067 Ph 1 888 594 5866 Fax 1 800 626 9676 E mail jet wmhtoolgroup com www wmh...

Страница 2: ...y to misuse abuse negligence or accidents normal wear and tear repair or alterations outside our facilities or to a lack of maintenance THE WMH TOOL GROUP LIMITS ALL IMPLIED WARRANTIES TO THE PERIOD S...

Страница 3: ...in damp or wet locations or expose them to rain Keep work area well lighted 13 Keep children and visitors away All visitors should be kept a safe distance from the work area 14 Make the workshop child...

Страница 4: ...rev 0 0006 0 0112 Number of Inch Threads 38 Range of Inch Threads 3 1 2 80 TPI Number of Metric Threads 23 Range of Metric Threads 0 45 10mm Leadscrew 7 8 8 TPI Feed Rod Diameter 3 4 Compound and Carr...

Страница 5: ...Thread and Feed Chart 17 Automatic Feed Operation and Feed Changes 18 Powered Carriage Travel 18 Saddle Adjustment 18 Cross Slide Adjustment 18 Compound Rest Adjustment 19 Tailstock Adjustment 19 Half...

Страница 6: ...strapped to container 1 Chip Tray 1 Lifting Hook 2 Lifting Blocks Tool Box 3 Open End Wrenches 9 11 10 12 12 14mm 1 Touch Up Paint 1 Oil Can 1 Hex Socket Wrench Set 2 5 3 4 5 6 8mm 2 Shear Pins 1 33T...

Страница 7: ...With adequate lifting equipment slowly raise the lathe off the shipping crate bottom Make sure lathe is balanced before moving to sturdy bench or optional stand 5 To avoid twisting the bed the lathe...

Страница 8: ...ed or broken during transit Clean all parts thoroughly with solvent Also clean the spindle and camlocks 4 Cover all chuck jaws and scroll inside the chuck with Mobilith AW2 Cover the spindle cam locks...

Страница 9: ...ree months of operation Then change oil in the headstock annually Grease three fittings D Fig 5 with Mobil 1 Synthetic Universal Grease daily 2 External Gears Coat all gears with a heavy non slinging...

Страница 10: ...cate two ball oilers D Fig 6 once daily with Mobil DTE Oil Heavy Medium 8 Thread Dial Indicator Lubricate ball oiler E Fig 6 once daily with Mobil DTE Oil Heavy Medium 9 Compound Rest Lubricate three...

Страница 11: ...g 9 is made from high quality cast iron The sliding parts are smooth ground The cross slide is mounted on the carriage and moves on a dove tailed slide which can be adjusted for play by means of the g...

Страница 12: ...e gear box E Fig 10 is made from high quality cast iron and is mounted to the left side of the machine bed Steady Rest The steady rest F Fig 10 serves as a support for shafts on the free tailstock end...

Страница 13: ...ig 13 Pull lever up for clockwise spindle rotation reverse Push lever down for counter clockwise spindle rotation forward Neutral position is a center detent and the spindle remains idle 7 Compound Re...

Страница 14: ...Clamping Lever F Fig 14 Rotate counter clockwise to loosen and clockwise to tighten Rotate the tool post when the lever is unlocked 17 Threading Dial G Fig 14 Engage by pushing into the leadscrew Pul...

Страница 15: ...s been operated in the low R P M range for three hours To allow time for the gears and bearings to break in and run smoothly do not run the lathe above 580 R P M for the first six hours of operation a...

Страница 16: ...gear meshes with the smaller gears and tighten to secure in place Note Make sure there is backlash of 0 002 0 003 between gears Setting the gears too tight will cause excessive noise and wear 7 Close...

Страница 17: ...17 Thread and Feed Chart...

Страница 18: ...er tighten 3 Move the carriage with the hand wheel and determine if drag is to your preference Readjust the setscrews as necessary to achieve the desired drag 4 Hold socket set screw firmly with a hex...

Страница 19: ...rew firmly with a hex wrench and tighten hex nut to lock in place Note over adjustment will cause excessive premature wear on gib and mating parts Headstock Alignment The headstock has been aligned at...

Страница 20: ...each cut until the bar stock measurements are the same Tighten all headstock bolts and jam nuts on adjusting screws Removing Gap Section 1 Using an open end wrench tighten the two hex nuts A Fig 26 T...

Отзывы: