background image


Preface 


Please read the user manual carefully before taking the product into use. 


  This manual contains operations, assembly methods, and simple faults solutions.

  This manual applies to our models: JRWD303.

  This manual contains wheelchair maintenance and self checking methods, please put it in 

proper place.

  Please provide this manual for reference when other people are going to use this 

wheelchair.

  The annotations and illustrations in this manual might be slightly different with the real parts 

due to quality improvement or changing design. Please in kind prevail.

  Contact with your dealer if there is any ambiguity or question.

  Improper use of any vehicle may lead to injury. Unsafe driving could harm yourselves and 

others.

  The electric wheelchair is intended to comfortably transport persons with walking difficulties 

or no walking abilities.

  This electric wheelchair is designed to transport 1 person only.


Symbols used in this manual 


Warning symbol 

Follow the instructions next to this symbol closely. 


Not paying careful attention to these instructions could result in physical injury or damage to the 
wheelchair or the environment. 


1 Product Introduction 

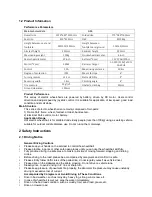
1.1 Product Image 


Содержание JRWD303

Страница 1: ...RECLINING ELECTRICAL WHEELCHAIR G04 User Manual ...

Страница 2: ...l parts due to quality improvement or changing design Please in kind prevail Contact with your dealer if there is any ambiguity or question Improper use of any vehicle may lead to injury Unsafe driving could harm yourselves and others The electric wheelchair is intended to comfortably transport persons with walking difficulties or no walking abilities This electric wheelchair is designed to transp...

Страница 3: ...art control motor battery Application Range Our electric wheelchair is for disabled and elderly people less than 100kg using as walking vehicle suitable for outdoor middle distance use Do not run on the motorways 2 Safety Instructions 2 1 Driving Notice General Driving Cautions Please keep your hands on the armrest to control the wheelchair Please practice in parks or other safe open places until ...

Страница 4: ...uld push the wheelchair to move forward to keep safe on steep slope or long slope 2 2 Other Notice Repair and Reform If the repair and modification is necessary please contact your dealer Do not modify by yourself it may lead to accident or malfunction Protect Environment In order to protect environment do not casually discard the abandoned wheelchair and scrapped battery Please contact your local...

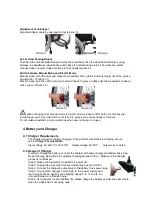
Страница 5: ...ed state turn up both side handle to hear a click sound and check there s no shaking Connect Wire Line Connect the battery box s plug to control s plug picture 2 Picture 2 Adjustment of Joystick Adjust the control to perfect position by screwing the nut counterclockwise picture 3 Screw tight the nut when adjustment is done Picture 3 Assemble and Dissemble the Footrest Install the footrest into the...

Страница 6: ...ay cause danger of rollover Do not make wheelchair into manual mode when user is driving on slopes 4 Battery and Charger 4 1 Charger Requirements The charger is used for battery charging During electric wheelchair is charging do not use it Charger Technical Data Input voltage AC 220V 110V 10 Output voltage 24V DC Output current 2A 4A 4 2 Usage of Charger In order to charge the battery connect the ...

Страница 7: ...easily make battery damaged It s normal for the fan making a sound during charging It is for cooling the charger please do not worry about it Prevent liquid go into the charger during charging And do not place charger on the flammable items such as fuel footrest or seat cushion 4 3 The Usage and Maintenance of Battery Wrong operation of replacing battery may cause danger of explosion Only the same...

Страница 8: ...tion and is not able to charge Two short beeps with five The left side motor is The left side motor is poor connected indicator lights blink twice malfunction or the wire is disconnected Four short beeps with five The right side motor is The right side motor is poor connected indicator lights blink four times malfunction or the wire is disconnected Check the brakes and check if the Six short beeps...

Страница 9: ... shown the battery power is full When there is only the red or yellow LED light lit the battery should be charged And for a long distance driving the battery should be fully charged If only the red LED light is lit the battery power is extremely inadequate users need to charge battery as soon as possible Use of joystick The wheelchair moving direction is controlled by joystick The moving extent of...

Страница 10: ... if the control s plug is loose Step 2 To check if the connection of control s plug and battery box is loose Please reinsert the plug connector hold the plug when pull out the plug Do not pull the wire to avoid unnecessary damage to the wire line After above checking if the wheelchair is still not able to restore the power or if users have any question for above checking please connect with your d...

Страница 11: ...uthorized modifications Out authorized service centers maintain costs Customers pay attention following cautions In order to make the warranty is valid customers have obligation to follow below cautions Correctly testing and driving the power wheelchair as manual instructions Daily checking Implementing the check tips according to our suggestion Warranty acceptable If warranty is needed please tak...

Страница 12: ... in a flammable anesthetic mixture with air or gas mixed with oxygen or nitrous oxide flammable anesthetic gases occurs Non AP APG type Classified according to operation mode Continuous operation Rating voltage DC 24V Have no protective effect on the application of defibrillator discharge section No signal output or input part Non permanently installed equipment After Sales Service Card Card Holde...

Страница 13: ...the red wire in the box to battery s red pole positive pole and fixed by soldering Step 3 Connect the black wire in the box to battery s blue pole cathode and fixed by soldering Step 4 Connect one battery s red pole positive pole to another battery s blue pole cathode pole by the single red wire Step 5 Close the box screw the battery box The battery box installation is done ...

Отзывы: