background image

STEREO PHONOGRAPH OPERATION 

  Please Note - Before Use 

-

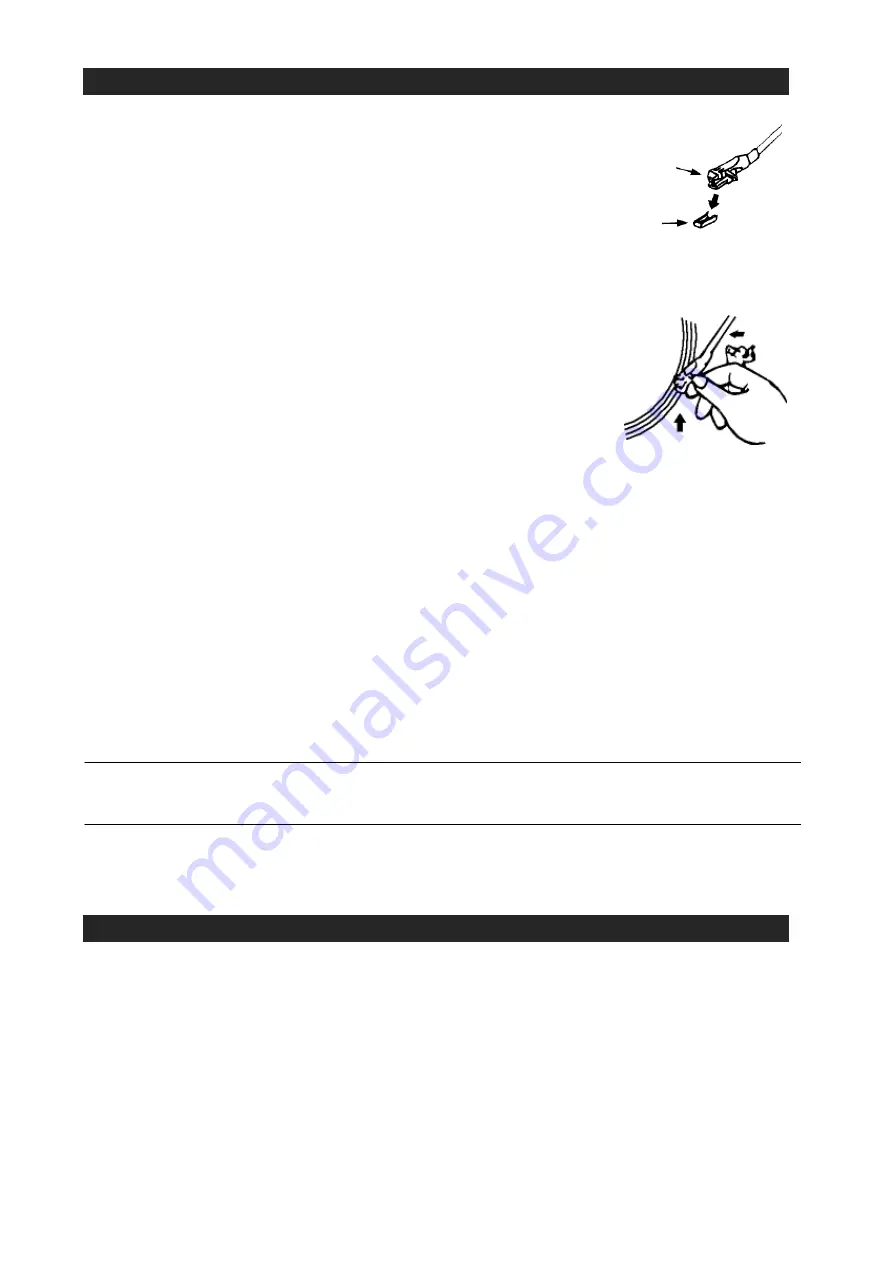
  Remove the stylus protector. 

-

  Make sure that the tone arm is unlocked and free 

to move from the tone arm rest prior to operating. 
Lock the tone arm in place again when not in use. 

1.  Slide the Power ON/OFF switch to the On position 
2.  Raise the turntable dust cover. 
3.  Place a record on the turntable platter (use the 45 RPM record


adaptor if you are 

playing 45 RPM records). 

4.  Set the speed selector to the proper position for the record you are playing. 
5.  Lift the tone arm from the rest and slowly move it over the 

record. The turntable platter will begin spinning. 

6.  Place the tone arm down onto the record at the location that 

you want to play. 

7.  Adjust the volume to the desired level. 
8.  At the end of record, the platter will automatically stop spinning. 

Lift the tone arm from the record and return it to the rest. 

9.  To stop playing manually, lift the tone arm from the record and return it to the rest. 
 

NOTES:


1.) Certain types of records may have an auto-stop area outside the preset limit, so 

the turntable may stop before the last track finishes. If this occurs, set the 
AUTO-STOP switch to the “OFF” position. This allows the record to play to the 
end, but please note that it will not stop automatically. You must manually raise 
the tone arm and place it back in the rest and then turn off the power to stop the 
turntable from spinning. 

2.) The turntable will automatically disconnect and stop playing when a 3.5 mm   

stereo aux-in cord (not included) is plugged into the AUX-IN Jack on the front. 
The turntable cannot be used while using the Aux-in, so be sure to disconnect 
the Aux-in cord prior to using the turntable. 

 
TONE CONTROL 

Rotate the TONE control knob to adjust the treble level of the music you are playing.   
 

PITCH CONTROL 

The Pitch Control allows you to fine tune the playing speed of the record once the correct 
speed (33/45/78 RPM) is chosen. Rotate the Pitch Adjust Control to slightly increase or 
decrease the speed of the turntable if necessary.


AUXILIARY INPUT 

This unit provides an auxiliary audio signal input jack for connecting external audio 

devices like MP3 players, CD players and older, non- dockable iPods (except iPod 

shuffle 3

rd

 gen) so you can listen to your external source through the speakers of this 

system. 
1.  Use an audio cable (not included) with one 3.5 mm stereo plug on each end of the 

cable. 

2.  Plug one end into the AUX-IN jack on the main unit and the other end of the cable 

into the Line-out Jack or Headphone Jack of your external audio device. It will 
automatically switch the unit to AUX mode. 

Cartridge 

Stylus assembly 

Содержание JTA-232

Страница 1: ...3 SPEED STEREO TURNTABLE WITH BUILT IN SPEAKERS AND SPEED ADJUSTMENT USER MANUAL JTA 232 PLEASE READ THIS USER MANUAL COMPLETELY BEFORE OPERATING THIS UNIT AND RETAIN THIS BOOKLET FOR FUTURE REFERENC...

Страница 2: ...a safe level Start your volume control at a low setting Slowly increase the sound until you can hear it comfortably and clearly and without distortion Once you have established a comfortable sound lev...

Страница 3: ...should be situated so that its location or position does not interfere with its proper ventilation For example the appliance should not be situated on a bed sofa rug or similar surface that may block...

Страница 4: ...n the apparatus has been damaged in any way such as power supply cord or plug is damaged liquid has been spilled or objects have fallen into the apparatus the apparatus has been exposed to rain or moi...

Страница 5: ...vision reception which can be determined by turning the equipment off and on the user is encouraged to try to correct the interference by one or more of the following measures Reorient or relocate the...

Страница 6: ...rntable to a suitable USB port on your computer via the USB cable provided 2 Please refer to CONNECTING TO A COMPUTER FOR RECORDING section of this manual for detail 1 Dust Cover 2 Power LED Indicator...

Страница 7: ...but please note that it will not stop automatically You must manually raise the tone arm and place it back in the rest and then turn off the power to stop the turntable from spinning 2 The turntable...

Страница 8: ...S IMPORTANT INFORMATION BEFORE USING YOUR HEADPHONES 1 Avoid extended play at very high volume as it may impair your hearing 2 If you experience ringing in your ears reduce the volume or shut off your...

Страница 9: ...installation complete until your computer shows a pop up a message that it is installed properly and ready to use SET RECORDING INPUT LEVEL USE WINDOWS XP COMPUTER 1 Click the Start in the left corner...

Страница 10: ...a record on the turntable and use the Sound Recorder to record a short clip of music for testing The sound wave will show on the interface screen when recording RUNNING AUDACITY SOFTWARE Note Please...

Страница 11: ...ears You will find the Record Play Pause Stop Skip to Start and Skip to End control buttons here Use the File Edit View Transport Tracks Generate Effect and Analyze menus from your computer screen to...

Страница 12: ...nput and Output Volume bars 5 Click the record button to start recording left and right tracks will show on your computer screen If you cannot see the sound waves appear on the Interface when recordin...

Страница 13: ...you want to encode your recorded music to MP3 format you need to download the LAME MP3 encoder either in the CD provided or under the page Other Audacity Downloads for Windows of the website http aud...

Страница 14: ...wer source when cleaning The finish on the unit may be cleaned with a dust cloth and cared for as other furniture Use caution when cleaning and wiping the plastic parts If the cabinet becomes dusty wi...

Страница 15: ...nit is ON but there is low or no volume The volume Control has been turned all the way down Turn the Volume control to a higher output Sound is distorted Volume level is set too high Decrease the volu...

Страница 16: ...re to provide reasonable care and necessary maintenance as outlined in the user manual 3 Warranty of all SPECTRA products applies to residential use only and is void when products are used in a nonres...

Отзывы: