background image

1)

Read these instructions.

2)  Keep these instructions.
3)  Heed all warnings.
4)  Follow all instructions.
5)  Do not use this apparatus near water.


Apparatus should not be exposed to dripping or 
splashing and no objects filled with liquids, such 
as vases, should be placed on the apparatus.

6)  Clean only with a dry cloth.
7)

Do not block any ventilation openings. Install in 

accordance with the manufacturer's 
instructions.

8)  Do not install near any heat sources 

such as radiators, heat registers, 
stoves, or other apparatus (including 
amplifiers) that produce heat.

9)  Do not defeat the safety purpose of the 

polarized or grounding-type plug. A polarized 
plug has two blades with one wider than the 
other. A grounding type plug has two blades and 
a third grounding prong. The wide blade or the 
third prong are provided for your safety. If the 
provided plug does not fit into your outlet, 
consult an electrician for replacement of the 
obsolete outlet.

10)  Protect the power cord from being walked on or 

pinched, particularly at plugs, convenience 
receptacles, and the point where they exit from 
the apparatus.

11)  Only use attachments/accessories specified by 

the manufacturer.

12)  Use only with the cart, stand, tripod, bracket, or 

table specified by the manufacturer or sold with 
the apparatus. 

When a cart is used, use caution when 

moving the cart/apparatus combination 
to avoid injury from tip-over.

13)  Unplug this apparatus during lightning 

storms or when unused for long periods of time.

14) Refer all servicing to qualified service 

personnel. Servicing is required when the 
apparatus has been damaged in any way, such 
as power-supply cord or plug is damaged, liquid 
has been spilled or objects have fallen into the 
apparatus, the apparatus has been exposed to 
rain or moisture, does not operate normally, or 
has been dropped.

WARNING

To reduce the risk of fire or electric shock, do not expose 
this apparatus to rain or moisture.

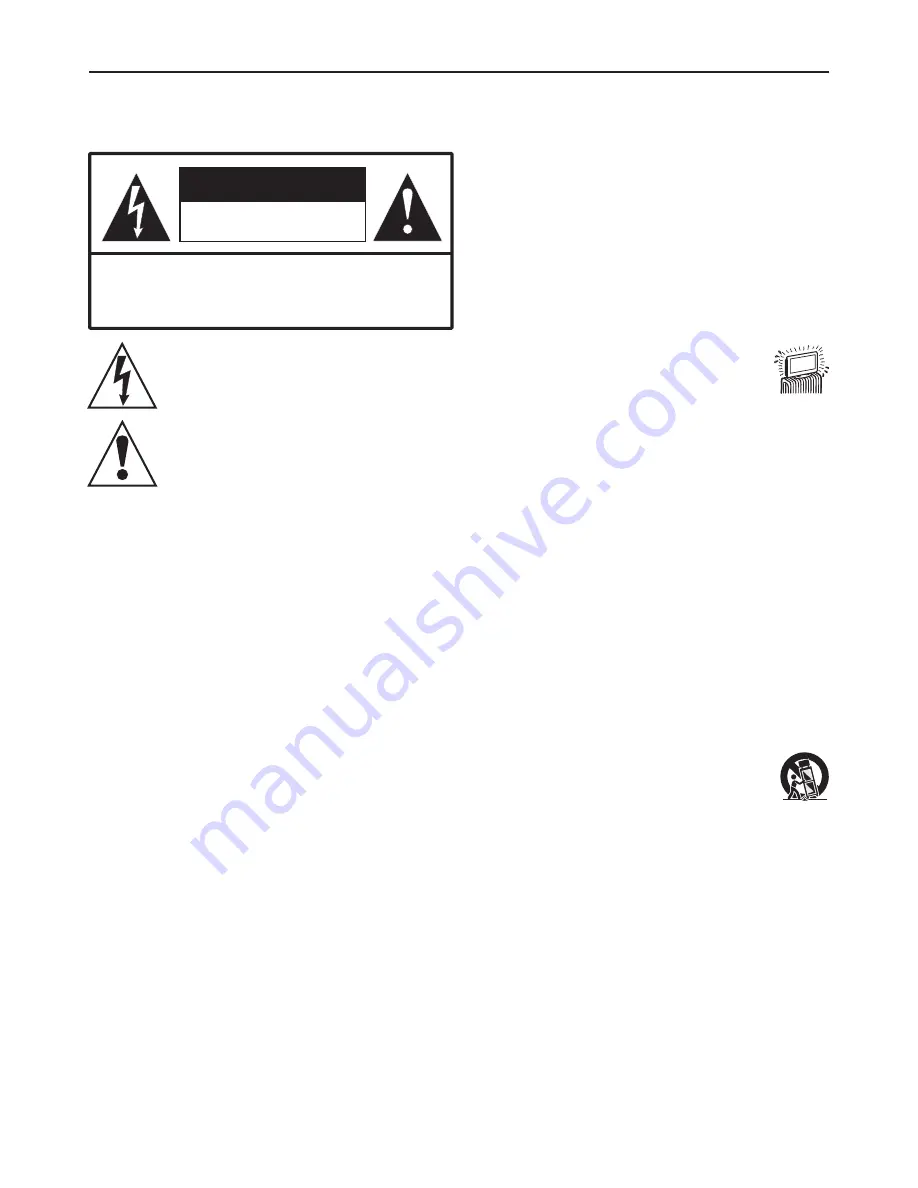
This symbol is intended to alert the user to the 
presence  of  uninsulated  "dangerous  voltage" 
within the product's enclosure that may be of 
sufficient  magnitude  to  constitute  a  risk  of 
electric shock to persons.

RISK OF ELECTRIC SHOCK    
DO NOT OPEN

CAUTION

CAUTION

-To  reduce  the  risk  of  electric  shock,  do  not 

perform  any  servicing  other  than  that 
contained in the operating instructions unless 
you are qualified to do so.

This product utilizes tin-lead solder, and fluorescent lamp 
containing a small amount of mercury. Disposal of these 
materials  may  be  regulated  due  to  environmental 
considerations.  For  disposal  or  recycling  information, 
please  contact  your  local  authorities  or  the  Electronic 
Industries Alliance: www.eia.org

FCC STATEMENT

This  equipment  has  been  tested  and  found  to  comply 
with the limits for a Class B digital device, pursuant to part 
15  of  the  FCC  Rules.  These  limits  are  designed  to 
provide  reasonable  protection  against  harmful 
interference  when  the  equipment  is  operated  in  a 
commercial environment.

This equipment generates, uses, and can radiate radio 
frequency  energy  and,  if  not  installed  and  used  in 
accordance  with  the  instruction  manual,  may  cause 
harmful interference to radio communications. Operation 
of this equipment in a residential area is likely to cause 
harmful  interference  in  which  case  the  user  will  be 
required to correct the interference at his own expense.

FCC CAUTION:

Pursuant  to  47CFR,  Part  15.21  of  the  FCC  rules,  any 
changes or modifications to this monitor not expressly 
approved  by  the  manufacturer  could  cause  harmful 
interference  and  would  void  the  user's  authority  to 
operate this device.

This  is  a  CLASS  B  product.  In  a  domestic 
environment,  this  product  may  cause  radio 
interference,  in  which  case  the  user  may  be 
required  to  take  adequate  measures  to  counter 
interference.

Important Information

This symbol is intended to alert the user to the 
presence  of  important  operating  and 
maintenance  (servicing)  instructions  in  the 
literature accompanying the appliance.

WARNING: 

IMPORTANT SAFETY INSTRUCTIONS

1

Содержание JE3207

Страница 1: ...or future reference The illustrations and on screen displays in this operation manual are for explanation purposes and may vary slightly from the actual operations Menu items that are not selectable are grayed out FORASSISTANCE VISIT USAT WWW ASAELECTRONICS COM LCD Color TV with ATSC Tuner Operating Manual JE3207 ...

Страница 2: ...atus to rain or moisture This symbol is intended to alert the user to the presence of uninsulated dangerous voltage within the product s enclosure that may be of sufficient magnitude to constitute a risk of electric shock to persons RISK OF ELECTRIC SHOCK DO NOT OPEN CAUTION CAUTION To reduce the risk of electric shock do not perform any servicing other than that contained in the operating instruc...

Страница 3: ...ly with a soft cloth Stubborn stains may be removed with a cloth slightly dampened with a solution of mild soap and warm water Never use strong solvents such as thinner or benzine for cleaning If using a chemically pre treated cloth please follow the instructions provided on the package Overloading Do not overload wall outlets extension cords or convenience receptacles beyond their capacity since ...

Страница 4: ...perating instructions Improper adjustment of controls not described in the instructions can cause damage which often requires extensive adjustment work by a qualified technician e The product has been dropped or the cabinet has been damaged in any way f The product displays an abnormal condition or exhibits a distinct change in performance Any noticeable abnormality in the product indicates that t...

Страница 5: ...atteries into the Remote Control 18 Using the Remote Control 18 Button Descriptions 20 Getting Started 21 Running Initial Setup 21 Setting a Secret Number 22 Menu Navigation 22 Watching TV 23 Turning On Off 23 Introducing Channel Number 23 Selecting Channels 23 Adjusting Volume 24 Using FREEZE button 24 Using ZOOM button 24 Using External Equipment 12 Introduction 12 Equipment with HDMI Connection...

Страница 6: ...te Channels 30 Using the FAVORITE button 30 Editing Channel Name 30 Using the Program Guide 31 Accessing Program Guide 31 Setting System 32 Accessing Settings Menu 32 Setting Date Time 32 Setting Timer 32 Input Select 33 Setting Caption Vision 33 Using the CCD button 33 Setting Menu Display 33 Editing Input Labels 34 Setting Screen Saver 34 Running Reset System 34 Parental Lock Control 35 Accessin...

Страница 7: ...d damage the unit Do not install this unit outdoors If the unit is exposed to rain it may result in fire or electric shock If the unit is exposed to direct sunlight the unit may heat up and cause damage to the unit Do not install this unit in a vehicle or hang from the ceiling Bumping of the vehicle may cause the unit to fall down and cause injury Do not install this unit in a ship or vessel If th...

Страница 8: ...nu operations these buttons serve as left right buttons VOL VOL 4 MENU 5 To access the Menu main page INPUT 7 To display the input source list or to quickly select input source POWER 6 Turn the unit on or off 7 In normal viewing press the MENU button to access the Menu main page In Menu operations the MENU button is used to confirm or alter the settings of the selected menu item It has the same fu...

Страница 9: ... s componentvideo YPbPr andaudio L R jacks Component video provides better picture quality than the S VIDEO or the composite video S VIDEO input Connects totheS VIDEO output jack ofyourVCRorother videoequipmentthathasS VIDEO S VIDEO providesbetterpicturequalitythanthe compositevideoconnection Composite Video IN Connect tothecompositevideooutput jacksonyourVCRorothervideodevice Video OUT Connectsto...

Страница 10: ... way in which you connect your TV will vary depending on how your home receives a signal antenna and satellite cable and cable box Do not use an indoor antenna which is especially susceptible to radio noise For best results use this connection if you have an antenna system Antenna cable Be sure to choose Antenna before you start Auto Program See chapter Getting Started for details Connecting Cable...

Страница 11: ...the RF coaxial cable from the CATV to the input of the digital cable box Use a component video cable to connect the YPbPr jacks of your digital cable box to theTV s component jacks Component video connection is necessary to view digital broadcastings in 1080i 720p 480i and 480p ThisTV displays most picture formats The component Jacks do not provide audio so audio cables must be connected to provid...

Страница 12: ... 480i and 480p ThisTV displays most picture formats The component Jacks do not provide audio so audio cables must be connected to provide sound Digital Satellite Receiver Satellite Receiver Satellite antenna cable Cables are often color coded to connectors Connect red to red white to white etc AV cable S VIDEO cable If your is not equipped with S VIDEO use a VIDEO cable yellow instead of the S VID...

Страница 13: ...fore making connections Loose connectors can result in image or color problems Make sure all connectors are securely inserted into their terminals Refer to your external equipment operation manual for the signal type The illustration of the external equipment may be different depending on your model Equipment with HDMI Connection For best results use this connection if your equipment has a High De...

Страница 14: ...se an adapter Y ou can use a commercial HDMI to DVI cable or an HDMI adapter Both are available at your local electronics store When you use the adapter you will also need to use separate audio cables for sound as DVI connector is for video signals only 13 TV Left Side HDMI D SUB IN AUDIO PIC COMPONENT IN AV 2 IN R AUDIO L S VIDEO AV OUT AV 1 IN VIDEO L AUDIO R VIDEO L AUDIO R Y P P VIDEO L AUDIO ...

Страница 15: ...rminal share the same audio jacks with video2 and has priority over the video2 jack Connecting a VCR for Recording UseAV cables to connect the VCR sAV input jacks to theTV s output jacks AV cable VCR for Recording Cables are often color coded to connectors Connect red to red white to white etc 14 Only analog TV programs AV1 and AV2 input sources can be output through theAV output jacks TV Left Sid...

Страница 16: ...ectors Connect red to red white to white etc Connecting a DVD Player with S Video and Audio Connectors Use an AV cable to connect the DVD player s AUDIO OUT jacks to the TV s AUDIO IN jacks Use a S VIDEO cable to connect the DVD player s S VIDEO OUT jack to the TV s S VIDEO IN jack AV cable S VIDEO cable Cables are often color coded to connectors Connect red to red white to white etc If your DVD p...

Страница 17: ...b To audio output jack Audio cable stereo mini plugs Connecting a Camcorder or PlayStation Use anAV cable to connect the camcorder or PlayStation AV output jacks to the TV sAV input jacks or Cables are often color coded to connectors Connect red to red white to white etc AV cable Camcorder PlayStation 16 TV Left Side HDMI D SUB IN AUDIO PIC COMPONENT IN AV 2 IN R AUDIO L S VIDEO AV OUT AV 1 IN VID...

Страница 18: ...heTV s output jacks See the Operating Manual of the second TV or monitor for further details regarding that device s input settings 17 Only analog TV programs AV1and AV2 input sources can be output through theAV output jacks Second TV or Monitor Cables are often color coded to connectors Connect red to red white to white etc AV IN COMPONENT IN R AUDIO L AV OUT VIDEO L AUDIO R Y P P b r TV Left Sid...

Страница 19: ...ed period of time remove the batteries from the remote control Using the Remote Control Use the remote control by pointing it towards the remote sensor window of the set Objects between the remote control and sensor window may prevent proper operation Cautions regarding use of remote control Do not expose the remote control to shock In addition do not expose the remote control to liquids and do no...

Страница 20: ...ENU INFO OK To enter a program number for multiple program channelssuchas2 1 2 2 etc To switch between the currently tuned channel andthepreviouslytunedchannel Toselectchannelsupwardordownward Toadjustvolume 9 Tomutethesound ToaccesstheMenumainpage Toaccesstheprogramguide To move upward or downward in menu operation Tomoveleftorrightinmenuoperation Toadjustselectedmenuiteminmenuoperation To confir...

Страница 21: ...cessthemasterchannellist Toselectapresetpicturemode 21 Tofreezecurrentpicture To access the favorite channel list and select from3differentfavoritelists ZOOM CCD MTS SAP SLEEP LIST PICTURE FREEZE FAVORITE AUDIO Toselectapresetsound mode 20 Toselectclosedcaptionmode SLOW EQ RPT PICTURE TITLE AS PS 0 1 6 2 9 5 7 3 8 4 OK POWER INFO CH TV DVD MENU VOL RECALL MUTE EXIT GUIDE INPUT FREEZE EJECT ANGLE P...

Страница 22: ... continue If you want to return to previous screen please highlight GO BACK item and press OK to return Press to highlight Yes item if you want to observe daylight saving or you may select No to abandon daylight saving and then press OK to confirm and continue If you want to return to previous screen please highlight GO BACK item and press OK to return Press to select Antenna or Cable according to...

Страница 23: ...enu The secret PIN is very important please keep it carefully As a precautionary measure make a note of your secret PIN and keep it in a familiar place Menu Navigation Press to display the Main menu 1 2 Press to highlight the menu items 3 Press to enter the sub menu field 4 Press to select items in the sub menu Press to confirm your operation or alter the settings for some items such as Cinemotion...

Страница 24: ...d digital channels in their lineups So i ajor channel number and a minor channel number n most situations the ATSC PSIP channel number is composed of a m The major channel number is same for both analog and digital channels It is equal to the NTSC channel number for existing broadcasters An analog channel usually has a minor channel number of zero while a digital channel usually has a minor channe...

Страница 25: ...lume Using MUTE on the remote control Press MUTE to mute the sound Press it again to cancel the mute Press FREEZE to temporarily capture a program s picture You can use this feature to write down information such as phone numbers recipes etc You may press any key to cancel FREEZE and return to normal viewing Select to match the source s image 4 3 to 4 3 16 9 to 16 9 Press ZOOM repeatedly to choose...

Страница 26: ... display an image with the same number of pixels on the screen Select to enlarge the picture horizontally and vertically to an equal aspect ratio that fills the wide screen Example Source Final Source Final Full Screen Panoramic Select to enlarge the 4 3 picture to fill the 16 9 screen keeping the original image as much as possible Source Final Panoramic Source Example Example Example Source Examp...

Страница 27: ...you can choose a proper aspect ratio for 4 3 or 16 9 program Select from Normal Direct FullScreen Panoramic ZOOM 1 and ZOOM 2 Choose fromthefollowingcolortemperatures Cool Neutral Warm Selecttogivethewhitecolorsabluetint Selecttogivethewhitecolorsaneutraltint Selecttogivethewhitecolorsaredtint Select ON to optimize the screen display automatically detecting film content and applying a reverse 3 2 ...

Страница 28: ...st match the TV environment which can vary due to room brightness type of program watched or the type of image input from external equipment Standard Vivid Movie Pro Custom Selectfor ahighlydefinedimageinanormallybrightroom Select for enhanced picture contrast and sharpness Select for a movie Select to customize the picture as desired Select for a normal picture Option Description Selecttoadjustho...

Страница 29: ...press the AUDIO button repeatedly For analog channels you can use the MTS SAP button to cycle through the Multi channel TV Sound options For digital channels use the MTS SAP button to quickly select audiotrack ifavailable 28 To highlight an option and to change settings press Press OK to confirm the selection or alter the settings Press EXIT to exit Analog Preference Digital Preference TV Speaker ...

Страница 30: ...l number Please contact your local station or cable operator for thisRF channelnumberinformation You will be asked to input a correct secret number before you accessthe Find Channel screen Allows you to assign labels such as station call letters to a selected channel See Editing Channel Name on the next page Setting Channel List Master Channel List Press OK to finish Done Digital Only Unmark All M...

Страница 31: ...buttons to move through the label characters A Z 0 9 etc Then press OK to select the highlighted character Repeat to add characters to the label Back select to move cursor backward for one character Shift select to change uppercase or lowercase forA Z Clear select to clear current inputs Select Done when you finish labeling the list Using the FAVORITE button Press the FAVORITE button repeatedly to...

Страница 32: ...r This TV is equipped to show program information if available from the station The Program Guide provides some information for the current program and next program if the next program information is available The information may include channel number channel name program title broadcast time brief introduction etc Normally you can access the program guide by Using the Guide menu Using the GUIDE ...

Страница 33: ...n Start Time Duration 8 00 PM 01 30 Option Description Selecttoactivatethecurrenttimer Select to set a start time so that the TV automatically turns on attheselectedtime Timer is on Start Time Duration Select to set a duration time that you want theTVto remain on beforeshuttingoffautomatically By using the SLEEP button the TV allows you to set the amount of time 15 minutes 30 minutes 45 minutes 60...

Страница 34: ...olescreen ifavailable Allows you to set digital closed captioning to Basic digital EIA 608 or Advanced digital EIA 708 Select from Always Basic AlwaysAdvanced and Automatic Allows you to make additional settings for digital closed captionoptions Youmaysetthefollowingitemsasdesired TextStyle TextColor TextOpacity TextSize Textalign Edge Color Edge Style Background Color Background Opacity FrameColo...

Страница 35: ...appears Please use the and OK buttons to input a label name Be sure to select Done when finished Option Description Select to set a delay time before the screen saver is activated when thereis no inputsignal Select to set a background color when the screen saver is activated Selecttopreviewthescreensaver Activation Delay Background Color Test RESET SCREEN SAVER Selecttoresetthesettingsofthescreens...

Страница 36: ...ockAll to lock all available channels or select Unlock All to unlock all channels You can use the and OK buttons to lock individual channels one by one The Locked channels will be markedwitha symbol Besuretoselect Done whenfinished Select to reset the locks settings to the defaults The customized lock settings will be cleared if you select RESET Ratings Locks Channel Locks Front Panel Lock Change ...

Страница 37: ...data of older movies Canadian Custom Rating Options Option Description CAN French CAN English G C All children C8 Children 8 years and older G General programming PG Parental guidance 14 Viewers 14 and older 18 Adult programming General programming 8 ans Not recommended for ages under 8 13 ans Not recommended for ages under 13 16 ans Not recommended for ages under 16 18 ans Programming restricted ...

Страница 38: ...rol Press theinputsourceselectbuttontocyclethroughtheconnectedvideosources Tryanotherchannel itcouldbestationtrouble Selectaproperpicturemode Adjustthebrightnessinthevideosetting Checktheantenna cableconnections Adjustthecolorsaturationinthevideosetting Checktheantenna cableconnections Tryanotherchannel itcouldbestationtrouble Adjusttheantenna MovetheTVawayfromnoisesourcessuchascars neonsigns orha...

Страница 39: ... Please remember your new password andkeepitcarefully Some items can t be accessed If a setting option appears in gray this indicates that the settings option is unavailable incurrentinputmode TV cabinet creaks When the TV is in use there is a natural rise in temperature causing the cabinet to expand or contract and may be accompanied by a slight creaking noise This is not a malfunction Control bu...

Страница 40: ...picture to be displayed for an extended period as this can cause a permanentafter imagetoremainonthescreen Examples of still pictures include logos video games computer images teletext and imagesdisplayedin4 3mode CAUTIONS The permanent after image on the screen resulting from fixed image use is not an operatingdefectandassuchisnotcoveredbythewarranty Thisproductisnotdesignedtodisplayfixedimagesfo...

Страница 41: ...s W X H X D in inches 32 28 W 21 38 H 4 71 D Weight 50 lbs Terminals Composite Video Audio L R 2 S video 1 Component Video Audio L R 2 HDMI interface 1 D Sub Audio 1 Antenna 1 Composite Video Audio L R 1 USB Port 1 As part of policy of continuous improvement the manufacturerreserves the right to make design and specification changes for product improvement without prior notice The performance spec...

Страница 42: ...www asaelectronics com ...

Отзывы: