background image


- 11 - 

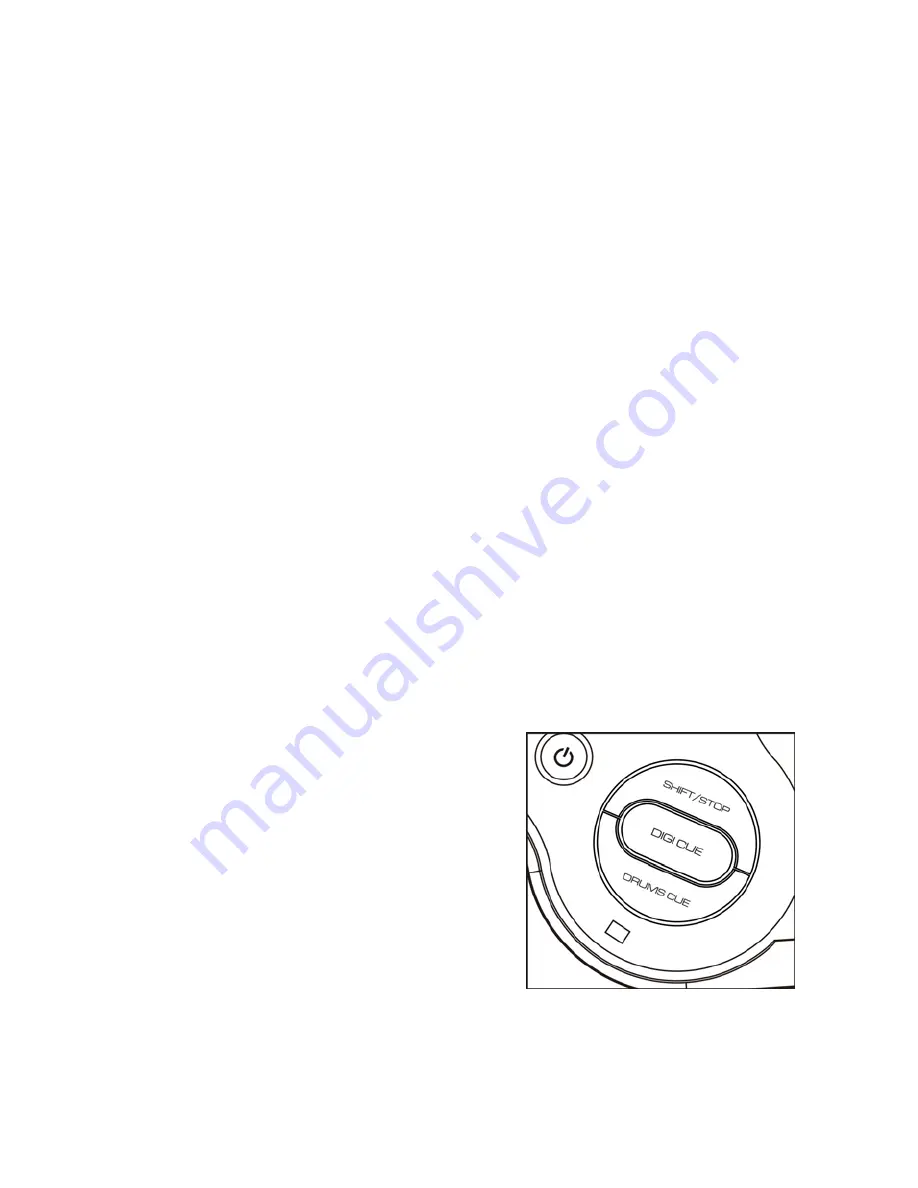
Press and hold the “DIGI CUE” and press “SHIFT” simultaneously to select one of 
three special digital sound effects. 

15.  SHIFT/STOP   

1) 

When a Beat effect is activated press the STOP button to stop the effect. 

2) 

Press the “DRUMS CUE” or “DIGI CUE” button and press “SHIFT” to switch 
between effects.   

16.  HEADPHONE JACK 

Monitor your music and effects and independently adjust your headphone volume 
with the Cue control (7).   

17.  MIC INPUT 

Connect a microphone to add your voice to the mix. 

18.  DC CONNECTOR 

Connect the supplied AC adaptor to the main appliance. 

19.  AUX 1, AUX 2 

Connect your iPod, MP3 player or auxiliary Audio Device  to the Deck via the 
supplied 3.5mm cables to the AUX 1 or AUX 2 input jack.   

20.  LINE OUT 

Connect to the external audio system via the supplied RCA cable or 3.5mm Audio 
cable. Plug the 3.5mm plug to the line out jack of your DJ Scratch Mixer. 


Listening to your Music from other audio device:


To hear the music from your player through the DJ Scratch Mixer, you must connect the 
line out jack of the Mixer to a pair of amplified speakers or a stereo system. 


Operating the Mixer:


(1) Press the power button to turn on the unit once the AC adaptor is connected. 
The power indicator LED next to the power button turns on.   
(2) Use the controls and effects on the Mixer to make your own music creations. 


Effects Controls:


The mixer allows you to add different effects to 
your music.   
The effects include  6 Beat  effects (3 Digi Cue, 3 
Drums Cue) and Scratch effects.   
You can easily add these effects as you mix the 
music from two audio sources. 
The Tempo control allows you to adjust the Beat 
speed  of the effect to match the beat of your 
music.   
The SCRATCH and BEAT controls used with the 
Jog Wheel allow you to add special sound effects 
to your mix.   


Headphone: (Not included)


The Mixer allows you to connect a set of headphone to monitor your audio creations. 
While using headphones you can monitor music from either Audio Source without 

Содержание JDJ-500

Страница 1: ...DJ SCRATCH MIXER MODEL JDJ 500 USER MANUAL PLEASE READ THIS USER MANUAL COMPLETELY BEFORE OPERATING THIS UNIT AND RETAIN THIS BOOKLET FOR FUTURE REFERENCE ...

Страница 2: ...al injury Do not open the unit This product is intended for indoor non industrial non commercial use do not use the product outdoors Do not mount this product on a wall or ceiling 1 Always follow basic safety precautions when using electrical products Children should be supervised to ensure that they do not play with appliances 2 Do not allow children to operate the unit without adult supervision ...

Страница 3: ...e unit with strong chemical agents 15 This product has no user serviceable parts Do not attempt to dismantle or repair this unit by yourself This unit should be repaired by qualified service technician only 16 Do not operate the unit if it is not working normally or has been damaged in any way Turn the unit off Unplug it from the power source And consult service personnel 17 Do not remove any fixe...

Страница 4: ...n accordance with the instructions may cause harmful interference to radio communications However there is no guarantee that interference will not occur in a particular installation If this equipment does cause harmful interference to radio or television reception which can be determined by turning the equipment off and on the user is encouraged to try to correct the interference by one or more of...

Страница 5: ...sh a safe level Start your volume control at a low setting Slowly increase the sound until you can hear it comfortably and clearly and without distortion Once you have established a comfortable sound level Set the dial and leave it there Taking a minute to do this now will help to prevent hearing damage or loss in the future After all we want you listening for a lifetime We Want You Listening For ...

Страница 6: ...ng steps to connect the adaptor 1 Unwind the power cord of the AC adaptor to its full length 2 Connect the DC plug of the AC adaptor to the DC socket on the rear of the appliance 3 Then plug the AC adaptor to the AC outlet AC120V 60Hz Connecting this system to any other power source may cause damage to the system For sufficient ventilation keep other objects at least 4 inches away from the unit 4 ...

Страница 7: ...ne using the supplied Audio cables b Connect to the external audio system via the supplied RCA cable or 3 5mm Audio cable c Plug the 3 5mm plug to the line out jack of your DJ Scratch Mixer d Plug the supplied AC adaptor to the mains power outlet Note the iPod iPhone and speaker systems are not included AC adaptor ...

Страница 8: ...e short 3 5mm cable through the hole at back of cradle making sure the3 5mm jack is inserted as shown in the drawing 2 Insert the 3 5mm jack through the bracket and connect to the headphone jack of the iPod 3 Connect the iPod to the Deck via the 3 5mm Aux 1 jack 4 Put iPod with bracket into the cradle ...

Страница 9: ...Phone 3 Connect the iPhone to the Deck via the 3 5mm Aux 1 jack 4 Put iPhone with bracket into the cradle c Auxiliary Audio Device Connection 1 Connect the 3 5mm cable to the 3 5mm headphone jack on the MP3 player or auxiliary Audio Device 2 Connect the MP3 player or auxiliary Audio Device to the Deck via the 3 5mm Aux 2 jack ...

Страница 10: ... 9 MAIN FEATURES AND BASIC OPERATION ...

Страница 11: ...ton 10 Digi Cue Button 14 or Drums Cue Button 13 9 CROSS FADER Used to achieve a clean segue between the two input channels Hard left selects channel 1 Hard right selects channel 2 Sliding the control from left to right or right to left will fade the channels in and out With the cross fader centered both channels are balanced 10 BEAT BUTTON Press the beat button to choose between 6 special sound e...

Страница 12: ...ng to your Music from other audio device To hear the music from your player through the DJ Scratch Mixer you must connect the line out jack of the Mixer to a pair of amplified speakers or a stereo system Operating the Mixer 1 Press the power button to turn on the unit once the AC adaptor is connected The power indicator LED next to the power button turns on 2 Use the controls and effects on the Mi...

Страница 13: ...eration Cross fade The cross fade bar allows you to easily switch the audio output on the Mixer from Audio source A to Audio Source B Slide the cross fade bar from left to right to switch the source of the audio When the cross fade bar in the middle both audio sources will be heard through the mixer Note Both audio sources need to be playing in order to switch the music Scratch Jog Wheel The Jog W...

Страница 14: ...nment 3 Do not use abrasive materials or chemical cleaners such as alcohol benzene etc Do not allow any water or other liquid enters the appliance Clean with dry soft cloth to wipe the dirty from the unit 4 Pressing buttons or operating switches with excessive force may damage the unit 5 To reduce the risk of electric shock do not remove the back cover there are no serviceable parts inside Refer s...

Страница 15: ...r purchase such as a duplicated copy of a sales receipt You must pay all shipping charges required to ship the product to SPECTRA for warranty service If the product is repaired or replaced under warranty the return charges will be at SPECTRA s expense There are no other express warranties other than those stated herein This warranty is valid only in accordance with the conditions set forth below ...

Страница 16: ... you regarding the status of your repair so include your name address phone number and e mail address to speed the process IF THE UNIT IS OUTSIDE THE WARRANTY PERIOD please include a check for 35 00 to cover the cost of repair handling and return postage All out of warranty returns must be sent prepaid It is recommended that you contact SPECTRA first at 1 800 777 5331 or by e mail at info spectrai...

Отзывы: