background image

JCD3010

7

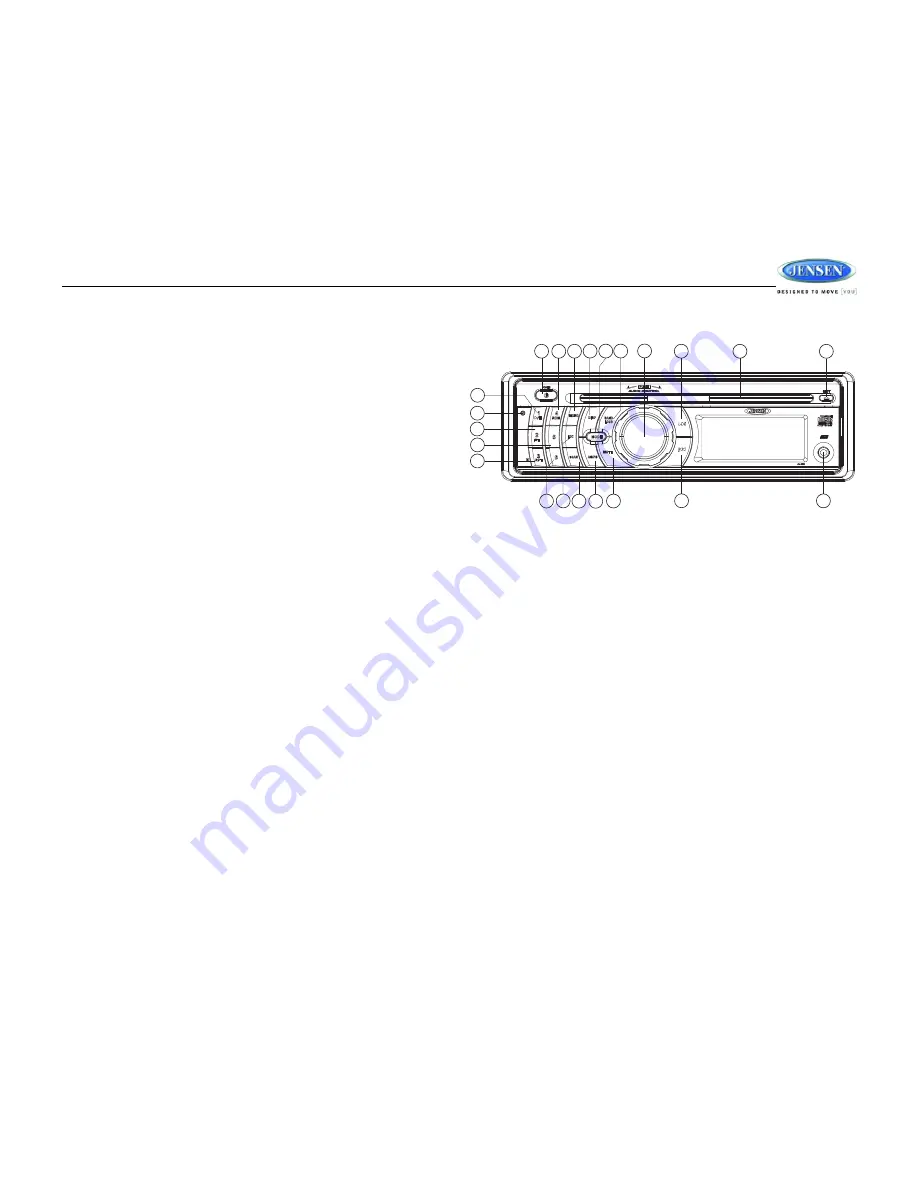
Automatically Store / Preset Scan (AS/PS, AMS)

Automatically Store

Select a band (if needed). Press the 

AS/PS

 button (16) on the control panel (or the 

AMS

 button 

on the remote control) for more than three seconds to automatically select six strong stations 
and store them in the current band. The new stations replace any stations already stored in 
that band.

Preset Scan

Select a band (if needed). Press the 

AS/PS 

button


(16) on the control panel (or the 

AMS

 button 

on the remote control) to scan stations stored in the current band. The unit will pause for ten 
seconds at each preset station. Press 

AS/PS 

again to stop scanning when the desired station 

is reached.

FM Mono Select (MONO)

During FM radio operation, the 

MONO

 button (7) is used to select monaural or stereo reception 

of the broadcast signal. Under normal reception conditions, the unit should be left in the stereo 
mode (indicated by the “ST” icon when tuned to an FM stereo signal). If the signal is too noisy 
for comfortable listening, press the 

MONO

 button on the control panel (or the 

MO

 button on the 

remote control). To return to stereo reception mode, press the 

MONO

 button again. 

CD OPERATION

Insert and Eject Disc

Insert a disc, label-side up, with the unit turned on. “CDP PLAY” will display on the LCD for 
about 5 seconds and the unit will play the first track on the disc. Press the eject button (2) to 
stop disc play and eject the disc. The unit does not have to be turned on to eject the disc.

Controlling Disc Playback

Track Select

Press the 

TUNE

 up button (19) or 

TUNE

 down button (18) on the control panel for less than 

one second to advance to the next track on the CD. The selected track number will appear on 
the display. 

Press and hold

 the 

TUNE

 up button (19) or 

TUNE

 down button (18) for >1 second 

to fast forward or fast reverse through the disc. CD play starts when the button is released.

Play/Pause Disc Playback (1/>||)

Press the 

1/>||

 button (9) to suspend disc play. Press the 

1/>||

 button again to resume disc 

Play.

Intro Scan (2/INT)

Press the 

2/INT

 button (10) on the control panel to play the first 10 seconds of each track 

sequentially. Press 

2/INT

 again to stop Intro Scan and resume normal play at the current track.

Repeat Play (3/RPT)

Press the 

3/RPT

 button (11) during disc play to repeat play the current track. Press 

3/RPT


again to stop repeat play.

Random Play (4/SHF)

Press the 

4/SHF

 button (12) on the control panel during disc play to play all tracks on a CD in 

random, shuffled order. Press 

4/SHF

 again to stop random play.

1

4

6

5

2

3

8

10

16

9

11

12

13

14

21

15

20

19

18

7

22

17

JCD3010

Содержание JCD3010

Страница 1: ...JCD3010 JCD3010 Installation and Operation Manual MOBILE CD PLAYER RECEIVER ...

Страница 2: ...IS EQUIPMENT TO RAIN OR MOISTURE TO REDUCE THE RISK OF FIRE OR ELECTRIC SHOCK AND ANNOYING INTERFERENCE USE ONLY THE RECOMMENDED ACCESSORIES DISC NOTES Compatible Disc Types NOTE CD R and CD RW discs will not play unless the recording session is closed and the CD is finalized Disc Maintenance A dirty or defective disc may cause sound dropouts while playing Before playing wipe the disc using a clea...

Страница 3: ...hassis 3 Locate the series of bend tabs along the top bottom and sides of the mounting sleeve With the sleeve fully inserted into the dashboard opening bend as many of the tabs outward as necessary to firmly secure the sleeve to the dashboard 4 Place the radio in front of the dashboard opening so the wiring can be brought through the mounting sleeve 5 Follow the wiring diagram carefully and make c...

Страница 4: ...se or 12 VDC switched power source POWER ANTENNA Connect to power antenna or amplifier If not used tape bare end of wire MEMORY BATTERY GROUND Connect to battery or 12 volt power source that is always live The radio will not work if this wire is not connected Connect to ground terminal or clean unpainted metal part of chassis ...

Страница 5: ...tems by pressing the AUDIO or S button repeatedly Once the desired menu item appears on the display adjust that option by turning the AUDIO control or pressing the VOL or VOL buttons 24 on the remote control the within 5 seconds The unit will automatically exit the Audio Menu after five seconds of inactivity The following menu items can be adjusted Volume Level Use the button to adjust the Volume ...

Страница 6: ...ct a Band Press the BAND button 21 on the control panel or BND on the remote control to change between three FM bands and one AM band Each band stores up to six preset stations Tuning Auto Seek Tuning Press the TUNE up 19 or TUNE down button 18 on the control panel or U and D on the remote control for less than three seconds to move to the next station automatically Manual Tuning Press the TUNE up...

Страница 7: ...isc Insert a disc label side up with the unit turned on CDP PLAY will display on the LCD for about 5 seconds and the unit will play the first track on the disc Press the eject button 2 to stop disc play and eject the disc The unit does not have to be turned on to eject the disc Controlling Disc Playback Track Select Press the TUNE up button 19 or TUNE down button 18 on the control panel for less t...

Страница 8: ... play a new one Temperature inside the vehicle is too high Wait until the ambient tempera ture returns to normal Condensation Leave the player off for an hour or so then try again No sound Volume too low or Mute is on Adjust volume to audible level Fader is set incorrectly Press AUDIO button to access menu and adjust FADER setting Wiring is not properly con nected Check wiring connections Unit is ...

Страница 9: ...JCD3010 9 ...

Страница 10: ...ASA Electronics Corporation www asaelectronics com www jensenrvdirect com 2010 ASA Electronics Corporation v 092209 ...

Отзывы: