


9
DV2007
10. TUNER OPERATION
7) BAND BUTTON (BAND)
Press BAND to change between three FM bands and two AM bands.
Manual Tuning
Press the Up Tuning( ) or Down Tuning ( )button for more than 3 seconds to move the
radio frequency number up or down by one step.
Auto Seek Tuning
Press the Up Tuning ( )or Down Tuning ( )button for less than 3 seconds to move to
next station automatically.
20&21)TUNING UP/DOWN BUTTON ( / )
12~17)PRESET STATIONS BUTTONS
Six numbered preset buttons store and recall stations for each band.
11)AUTOMATICALLY STORE / PRESET SCAN (AS/PS)
Automatically select 6 strong stations and store them in the current band. Select a band (if
needed). Press AS/PS button for more than three seconds. The new stations replace stations
already stored in that band.
Preset Scan
Scan stations stored in the current band. Select a band (if needed). Press AS/PS button for less
than 3 seconds. The unit will pause for ten seconds at each preset station. Press AS/PS button
again to stop scanning when the desired station is reached.
STEREO
The unit will automatically pick up a stereo signal when available. When in stereo mode, the ST
icon appears in the display. When no stereo signal is available, the unit will automatically revert
to mono operation, and no icon will be displayed.
11. iPod OPERATION
This unit is equipped with iPod Ready function which allow end user to have direct control of the
iPod on the front panel control button and display iPod song information on the unit's LCD display.
Pls read below for more details operation
iPod Compatibility Chart
This unit is support following iPod software version
iPod 1G
Not Supported
iPod 2G
Not Supported
iPod 3G
Firmware Version 2.2
iPod Mini
All versions
iPod 4G
All versions
iPod Photo
All versions
iPod Nano
All versions
iPod 5G(Video)
All versions
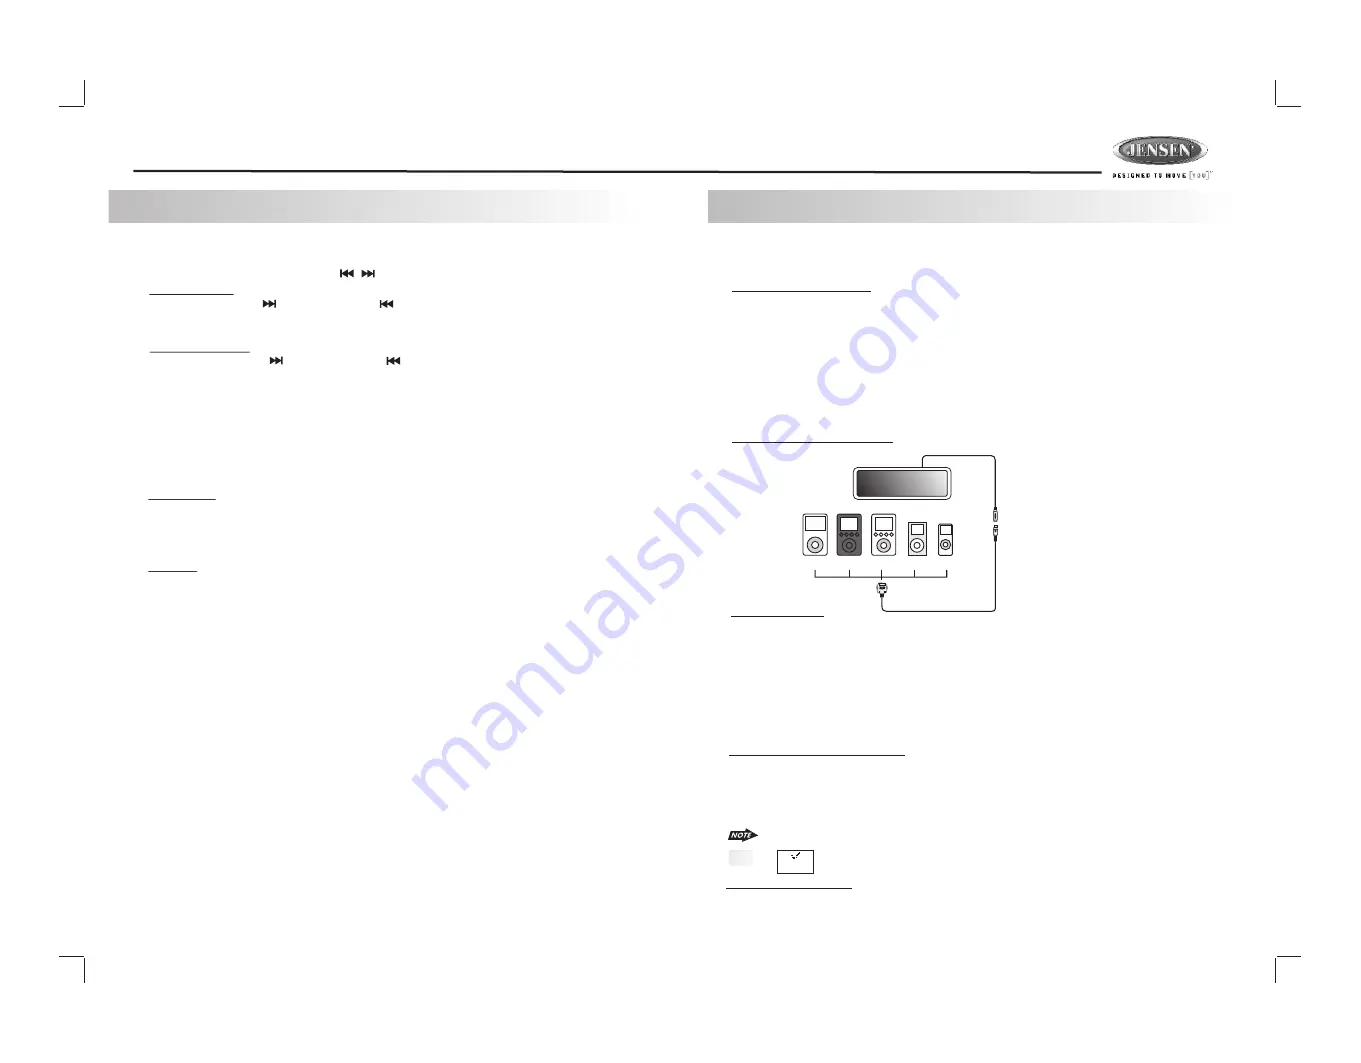
Connect the iPod to this unit
About Video File
This unit can support iPod Video display output feature, however it is
NOT ABLE
to select any
VIDEO FILE OR VIDEO ALBUM which contained in the iPod Video. This unit will only automatically
select Music Album or File regardless the connected Video iPod last playing is a Video File or
Album. If user want to select and playback a video file on the iPod Video, Long press
“AS/PS”button for more than 3 seconds to de-activates the front panel control iPod feature. After
the LCD display “iPod Video”, the iPod now is controllable and user can select the desire playback
video file on iPod itself. Once selected a video it will automatically display on the unit thru the video
output.
Turning iPod Power On and Off
The iPod power turns on automatically as soon as it is connected to the 30 Pin Connector and as
long as the vehicle's ignition is turned ON. The iPod power can be turned OFF by removing the
iPod from the 30 Pin Connector or if the vehicle's ignition is turned OFF. Under this condition the
iPod will go into pause mode and goes into sleep mode about 2 minutes later
While the iPod is connected, the power cannot be turned on or off from the iPod itself.
“ ” will be shown in the iPod's display while it is connected to the unit .
Tips
iPod Battery Charging
While connected to the unit, the iPod will automatically start re-charging as long as the vehicle's
ignition key is turn to ACC or ON.
OK to disconnect
iPod
photo
iPod
iPod
mini
iPod
nano
HEAD UNIT
8 Din iPod Ready Cable
iPod Cable
iPod
Video
Содержание DV2007
Страница 22: ...22 ...


