For Service Technician Use Only
DIAGNOSTICS
Four Door Bottom Mount
n
2-5
Control Board Troubleshooting
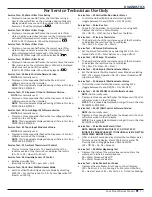
To ENTER SERVICE DIAGNOSTICS Mode:
Press SW1 and SW2 simultaneously for 3 seconds. Release both buttons when you hear the CHIME indicator.
Unit must not be in Lockout prior to entering SERVICE DIAGNOSTIC MODE.
The display will show 01 to indicate the control is in step 1 of the diagnostics routine.
To EXIT SERVICE DIAGNOSTICS Mode do one of the following 3 options:
• Press SW1 and SW2 simultaneously for 3 seconds.
• Disconnect the product from power.
• Allow 20 minutes to pass.
•
Following the exit of the diagnostic mode, the controls will
then resume normal operation.
NOTES:
•
Cooling diagnostics are steps 1 through 7 and 32 through 39.
•
Dispensing diagnostics are steps 8 through 31.
•
Each step must be manually advanced.
•
Press SW5 to move to the next step in the sequence.
•
Press SW4 to back up in the sequence to the previous step.
•
Diagnostics will begin at Step 1.
•
Each step is displayed in the two digits of the dispenser user
interface display.
• The step results are displayed in the two digits on dispenser
user interface display 2 seconds after the step number
is displayed. An amber order filter light will be shown to
designate that the step number is being displayed and a red
replace filter light will be shown to designate that the status
of the test is being displayed.
•
All button and pad inputs shall be ignored and all inputs shall
be off except as described in the actions for each step.
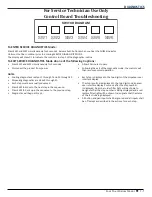
SWITCH DIAGRAM
SW1 SW2 SW3 SW4 SW5 SW6
Содержание JFX2897DRM
Страница 4: ...iv n Four Door Bottom Mount Notes...
Страница 18: ...1 14 n Four Door Bottom Mount GENERAL INFORMATION Notes...
Страница 26: ...For Service Technician Use Only DIAGNOSTICS 2 8 n Four Door Bottom Mount Notes...
Страница 58: ...COMPONENT ACCESS 4 26 n Four Door Bottom Mount Notes...
Страница 60: ......


