A – 10
16025927
©2005 Maytag Services
Installation Instructions (Models JES9750A**, JES9800A**, JES9860A**)
MOBILE HOMES
The installation of a range designed for mobile home
installation must conform with the Manufactured Home
Construction and Safety Standard, Title 24 CFR, Part
3280 (formerly the Federal Standard for Mobile Home
Construction and Safety, Title 24 HUD, Part 280) or,
when such standard is not applicable, the Standard for
Manufactured Home Installations 1982 (Manufactured
Home Sites, Communities and Set-Ups), ANSI
A225.1-latest edition, or with local codes.
LOCATING THE
RANGE
Place range in a well lit area. Do not set range over holes
in the floor or other locations where it may be subject to
strong drafts. Any opening in the wall behind the range
and in the floor under the range should be sealed. Make
sure the flow of cooling/ventilation air is not obstructed
below the range.
NOTE:
A range should NOT be installed over kitchen
carpeting.
ANTI-TIP DEVICE INSTALLATION
INSTRUCTIONS
WARNING:
A risk of range tip-over exists if the appliance
is not installed in accordance with the provided installation
instructions. The proper use of this device minimizes the
risk of TIP-OVER. In using this device the consumer must
still observe the safety precautions as stated in the USE
and CARE MANUAL and avoid using the oven doors as a
step stool.
Installation instructions are provided for wood and cement
in either floor or wall. Any other type of construction may
require special installation techniques as deemed
necessary to provide adequate fastening of the ANTI-TIP
bracket to the floor or wall. The bracket may be installed
to engage the LEFT or RIGHT rear leveling foot.
NOTE:
The bracket provided is designed for use with
flush mount and non-flush mount outlet receptacles.
Install the bracket with the orientation hole in the longer
leg against the wall as shown in figure 5.
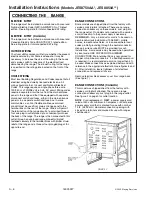
STEP 1 - Locating The Anti-tip Bracket (See Figure
5)
A. Determine where either the right or left “EDGE” of the
range will be located and mark the floor or wall.
B. Place the BRACKET 15/16 (24mm) from the marked
“EDGE” toward center of opening and against the
back wall as shown in figure 5, with orientation hole
against wall.
C. Use the bracket as a template and mark the required
holes, as shown in figure 5, for the type of
construction you will be using.
D. Anti-tip bracket may be secured to either floor or wall.
See Step 2 on page 6 for bracket installation options.
FIGURE 5
Содержание Jenn Air Range Stove Oven JES8750AAB
Страница 25: ... 2005 Maytag Services 16025927 A 1 Appendix A ...
Страница 41: ... 2005 Maytag Services 16025927 B 1 Appendix B ...


