background image

21

O

PTIONS

More Options

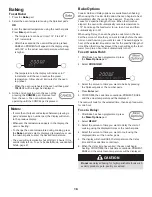
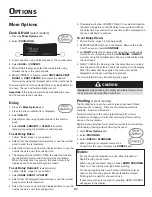
Cook & Hold 

(select models)

1. Press the 

More Options

 pad.

2. Select 

COOK/HOLD

.

5. The display will show CONVECT DELAY, the selected function,

the preset temperature and the delay time countdown. When
the delay time has expired, the cook time will be displayed and
the oven will begin to preheat.

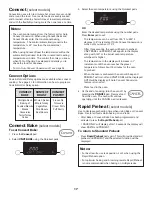
To set Delay Clean:

1. Follow “Delay” steps 1-4 (see below left).

2. REMOVE RACKS will show in the display. Remove the racks

from the oven and select 

CONTINUE

.

3. Set 

LIGHT 

soil level by entering 200 using the number pads

for two hours of cleaning time. Select 

MEDIUM

 or 

HEAVY

soil level using the Quickset pads. There is a brief delay while
the door locks.

4. DELAY CLEAN, the cleaning time, the delay time and unlock

time (based on the selected soil level) will show in the display.
When the delay time has expired, the clean time will be
displayed and the oven will begin to preheat.

For more information on self-cleaning, see page 5.

3. Enter cook time using Quickset pads or the number pads.

4. Select 

BAKE

 or 

CONVECT

.

5. When BAKE is pressed, select the temperature using

Quickset pads or the number pads.

6. When CONVECT is pressed, select 

CNVT BAKE

CNVT

ROAST

 or 

CNVT PASTRY

, then select the desired

temperature using the Quickset pads or the number pads.

The oven will cook for the selected time, then Keep Warm for
one hour. The oven will automatically turn off.

Important:

 If the recipe recommends preheating the oven,

add 15 minutes to the cook time.

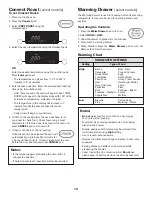
Delay

1. Press the 

More Options

 pad.

2. Press the arrow until DELAY is displayed.

3. Select 

DELAY

.

4. Select Delay time using Quickset pads or the number

pads.

5. Select 

BAKE

CONVECT

 or 

CLEAN

, then select

temperature using the Quickset or number pads.

To set Delay Bake:

1. Follow “Delay” steps 1-4 (see above).

2. Select from the displayed temperatures or use the number

pads to enter the temperature.

3. Select the time to cook from the displayed times or use the

number pads to enter the cooking time.

4. The display will show DELAY TIME, the selected function,

the preset temperature and the delay time countdown.
When the delay time has expired, the cook time will be
displayed and the oven will begin to preheat.

To set Delay Convect: 

(select models)

1. Follow “Delay” steps 1-4 (see above).

2. Select 

BAKE

ROAST

 or 

PASTRY

.

3. Select from the displayed temperatures or use the number

pads to enter the temperature.

4. Select the time to cook from the displayed times or use the

number pads to enter the cooking time.

Notes:

• For any dough that requires one rise, either Standard or

Rapid Proofing can be used.

• When using frozen bread dough, choose 

RAPID PROOFING

.

There is no need to thaw dough before proofing.

• For dough requiring two rises, Standard Proofing must be

used for the first rising period. Either Standard or Rapid
Proofing can be used for the second rise.

• If oven temperature is too high for proofing, OVEN COOLING

will appear in the display.

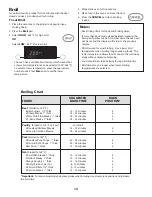
Proofing


(select models)

The Proofing feature can be used to raise yeast-based bread
products prior to baking.  There are two proofing methods
available – Rapid and Standard.

Standard proofing in the oven protects dough from room
temperature changes or drafts that commonly affect proofing
done on the countertop.

Rapid proofing provides faster proofing results than countertop
or Standard proofing, without harming the yeast.

1. Press 

More Options

 pad.

2. Select 

PROOFING

.

3. Select 

RAPID

 or 

STANDARD

.

4. When proofing is complete, remove the

dough from the oven and press the 

CANCEL

 pad.

CAUTION

Do not

 use delayed baking for highly perishable foods such as

dairy products, pork, poultry, or seafood.

8113P626-60

5/3/06, 9:50 AM

22

Содержание 8113P759-60

Страница 1: ...11 Surface Cooking 12 13 Oven Cooking 14 20 Options 21 24 Favorites 25 Setup 26 28 Accessories 28 Warranty Service 29 Guide d utilisation et d entretien 30 Gu a de uso y cuidado 60 USE CARE GUIDE TAB...

Страница 2: ...d purpose as described in this guide To ensure proper and safe operation Appliance must be properly installed and grounded by a qualified General Instructions WARNING To reduce risk of tipping of the...

Страница 3: ...r fire or flame by closing the oven door Do not use water on grease fires Use baking soda a dry chemical or foam type extinguisher to smother fire or flame CAUTION NEVER store items of interest to chi...

Страница 4: ...that are easily grasped and stay cool Avoid using unstable warped easily tipped or loose handled pans Also avoid using pans especially small pans with heavy handles as they could be unstable and easi...

Страница 5: ...to cause cancer or reproductive harm and requires businesses to warn customers of potential exposures to such substances Users of this appliance are hereby warned that when the oven is engaged in the...

Страница 6: ...in heat during the clean cycle 5 Wipe up excess grease or spill overs from the oven bottom This prevents excessive smoking flare ups or flaming during the clean cycle 6 Wipe up sugary and acidic spill...

Страница 7: ...part is removed be sure it is correctly replaced Brand names are registered trademarks of the respective manufacturers To order call 1 800 JENNAIR 1 800 536 6247 Broiler Pan Never cover insert with a...

Страница 8: ...void using excessive amounts of water which may seep under or behind glass causing staining and Door Glass Wash with soap and water Rinse with clear water and dry Glass cleaner can be used if sprayed...

Страница 9: ...place excessive weight on or stand on an open oven door This could cause the range to tip over break the door or injure the user NEVER attempt to open or close door or operate oven until door is prop...

Страница 10: ...r cleaning or to relocate If this appliance has to be moved and or removed for servicing follow the procedure described in the installation instructions For information contact Jenn Air Customer Servi...

Страница 11: ...itting on the grate above off ports Baking results are not as Check the oven temperature selected Make sure oven is preheated when recipe expected or differ from or directions recommend preheat previo...

Страница 12: ...emove the smoke and or odor Excessive food soils on the oven bottom Use a self clean cycle Fault Codes The oven may detect a fault during programming or during operation If a fault is detected the mes...

Страница 13: ...a cooking operation and the burner does not reignite itself turn the burner off If a strong gas odor is detected open a window and wait five minutes before relighting the burner Be sure all surface co...

Страница 14: ...gned to be removed Since the burners are sealed into the cooktop boilovers or spills will not seep underneath the cooktop However the burner should be cleaned after each use The cap portion of the bur...

Страница 15: ...e programming process Control panel features vary by model Oven display above is programmed for a bake operation A B C D E F G H Control Panel Quickset Pads Quickset pads are located on each side of t...

Страница 16: ...e Quickset pads repeatedly until the desired time is entered OR 3 Press the number pads to enter the new desired time 4 Press Enter pad Canceling the Timer 1 Press the TIMER 1 or TIMER 2 pad twice If...

Страница 17: ...e you want to delay the start of cooking using the displayed times or the number pads 4 Select the amount of time you want to cook using the displayed times or the number pads 5 The display will show...

Страница 18: ...uickset pads OR Enter the desired temperature using the number pads Press Enter pad to set The temperature can be set from 195 F to 550 F degrees in 5 increments If Auto Convect Conversion is turned o...

Страница 19: ...f the recipe suggests preheating the oven add 15 minutes to cook time If Auto Convect is off roast time will not be required Warming Drawer select models The Warming Drawer is used for keeping hot foo...

Страница 20: ...cooking foods The lower temperature allows food to cook to the well done stage without excessive browning Food should be turned halfway through broiling time Broil times may be longer when lower broi...

Страница 21: ...ssert souffles angel food cake or two rack baking MULTIPLE RACK COOKING Two rack Use rack positions 2 and 4 Three rack convection only select models Use rack positions 1 3 and 5 see illustration Bakin...

Страница 22: ...number pads To set Delay Bake 1 Follow Delay steps 1 4 see above 2 Select from the displayed temperatures or use the number pads to enter the temperature 3 Select the time to cook from the displayed t...

Страница 23: ...ECT 8 Set the oven temperature by selecting one of the displayed temperatures or enter the temperature using the number pads Meat Probe select models Using the probe supplied with your oven assures ex...

Страница 24: ...cer provides a gap between the oven frame and the oven door to allow moisture to escape Gently close the door until the spacer magnet makes contact with the oven door The magnet will hold the spacer i...

Страница 25: ...lices 12 16 hours Orange and Select rough skinned fruit Wash well Thinly peel the outer 1 2 hours Tough to brittle Lemon Peel Do not dry the peel of fruit 1 16 to 1 8 of the peel Do not use marked col...

Страница 26: ...he JKL pad three times for L Press the ABC pad once for A press the STU pad once for S Continue until you ve finished the word After each desired letter wait three seconds until an underline appears i...

Страница 27: ...nversion automatically reduces the set temperature by 25 for Convect Bake and Convect Pastry For Convect Roast the control will alert you at 75 of the programmed roasting time to check foods for donen...

Страница 28: ...de The Bake temperature can be changed during an Active Sabbath Mode Simply press the Bake pad and then enter the desired temperature using the Quick set pads Pressing the CANCEL pad will cancel a Bak...

Страница 29: ...ver To save energy the display can be set to go dark if it is not being used To set the Energy Saver feature 1 Press Setup pad 2 Use the arrow to scroll 3 Select ENERGY SAVER 4 Select ON or OFF using...

Страница 30: ...enn Air within 30 days from the date of purchase 6 Any food loss due to refrigerator or freezer product failures 7 Costs associated with the removal from your home of your major appliance for repairs...

Страница 31: ...Entretien et nettoyage 35 37 Entretien 38 39 D pannage 40 41 Cuisson sur la surface 42 43 Cuisson au four 44 50 Options 51 54 R glage favori 55 56 R glage 56 58 Accessoires 58 Garantie et service 59 G...

Страница 32: ...r les fonctions pr vues d crites dans ce guide Pour assurer une utilisation appropri e et en toute s curit Seul un technicien qualifi devrait installer l appareil et le mettre la terre Ne tentez pas d...

Страница 33: ...pour minimiser la propagation des flammes teignez les flammes puis mettez la hotte en marche pour vacuer la fum e et les odeurs Table de cuisson Utilisez un couvercle ou une plaque biscuits pour touff...

Страница 34: ...chaude avant de tenter de le d placer et le manipuler Ne laissez pas la graisse de cuisson ou autre mat riau inflam mable s accumuler dans ou pr s de l appareil de la hotte ou du ventilateur Nettoyez...

Страница 35: ...tissement et avis importants En vertu de la California Safe Drinking Water and Toxic Enforcement Act de 1986 Proposition 65 le gouverneur de la Californie doit publier une liste des substances qui sel...

Страница 36: ...es r sidus de graisse ou de produits renvers s sur la sole avant le nettoyage Ceci emp che la formation de flammes ou de fum e durant le nettoyage 6 Essuyez les r sidus sucr s et acides comme les pata...

Страница 37: ...une d coloration nettoyez l appareil apr s chaque utilisation Si vous devez retirer une pi ce veillez la remettre en place correctement Les noms de marque sont des marques d pos es des diff rents fabr...

Страница 38: ...Poign e sucr s La surface pourrait se d colorer ou se ternir si la salet n tait pas imm diatement enlev e Ceci de porte est particuli rement important dans le cas de surfaces blanches peintes email H...

Страница 39: ...la cuisini re de basculer accidentellement Assurez vous que la cuisini re est d aplomb une fois install e Dans le cas contraire tournez les pieds de mise niveau chacun des angles de la cuisini re jus...

Страница 40: ...rois broches offre une protection contre le risque de choc lectrique NE COUPEZ PAS OU N ENLEVEZ PAS LA BROCHE DE TERRE DU CORDON D ALIMENTATION Si la prise ne comporte que deux cavit s n est pas mise...

Страница 41: ...la cuisson V rifiez que la temp rature s lectionn e est correcte Assurez vous que le four est pr chauff diff rent de ceux du quand cela est pr cis dans la recette four pr c dent D terminez si l vent d...

Страница 42: ...apidement La mise en marche d un ventilateur d extraction aide enlever fum e et odeur Salet importante sur la sole Ex cutez une op ration d autonettoyage Codes d anomalie Le four peut d celer une anom...

Страница 43: ...iv e de gaz au br leur Si une forte odeur de gaz est perceptible ouvrez une fen tre et attendez cinq minutes avant d allumer de nouveau le br leur Avant d ouvrir l arriv e de gaz la cuisini re v rifie...

Страница 44: ...l s Les br leurs scell s de la cuisini re sont fix s sur la table de cuisson ils ne sont pas con us pour tre enlev s Comme les br leurs sont scell s un produit qui d borde d un ustensile ne s infiltre...

Страница 45: ...tion Laconsoleaffichelesoptionsdechaquefonctionetvousguidepas pasdurant la programmation Les caract ristiques du tableau de commande varient selon le mod le L afficheur du four illustr ci dessus est p...

Страница 46: ...apides jusqu ce que la dur e d sir e soit r gl e OU 3 Appuyez sur les touches num riques pour entrer la nouvelle dur e voulue 4 Appuyez sur la touche Enter Pour annuler la minuterie Appuyez deux fois...

Страница 47: ...r glage Puis le four fonctionne pendant la dur e sp cifi e Lorsque cette dur e est coul e le four r duit automatiquement la temp rature 75 C 170 F et garde la nourriture au chaud pendant une heure au...

Страница 48: ...t tre r gl e partir de 170 C 77 F Apr s trois secondes le four se met pr chauffer CUISSON CONVEC et PREHEAT Prechauffage apparaissent l afficheur avec la mention 100 ou la temp rature actuelle du four...

Страница 49: ...la caract ristique de conversion automatique pour convection est d sactiv une dur e de r tissage n est pas requise Tiroir de r chauffage certains mod les Le tiroir de r chauffage sert maintenir la te...

Страница 50: ...era pas programm et l afficheur retournera l cran pr c dent Utilisez le r glage HAUT pour la plupart des cuissons au gril Utilisez la temp rature plus basse pour la cuisson au gril de mets devant cuir...

Страница 51: ...ud N utilisezpaslefourpourrangerdesalimentsoudesustensiles Lampe du four La lampe du four s allume automatiquement l ouverture de la porte Lorsque la porte est ferm e appuyez sur la touche Oven Light...

Страница 52: ...ou des touches num riques Le four effectue la cuisson pour la dur e choisie puis garde les aliments au chaud pendant une heure Le four s arr tera automatiquement Important Si la recette recommande de...

Страница 53: ...ur une surface froide Les changements rapides de temp rature pourraient les casser ou les fendiller Maintien au chaud La caract ristique de maintien au chaud est utilis e pour garder au chaud des alim...

Страница 54: ...Apr s la deshydration d aliments contenu lev en sucre ou en acide la sole du four doit tre nettoy e l eau et au savon Le fini de porcelaine peut se d colorer si les projections de sucre ou d acide ne...

Страница 55: ...ssez les fruits avec Lavez bien Enlevez l corce externe sur 1 2 heures Dures cassantes et de citron une surface rugueuse une paisseur de 1 3 mm 1 16 1 8 po Ne d shydratez pas de N utilisez pas la pell...

Страница 56: ...1 Appuyez sur la touche Favorites 2 Appuyez sur la fl che pour faire d filer l cran 3 S lectionnez MODIF RECETTE 4 Choisissez la recette modifer Au besoin utilisez les fl ches pour rep rer la recette...

Страница 57: ...z les aliments lorsque 75 de la dur e habituelle de la cuisson est coul e Si la conversion automatique pour convection est d sactiv e ne programmez pas une dur e de r tissage avec convection La conver...

Страница 58: ...r l cran 3 S lectionnez REGLER TEMP 4 Entrez la modification de temp rature d sir e l aide des touches num riques 5 S lectionnez pour indiquer une augmentation ou une r duction de temp rature La modif...

Страница 59: ...on Le wok fond plat peut tre utilis sur TOUS les modules 3 Appuyez sur la fl che pour faire d filer l cran 4 S lectionnez 1 30 MIN pour entendre un bip toutes les 30 secondes OU S lectionnez 1 60 MIN...

Страница 60: ...s suivant la date d achat 6 Toute perte d aliments due une d faillance du r frig rateur ou du cong lateur 7 Les co ts associ s au transport du gros appareil m nager du domicile pour r paration Ce gros...

Страница 61: ...65 Cuidado y limpieza 66 68 Mantenimiento 69 70 Localizaci n y soluci n de aver as 71 72 Cocci n en la cubierta 73 74 Cocci n en el horno 75 81 Opciones 82 85 Favoritos 86 87 Ajuste 87 89 Accesorios...

Страница 62: ...stalado debidamente y puesto a tierra por un t cnico calificado No instente ajustar reparar realizar servicio o reemplazar cualquier pieza de su electrodom stico a menos que se recomiende espec ficame...

Страница 63: ...o mire debajo de la estufa con una linterna para asegurarse de que uno de los tornillos niveladores traseros est debidamente enganchado en la ranura del soporte El dispositivo antivuelco asegura el to...

Страница 64: ...uperior antes de encenderlo Aseg rese de saber cu l perilla corresponde al quemador superior que va a utilizar Aseg rese de haber activado el quemador correcto y de que el mismo se haya encendido Una...

Страница 65: ...repentino cambio de temperatura Siga las instrucciones del fabricante del utensilio cuando use vidrio El rendimiento y funcionamiento seguro de este electrodom stico se han comprobado usando utensilio...

Страница 66: ...sultar en una exposici n de bajo nivel a algunas de las sustancias publicadas incluyendo el mon xido de carbono La exposici n a estas sustancias puede ser minimizada ventilando el horno adecuadamente...

Страница 67: ...derrames del fondo del horno Esto evita el humo excesivo las llamas y las llamaradas durante el ciclo de autolimpieza 6 Limpie los derrames azucarados y cidos tales como los derrames de batatas tomate...

Страница 68: ...la estufa despu s de cada uso Si se retira alguna pieza aseg rese de volver a instalarla de manera correcta Los nombres de los productos son marcas registradas de sus respectivos fabricantes Para hac...

Страница 69: ...ie puede y manijas decolorarse u opacarse si no se limpian inmediatamente Esto manijas de la es especialmente importante para las superficies blancas puerta Esmalte pintado Ventanilla y Evite usar can...

Страница 70: ...ando est instalada Si la estufa no est nivelada gire los tornillos niveladores que se encuentran en cada esquina de la estufa hasta que la misma est nivelada SOPORTE ANTIVUELCO TORNILLO NIVELADOR PREC...

Страница 71: ...acio o para reubicarlo Si este electrodom stico debe ser reubicado o desinstalado para hacer reparaciones siga el procedimiento descrito en las instrucciones de instalaci n Para mayor informaci n p ng...

Страница 72: ...or Aseg rese de que haya un utensilio sobre la rejilla se eleva de los orificios Los resultados del horneado Verifique la temperatura programada del horno Aseg rese de precalentar el horno cuando la r...

Страница 73: ...liminar el humo y u olor Hay suciedad de alimentos excesiva en la parte inferior del horno Use un ciclo de autolimpieza C digos de fallas El horno puede detectar una falla durante la programaci n o du...

Страница 74: ...el quemador Si detecta un fuerte olor a gas abra una ventana y espere cinco minutos antes de volver a encender el quemador Aseg rese de que todos los controles superiores est n en la posici n OFF ant...

Страница 75: ...n sellados a la cubierta los derrames no se escurrir n debajo de la cubierta Sin embargo el quemador debe limpiarse despu s de cada uso El conjunto de la tapa del quemador se puede retirar f cilmente...

Страница 76: ...a una programaci n sencilla La pantalla muestra las opciones para cada funci n y va indicando los pasos delprocesodeprogramaci n Lascaracter sticasdelpaneldecontrolvar anseg nelmodelo Lapantalladelhor...

Страница 77: ...repetidamente las teclas r pidas hasta que el tiempo deseado quede programado O 3 Oprima las teclas num ricas para programar el tiempo nuevo deseado 4 Oprima la tecla Enter Anulaci n del temporizador...

Страница 78: ...cla CANCEL Horneado Para hornear 1 Oprima la tecla Bake Horneado 2 Seleccione la temperatura del horno usando las teclas r pidas O Programe la temperatura deseada usando las teclas num ricas Oprima la...

Страница 79: ...ede programar la temperatura desde los 170 F Despu s de tres segundos el horno comenzar a precalentarse HORNEADO CONV y PREHEAT Precalentamiento aparecer n en la pantalla junto con 100 o la temperatur...

Страница 80: ...entar el horno a ada tiempo a la duraci n de la cocci n Si Auto Autom tico est apagado no ser necesario programar el tiempo de asado Warm Drawer Gaveta calentadora modelos selectos La gaveta calentado...

Страница 81: ...ALTO para asar la mayor a de los alimentos Use la temperatura de asado m s baja cuando ase alimentos que requieran mayor tiempo de cocci n La temperatura m s baja permite que el alimento quede bien co...

Страница 82: ...limentos o utensilios Luz del horno La luz del horno se enciende autom ticamente cuando se abre la puerta del horno Cuando la puerta est cerrada oprima la tecla Oven Light Luz del horno para encender...

Страница 83: ...clas r pidas o las teclas num ricas El horno cocinar durante el tiempo seleccionado y luego mantendr el alimento caliente durante una hora El horno se apagar autom ticamente Importante Si la receta re...

Страница 84: ...e temperatura puede hacer que se rompan o causar fisuras Notas Los alimentos deben estar calientes cuando se colocan en el horno Para obtener la mejor calidad de los alimentos los mismos deben mantene...

Страница 85: ...pu s de secar alimentos con alto contenido cido o azucarado limpie la parte inferior del horno con agua y jab n El acabado de porcelana del horno se puede decolorar si las manchas cidas o azucaradas n...

Страница 86: ...cha de Elija frutas de concha spera Lave bien Pele delgadamente la 16 mm 1 a 2 horas Duras a fr giles Lim n o No seque la concha de las 1 16 a 32 mm 1 8 de la concha No Naranja frutas con color a adid...

Страница 87: ...na nueva receta favorita 1 Oprima la tecla Favorites 2 Oprima la flecha para navegar por las opciones 3 Seleccione CREAR NUEVA con la tecla a la izquierda 4 Introduzca el nombre usando las teclas Por...

Страница 88: ...rima la tecla Setup para salir del men de configuraci n Notas Cuando use Convect Bake Horneado por convecci n y Convect Pastry Pasteler a por convecci n con la opci n Auto Convect Conversion Conversi...

Страница 89: ...te de la temperatura Las temperaturas del horno son cuidadosamente probadas en la f brica Es normal notar una diferencia entre la temperatura de horneado o en el dorado entre un horno nuevo y un horno...

Страница 90: ...LTO para el volumen m s alto O Seleccione MEDIANO para un nivel de volumen intermedio O Selecciones BAJO para el volumen m s bajo 5 Oprima la tecla Setup para salir 12 Hr Shutoff Apagado despu s de 12...

Страница 91: ...r alimentos salteados cocinar al vapor ablandar alimentos y preparar guisos El wok tiene un acabado antiadherente asas de madera tapa rejilla para cocci n al vapor paletas para arroz y consejos de coc...

Страница 92: ...ebido a fallas del refrigerador o del congelador 7 Costos relativos a la remoci n de su electrodom stico principal desde su hogar para obtener reparaciones Este electrodom stico principal est dise ado...

Отзывы: