


EN
User manual
1
Introduction
Intended Use
This manual contains information and important instructions
for the installation and correct use of the Disc Sander (142009).
The sander disc is intended for the sanding of wood for non-
commercial woodworking activities. The commercial name of
the device (see cover) is substituted with the name "machine"
in this manual.
Please read and follow the safety instructions!
Before first use, read this manual carefully. It will familiarise you
with the correct use of the product and prevent any
misunderstanding, and avoid any damage to the product and
the user's health.
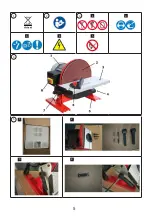
2
Symbol clarification
Disposal
Do not dispose of electrical appliances with your domestic
waste! According to the European Directive 2012/19/EU,
concerning used electrical and electronic appliances and its
implementation in national law, superannuated electrical
appliances must be collected and disposed of via an
environmentally suitable recycling facility.
See image 1
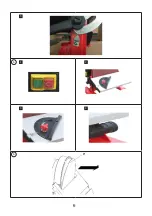
3
Parts list
See image 4
1
Motor
5
Base
2
Sanding Disc
6
Mitre gauge
3
Work table
7
Angle adjustment
4
Dust collector connection
8
On-Off-switch
4
Assembly instructions
See image 5
1.
Mounting and setting up. Ensure that the machine is
disconnected from the mains. Open the box.
2.
Ensure that no parts are missing.
3.
Fit locking handles on each side of the table.
4.
Fasten the locking handle using the locking bolt and the
spring. Do not over tighten.
5.
Set the table to a horizontal position. Check the pointer to
the 0°scale, tighten both locking handles.
6.
Mounting and setting up. Make sure that the machine is
disconnected from the mains socket. Fit the locking handles
on each side of the table using a washer, locking bolt,
locking handle, a spring and a screw through the angle
bracket underneath the table. Set the table in the horizontal
position, tighten both locking handles. Secure the machine
to a firm surface using bolts (not included) through the four
mounting holes. The machine must be placed on the level
surface to avoid any vibration during use.
5
Operation Guide
Check if all parts according to the parts list are included and
without damage as soon as the machine is delivered/purchased.
Each visible defect and in particular wrong amounts and
transport damages must be clearly noted on the delivery
documents. Otherwise, the goods shall be considered as taken
and fully accepted under the sole responsibility of the customer.
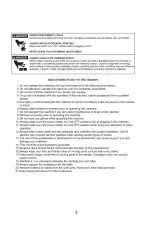
•
Warning: Perform all machine settings with the machine
disconnected from the power supply! Always use the
correct type of sandpaper disc according to the type of
work. Keep hands and tools clear of the sandpaper disc
when in use.
•
Attention: Please observe the following operating
instructions so that their work can be performed safely and
has the expected results.
5.1
Notice
1.
Check before starting work
• All cables and plugs.
•
Table and safety fence on tight fit.
•
The free and centred run of the sanding disc.
2. The sanding
•
Always use proper abrasives in working condition. (Change
worn down abrasives immediately!) With the abrasive in
good condition, you will obtain a good grinding result.
•
Do not exert too much pressure on the sanding abrasive.
•
The maximum distance between the table and the sanding
disc: 2mm!
•
The machine has no clamping opportunity, so it is important
to steady the work-piece on the worktable and maintain a
firm grip!
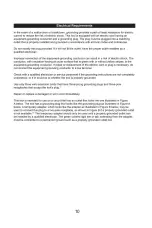
The connection of the machine to the electric power supply
and the following checks must be carried out by a trained
electrician only.
1) The electronic connection of the machine is designated for
operation with a grounded power socket.
2) The mains supply must be secured with a 16A circuit
breaker.
7
Содержание 555-81752
Страница 1: ...1 10 DISC SANDER ...
Страница 2: ...2 ...
Страница 3: ...3 ...
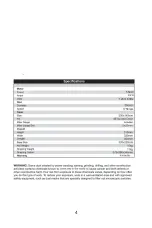
Страница 4: ...550W 4 2A 120V 60Hz 1750rpm 4 ...
Страница 5: ...4 5 1 3 4 5 2 1 2 3 4 1 2 3 5 ...
Страница 6: ...5 e 6 6 1 3 2 4 6 ...
Страница 10: ...10 ...
Страница 11: ...11 ...
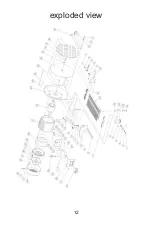
Страница 12: ...12 exploded view ...
Страница 13: ...Spare Parts List 13 ...


