background image

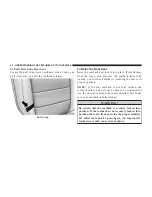
1. To return the seat to a sitting position, rotate the
seatback upright until it locks.

2. Push the seat rearward until the track locks.

NOTE:

The front driver seat has a full recliner memory, which

will allow the seatback to be returned to its original
position. If equipped with combination lever the seat-
back will return to its first locked position. The recliner
handle will have to be actuated to adjust the seatback
to the desired reclined position.

The front passenger seats have a track memory, which
returns the seat to just past the halfway point of the
track regardless of its original position.

The recliner and easy entry levers should not be used
during the automatic returning of the seat to its sitting
position.

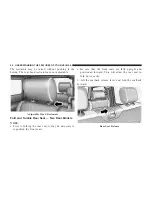
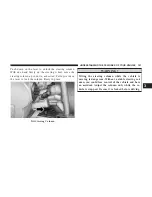
Head Restraints

Head restraints can reduce the risk of whiplash injury in
the event of a rear impact. Adjustable head restraints
should be adjusted so that the upper edge is as high as
practical. The front head restraints have a locking button
that must be pushed inward to lower the head restraint.

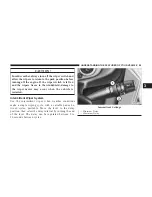
Easy Entry Seat With Combination Lever — If Equipped

3

UNDERSTANDING THE FEATURES OF YOUR VEHICLE

87

Содержание 2009 Wrangler

Страница 1: ......

Страница 2: ...eptions are less sharp your reflexes are slower and your judgment is impaired when you have been drinking Never drink and then drive This manual illustrates and describes the operation of features and...

Страница 3: ...ICLE 9 3 UNDERSTANDING THE FEATURES OF YOUR VEHICLE 77 4 UNDERSTANDING YOUR INSTRUMENT PANEL 195 5 STARTING AND OPERATING 271 6 WHAT TO DO IN EMERGENCIES 381 7 MAINTAINING YOUR VEHICLE 393 8 MAINTENAN...

Страница 4: ......

Страница 5: ...INTRODUCTION CONTENTS Introduction 4 Rollover Warning 5 How To Use This Manual 6 Warnings And Cautions 8 Vehicle Identification Number 8 Vehicle Modifications Alterations 8 1...

Страница 6: ...al Be sure you are familiar with all vehicle controls particularly those used for braking steering transmis sion and transfer case shifting Learn how your vehicle handles on different road surfaces Yo...

Страница 7: ...factory trained tech nicians and genuine Mopar parts and cares about your satisfaction ROLLOVER WARNING Utility vehicles have a significantly higher rollover rate than other types of vehicles This veh...

Страница 8: ...re likely to die than a person wearing a seat belt Always buckle up HOW TO USE THIS MANUAL Consult the Table of Contents to determine which section contains the information you desire Since the specif...

Страница 9: ...1 INTRODUCTION 7...

Страница 10: ...is found on the left front corner of the instrument panel pad visible from outside of the vehicle through the windshield This number also appears on the Automobile Information Disclosure Label affixed...

Страница 11: ...ring Wheel 14 To Release The Steering Wheel Lock 14 Sentry Key 14 Replacement Keys 15 Customer Key Programming 16 General Information 17 Vehicle Security Alarm If Equipped 17 Rearming The System 18 To...

Страница 12: ...If Equipped 26 Upper Half Door Window Installation If Equipped 27 Front Door Removal 27 Rear Door Removal Four Door Models 29 Door Locks 30 Manual Door Locks 30 Power Door Locks If Equipped 32 Automa...

Страница 13: ...m BeltAlert 46 Seat Belts And Pregnant Women 47 Seat Belt Extender 47 Supplemental Restraint Systems SRS 48 Child Restraint 60 Engine Break In Recommendations 72 Safety Tips 73 Transporting Passengers...

Страница 14: ...be obtained by your authorized dealer from your vehicle invoice Ignition Key Removal Automatic Transmission If Equipped 1 Place the shift lever in the PARK position 2 Turn the ignition switch to the...

Страница 15: ...dows other controls or move the vehicle CAUTION An unlocked vehicle is an invitation to thieves Always remove the key from the ignition and lock all doors when leaving the vehicle unattended Key In Ig...

Страница 16: ...hicle is locked or unlocked The system uses ignition keys that have an embedded electronic chip transponder to prevent unauthorized vehicle operation Therefore only keys that are pro grammed to the ve...

Страница 17: ...n key being used when starting the vehicle Cell phones pagers or other Radio Frequency RF electronics will not cause inter ference with this system All of the keys provided with your new vehicle have...

Страница 18: ...itch to the ON position for at least three seconds but no longer than 15 seconds Then turn the ignition switch to the LOCK position and remove the first key 3 Insert the second valid key into the igni...

Страница 19: ...lowing conditions This device may not cause harmful interference This device must accept any interference that may be received including interference that may cause undes ired operation VEHICLE SECURI...

Страница 20: ...s arming During this 16 second arming period opening any door or the swing gate will cancel the arming If the Vehicle Security Alarm successfully arms the Vehicle Security Light will flash at a slower...

Страница 21: ...doors are closed and then fade to off or they will immediately fade to off once the ignition switch is turned on REMOTE KEYLESS ENTRY RKE IF EQUIPPED This system allows you to lock or unlock the door...

Страница 22: ...KE transmitter LOCK button for at least four seconds but not longer than 10 seconds then press and hold the RKE transmitter UNLOCK button 3 Release both buttons at the same time 4 Test this feature wh...

Страница 23: ...press and hold the PANIC button on the RKE transmitter for at least one second and release When the Panic Alarm is activated the headlights and park lights will flash the horn will pulse on and off an...

Страница 24: ...e Flash Lights With Lock feature can be reactivated by repeating this procedure Programming Additional Transmitters Refer to Sentry Key Customer Key Programming If you do not have a programmed RKE tra...

Страница 25: ...y See www dtsc ca gov hazardouswaste perchlorate 1 If the RKE transmitter is equipped with a screw remove the screw With the RKE transmitter buttons facing down use a flat blade screwdriver to pry the...

Страница 26: ...the engine will remote start Shift lever in PARK Doors closed Hood closed Hazard switch off Brake switch inactive brake pedal not pressed Ignition key removed from ignition switch Battery at an accept...

Страница 27: ...However the ignition switch must be cycled to the ON position before you can repeat the start sequence for a third cycle Remote start will also cancel if any of the following occur The engine stalls...

Страница 28: ...nsert the key into the ignition switch and turn the switch to the ON position NOTE The ignition switch must be in the ON position in order to drive the vehicle DOORS CAUTION Careless handling and stor...

Страница 29: ...the half door window is fully seated Front Door Removal 1 Remove the hinge pin screws from the upper and lower outside hinges using a T50 Torx head driver 2 Unplug the wiring harness connector under...

Страница 30: ...bling the harness to be disconnected 3 Unhook the door strap from the body hook Be careful not to allow the door to swing fully open as the mirror may damage paint 4 With the door open lift the door t...

Страница 31: ...crews from the upper and lower outside hinges using a T50 Torx head driver 2 Slide the front seat s fully forward 3 Remove the trim access door from the bottom of B pillar 4 Unplug the wiring harness...

Страница 32: ...the door to clear hinge pins from their hinges and remove door To reinstall the door s perform the previous steps in the opposite order DOOR LOCKS Manual Door Locks The front two door models and rear...

Страница 33: ...Never leave children alone in a vehicle Leaving unattended children in a vehicle is dangerous for a number of reasons A child or others could be seriously or fatally injured Do not leave the key in th...

Страница 34: ...ever leave children alone in a vehicle Leaving unattended children in a vehicle is dangerous for a number of reasons A child or others could be seriously or fatally injured Do not leave the key in the...

Страница 35: ...four times ending up in the LOCK position 3 Depress the power door unlock switch to unlock the doors 4 A single chime will indicate the completion of the programming 5 Repeat these steps if you want t...

Страница 36: ...steps if you want to return this feature to its previous setting NOTE Use the Automatic Door Locks feature in accordance with local laws WINDOWS Power Windows If Equipped The power window switches are...

Страница 37: ...ure Press the window switch past the first detent release and the window will go down automatically To cancel the Auto Down move ment operate the switch in either the up or down direction and release...

Страница 38: ...ind buffeting with the windows down in certain open or partially open posi tions This is a normal occurrence and can be minimized by adjusting window opening REAR SWING GATE The swing gate can be unlo...

Страница 39: ...osing the rear flip up window as damage to the blade will result WARNING Driving with the flip up window open can allow poisonous exhaust gases into your vehicle You and your passengers could be injur...

Страница 40: ...system properly to keep you and your passengers as safe as possible WARNING In a collision you and your passengers can suffer injuries including fatalities if you are not properly buckled up You can...

Страница 41: ...ion people riding in these areas are more likely to be seri ously injured or killed Continued WARNING Continued Do not allow people to ride in any area of your vehicle that is not equipped with seats...

Страница 42: ...s 1 Enter the vehicle and close the door Sit back and adjust the seat 2 The seat belt latch plate is above the back of the front seat next to your arm in the rear seat Grasp the latch plate and pull o...

Страница 43: ...rward increasing the possibility of injury Wear your seat belt snugly A belt that is worn under your arm is very danger ous Your body could strike the inside surfaces of the vehicle in a collision inc...

Страница 44: ...Position the lap belt across your thighs below your abdomen To remove slack in the lap belt portion pull up on the shoulder belt To loosen the lap belt if it is too tight tilt the latch plate and pull...

Страница 45: ...rtable and not resting on your neck The retractor will withdraw any slack in the belt 6 To release the belt push the red button on the buckle The belt will automatically retract to its stowed position...

Страница 46: ...actor ALR system may be activated To reset this feature you must let all of the belt webbing return into the retractor You will not be able to pull out more webbing until all of the webbing has been r...

Страница 47: ...e seat belt and increase the risk of injury in a collision As a guide if you are shorter than average you will prefer a lower position and if you are taller than average you will prefer a higher posit...

Страница 48: ...rt the driver to buckle the seat belt The driver should also instruct all other occupants to buckle their seat belts Once the warning is triggered BeltAlert will continue to chime and flash the Seat B...

Страница 49: ...n use seat belts throughout their pregnancy Keeping the mother safe is the best way to keep the baby safe Pregnant women should wear the lap part of the belt across the thighs and as snug across the h...

Страница 50: ...ehicle has airbags for both the driver and right front passenger as a supplement to the seat belt restraint systems The driver s front airbag is mounted in the steering wheel The front passenger airba...

Страница 51: ...Do not put anything on or around the front airbag covers or attempt to manually open them You may damage the airbags and you could be injured because the airbags are no longer functional These protect...

Страница 52: ...for the driver and front passenger Side airbags also work with seat belts to improve occupant protection The seat belts are designed to protect you in many types of collisions The front airbags will n...

Страница 53: ...t because the vehicle is crowded move the seat as far back as possible and use the proper child restraint Refer to Child Restraint in this section You should read the instructions provided with your c...

Страница 54: ...bly extending your arms to reach the steering wheel or instrument panel If the vehicle has side airbags they also need room to inflate Do not lean against the door Sit upright in the center of the sea...

Страница 55: ...umn If the key is in the LOCK position in the ACC position or not in the ignition the airbags are not on and will not inflate Also the ORC turns on the Airbag Warning Light for six to eight seconds fo...

Страница 56: ...vented through the vent holes in the sides of the airbag In this way the airbags do not interfere with your control of the vehicle The Side Impact SRS Seat Mounted Side Airbags If Equipped are designe...

Страница 57: ...river and front passenger as the airbags deploy and unfold The abrasions are similar to friction rope burns or those you might get sliding along a carpet or gymnasium floor They are not caused by cont...

Страница 58: ...nt of an impact that causes airbag deployment with the vehicle stopped the vehicle communication network intact and the power intact the ORC will determine if the event is severe enough for the Enhanc...

Страница 59: ...ll anyone who works on your vehicle that it has an airbag system Airbag Warning Light You will want to have the airbag system ready to inflate for your protection in an impact The airbag system is des...

Страница 60: ...fessional crash researchers such as those associated with universities and with hospital and insurance organizations In the event that an investigation is undertaken by Chrysler LLC regardless of init...

Страница 61: ...g light status for electronically controlled safety systems including the airbag system Airbag disable light status if equipped Time of airbag deployment in terms of ignition cycles and vehicle mileag...

Страница 62: ...ays check the child seat owner s manual to ensure you have the correct seat for your child Use the restraint that is correct for your child WARNING In a collision an unrestrained child even a tiny bab...

Страница 63: ...ward facing child seats must NEVER be used in the front seat of a vehicle with the front passenger airbag unless the airbag is turned off An airbag deployment could cause severe injury or death to inf...

Страница 64: ...around the child restraint so that it is not necessary to use a locking clip The ALR will make a ratcheting noise if you extract the entire belt from the retractor and then allow the belt to retract...

Страница 65: ...year These child seats are also held in the vehicle by the lap shoulder belt or the LATCH child restraint anchorage system Refer to LATCH Child Seat Anchorage System in this section The belt positioni...

Страница 66: ...on each side with each having a hook or connector for attachment to the lower anchorage and a means for adjusting the tension of the strap Forward facing toddler restraints and some rearward facing in...

Страница 67: ...ld restraint to the vehicle structure LATCH compatible child restraint systems are now avail able However because the lower anchorages are to be introduced over a period of years child restraint syste...

Страница 68: ...two outboard seating positions only The two door model does not have a center seating position Child seats with fixed lower attachments must be installed in the outboard positions only in both the two...

Страница 69: ...rs located at the rear of the seat cushion where it meets the seatback and are visible when you lean into the rear seat to install the child restraint You will easily feel them if you run your finger...

Страница 70: ...re are tether strap anchorages behind each rear seating position located on the back of the seat Latch Anchorages Four Door Models Tether Strap Mounting Two Door Models 68 THINGS TO KNOW BEFORE STARTI...

Страница 71: ...can more easily attach the hooks or connectors to the vehicle anchorages Next attach the lower hooks or connectors over the top of the anchorage bars pushing aside the seat cover material Then locate...

Страница 72: ...path opening on the restraint Disconnect the latch plate from the buckle and twist the short buckle end belt several times to shorten it Insert the latch plate into the buckle with the release button...

Страница 73: ...tion and possible injury to the child Use only the anchor positions directly behind the child seat to secure a child restraint top tether strap Transporting Pets Airbags deploying in the front seat co...

Страница 74: ...he engine oil installed in the engine at the factory is a high quality energy conserving type lubricant Oil changes should be consistent with anticipated climate conditions under which vehicle operati...

Страница 75: ...nd using a seat belt properly Exhaust Gas WARNING Exhaust gases can injure or kill They contain carbon monoxide CO which is colorless and odorless Breathing it can make you unconscious and can eventua...

Страница 76: ...exhaust system each time the vehicle is raised for lubrication or oil change Replace as required Safety Checks You Should Make Inside the Vehicle Seat Belts Inspect the belt system periodically checki...

Страница 77: ...sidewall for cuts and cracks Check the wheel nuts for tightness Check the tires including spare for proper pressure Lights Have someone observe the operation of exterior lights while you work the cont...

Страница 78: ......

Страница 79: ...ront Seat Adjustment 83 Manual Seat Height Adjustment If Equipped 84 Front Seatback Recline 85 Front Easy Entry Seats Two Door Models 85 Head Restraints 87 Fold And Tumble Rear Seat Two Door Models 88...

Страница 80: ...rn Signals 96 Lane Change Assist 96 Daytime Running Lights If Equipped 96 Interior Lights 96 Windshield Wipers And Washers 98 Windshield Wiper Operation 98 Intermittent Wiper System 99 Windshield Wash...

Страница 81: ...Top 109 Installing The Soft Top 111 Freedom Top Three Piece Modular Hard Top If Equipped 114 Front Panel s Removal 115 Front Panel s Installation 117 Front Panel s Installation Only With Rear Hard Top...

Страница 82: ...Sunrider Two Door Models If Equipped 178 Opening The Sunrider 179 Closing The Sunrider 181 Sunrider Four Door Models If Equipped 182 Folding Windshield 185 Lowering The Windshield And Removing Side Ba...

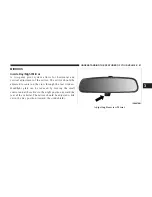
Страница 83: ...djusted to center on the view through the rear window Headlight glare can be reduced by moving the small control under the mirror to the night position toward the rear of the vehicle The mirror should...

Страница 84: ...side convex mirror will look smaller and farther away than they really are Relying too much on your right side mirror could cause you to collide with another vehicle or other object Use your inside m...

Страница 85: ...adio screen Phone Button uconnect phone When you press this button a Not Equipped with uconnect message will display on your radio screen SEATS Front Seat Adjustment Move the seat forward or rearward...

Страница 86: ...uld be injured Only adjust a seat while the vehicle is parked Manual Seat Height Adjustment If Equipped The driver s seat height can be raised or lowered by using the ratcheting handle located on the...

Страница 87: ...d release the handle Lift the handle to return the seatback to an upright position Front Easy Entry Seats Two Door Models Push the lever on the seatback rearward toward the rear of the vehicle to tilt...

Страница 88: ...Easy Entry Combination Lever If Equipped Easy Entry Seat 86 UNDERSTANDING THE FEATURES OF YOUR VEHICLE...

Страница 89: ...passenger seats have a track memory which returns the seat to just past the halfway point of the track regardless of its original position The recliner and easy entry levers should not be used during...

Страница 90: ...or to folding the rear seat it may be necessary to reposition the front seats Be sure that the front seats are fully upright and positioned forward This will allow the rear seat to fold down easily 1...

Страница 91: ...lision people riding in these areas are more likely to be seri ously injured or killed Do not allow people to ride in any area of your vehicle that is not equipped with seats and seat belts Be sure ev...

Страница 92: ...oofer if equipped 3 Fold the rear seat forward following steps 1 through 3 under Fold and Tumble Rear Seat in this section 4 Press down on the release bar on each side and pull the seat out and away f...

Страница 93: ...ended cargo space and still maintain some rear seating room NOTE Prior to folding the rear seat it may be necessary to reposition the front seat to its mid track position Be sure that the front seats...

Страница 94: ...er position NOTE If the rear seatback is not fully latched the center shoulder belt will not be able to be extended for use If you cannot extend the center shoulder belt make sure your seatback is ful...

Страница 95: ...re pushing the safety latch Insert the support rod into the slot on the hood To close the hood remove the support rod from the hood panel and place it in the retaining clip Lower the hood slowly Secur...

Страница 96: ...dimming and turn signals The lever is located on the left side of the steering column Parking Lights Instrument Panel Lights and Headlights Turn the end of the multifunction lever to the first detent...

Страница 97: ...ll sound when the driver s door is opened Headlight Dimmer Switch Push the multifunction lever away from you to switch the headlights to high beam Pull the lever toward you to switch the headlights ba...

Страница 98: ...Daytime Running Lights If Equipped The headlights come on at a low intensity level after the vehicle has been driven approximately 3 ft 1 m They will turn off when the vehicle is turned off or when t...

Страница 99: ...the light off When a door is open and the interior lights are on rotating the dimmer control all the way down to the off detent will cause all the interior lights to turn off This is also known as th...

Страница 100: ...ent lower than the dome light WINDSHIELD WIPERS AND WASHERS Windshield Wiper Operation The windshield wiper washer control lever operates the windshield wipers and washers when the ignition switch is...

Страница 101: ...en the vehicle is restarted Intermittent Wiper System Use the intermittent wiper when weather conditions make a single wiping cycle with a variable pause be tween cycles desirable Move the lever to th...

Страница 102: ...off Mist Feature Push down on the wiper lever to activate a single wipe to clear off road mist or spray from a passing vehicle As long as the lever is held down the wipers will continue to operate NO...

Страница 103: ...er to lock the column firmly in place WARNING Tilting the steering column while the vehicle is moving is dangerous Without a stable steering col umn you could lose control of the vehicle and have an a...

Страница 104: ...perated simultaneously If this occurs the Electronic Speed Con trol System can be reactivated by pushing the Electronic Speed Control ON OFF button and resetting the desired vehicle set speed To Activ...

Страница 105: ...Control lever toward you or normal brake or clutch pressure while slowing the vehicle will deactivate Electronic Speed Control without erasing the set speed memory Pressing the ON OFF button or turni...

Страница 106: ...l Vehicles equipped with manual transmissions may need to be shifted into a lower gear to climb hills without speed loss WARNING Electronic Speed Control can be dangerous where the system cannot maint...

Страница 107: ...can be covered when not in use When the optional cigar lighter heating element is used in the left side power outlet it heats when pushed in and pops out automatically when ready for use To preserve...

Страница 108: ...egrade battery life and or prevent the engine from starting Continued CAUTION Continued Accessories that draw higher power i e coolers vacuum cleaners lights etc will degrade the battery even more qui...

Страница 109: ...located in the center console NOTE The front cupholder insert is removable for cleaning Rear Cupholders The rear cupholders are located on the back of the center console Front Cupholders Rear Cuphold...

Страница 110: ...g loaded latch In order to remove the rear storage com partment cover use the following procedure NOTE The rear storage compartment latch should not be used as cargo tie down 1 Flip up the pull loop s...

Страница 111: ...wear and tear on the soft top Your vehicle warranty will not cover damage resulting from both tops remaining on the vehicle at the same time for extended periods of time Removing the Soft Top 1 Locate...

Страница 112: ...ing a rubber mallet carefully tap the knuckles from the left and right metal pivot brackets Remove the soft top from the vehicle and store in a clean dry location 5 Unzip the zipper on the sport bar c...

Страница 113: ...op procedures refer to Soft Top in this section 1 Locate and remove the following items prior to hard top removal Right and left door frames Door frame attachment knobs four for two door models six fo...

Страница 114: ...sport bar covers and attach the pivot brackets to the sports bar with the four screws that were removed using a T30 Torx head driver Re cover and re zip the sport bar covers b Lay the soft top into th...

Страница 115: ...are snug being careful not to cross thread the screws or over tighten CAUTION Do not overtighten the screws You can strip the screws if they are overtightened 5 Remove the swing gate bar black metal...

Страница 116: ...Soft Top in this section FREEDOM TOP THREE PIECE MODULAR HARD TOP IF EQUIPPED CAUTION The hard top is not designed to carry any addi tional loads such as roof racks spare tires build ing hunting or c...

Страница 117: ...ion can cause water to leak into the vehicles interior Careless handling and storage of the removable roof panels may damage the seals causing water to leak into the vehicles interior The front panel...

Страница 118: ...ped lock located above the shoul der belt anchorage 4 Turn the rear fasteners knobs located on the over head speaker bar assembly counter clockwise until they can be removed 116 UNDERSTANDING THE FEAT...

Страница 119: ...r Step 2 Front Panel s Installation NOTE Set the panels on the windshield frame so that there is no overhang Also make sure that the panels are sitting flush with the body 1 Install the right panel fi...

Страница 120: ...overhang Also make sure that the panels are sitting flush with the body 2 Install the right panel first then the left panel 3 Reinstall the panel s using the same steps for removal in reverse order Re...

Страница 121: ...Torx head driver 5 Open the swing gate all the way to ensure clearance of the rear window glass Lift the rear window glass 6 Locate the wire harness on the left rear inside corner of the vehicle 7 Dis...

Страница 122: ...e of the connector and pulling to disconnect NOTE If the red latch on the connector is locked push the red latch to the right until you can only see the latch on one end right of the connector This wi...

Страница 123: ...ides and check to ensure that there is a uniform gap between the lift glass and hard top DOOR FRAME WARNING Do not drive your vehicle on pavement with the door frame s removed as you will lose the pro...

Страница 124: ...ioned properly to ensure sealing Improper installation can cause water to leak into the vehicle s interior Door Frame Removal Two Door Models 1 Unscrew and remove the door frame attachment knobs two p...

Страница 125: ...me from the vehicle 4 Screw the knobs back into the door frame and fold for storage Store in a secure location WARNING Never store the door frames in your vehicle In an event of an accident a loose do...

Страница 126: ...he door frame pin has been set into the body side hole carefully set the front of the door frame into the rubber seal at the top of the windshield 4 Starting with the front of the door frame clip it o...

Страница 127: ...ide Door Frame Removal Four Door Models 1 Unscrew and remove the two forward most door frame attachment knobs WARNING Use both hands to remove the door frames The door frames will fold and could cause...

Страница 128: ...upper front of the front door frame 3 Pull the frame toward you with your front hand to remove the frame from the vehicle 4 Unscrew and remove the remaining door frame at tachment knob on the rear doo...

Страница 129: ...frame from the vehicle 6 Screw the knob back into the door frame and fold for storage Store in a secure location WARNING Never store the door frames in your vehicle In an event of an accident a loose...

Страница 130: ...ning 3 Position the top of the door frame against the metal sport bar and press onto the side bar making sure not to pinch the material of the sports bar covers and to ensure it is properly positioned...

Страница 131: ...sition the rear of the front door frame to lay on top of the front of the rear door frame 6 Loosely install both knobs beginning with the front knob long knob Then install the middle knob short knob t...

Страница 132: ...p This is caused by a natural contraction of the vinyl coating on the fabric top Place the vehicle in a warm area Pull steadily on the top fabric The vinyl will stretch back to its original size and t...

Страница 133: ...rk when opening or closing Damage to the top may result WARNING Do not drive the vehicle with the rear window curtain up unless the side curtains are also re moved Dangerous exhaust gases could enter...

Страница 134: ...owering a window while the top is wet may allow water to drip into the vehicle s interior Continued CAUTION Continued Careless handling and storage of the soft top may damage the seals causing water t...

Страница 135: ...Header Bow 6 Body Side Retainer 2 2 Bow 7 Quarter Window 3 3 Bow 8 Check Strap 4 Sail Panel 9 Front Retainer Quarter Window 5 Plastic Retainer 10 Bottom Retainer Quarter Window 3 UNDERSTANDING THE FE...

Страница 136: ...1 Zipper Start 2 Zipper Finish 3 Swing Gate Bar 4 Swing Gate Brackets 5 Sail Panels 134 UNDERSTANDING THE FEATURES OF YOUR VEHICLE...

Страница 137: ...are available through your authorized dealer 1 If your vehicle has half doors remove each half door window by opening the door and lifting the half door window out NOTE Stow the half door windows car...

Страница 138: ...s in the loops on the windshield 5 Open the swing gate 6 Before unzipping the rear window release the first 3 in 7 6 cm of both sail panels from the channel Remove the swing gate bar by pulling it str...

Страница 139: ...isengage it from the zipper on the top cover Stow the windows carefully to avoid scratch ing 7 Undo the Velcro that runs along the top and rear edge of the side window 8 Beginning from the rear lower...

Страница 140: ...at the rear corners of the vehicle NOTE When releasing the sail panel retainers it is helpful to pull down on the rear roof bow 11 As you begin to lower the top fold the sail panels so that they rest...

Страница 141: ...rackets pull the front of the bracket forward while rolling the entire bracket back in toward the vehicle to disengage 13 Completely release the latches from the loops on the windshield frame If your...

Страница 142: ...door rails Sun rider Models only 16 Before lowering the top open the swing gate to prevent possible damage to the rear center high mounted brake light Move to the front of the vehicle Grasp the side...

Страница 143: ...ill keep any portion of the top from flapping outside of the vehicle When the top is completely down position the drip rails so they make a v shape this prevents damage to the soft top material 18 Clo...

Страница 144: ...Header Bow 6 Body Side Retainer 2 2 Bow 7 Quarter Window 3 3 Bow 8 Check Strap 4 Sail Panel 9 Front Retainer Quarter Window 5 Plastic Retainer 10 Bottom Retainer Quarter Window 142 UNDERSTANDING THE...

Страница 145: ...1 Zipper Start 2 Zipper Finish 3 Swing Gate Bar 4 Swing Gate Brackets 5 Sail Panels 3 UNDERSTANDING THE FEATURES OF YOUR VEHICLE 143...

Страница 146: ...Sunrider Models only 4 Standing on the side of the vehicle lift the top by the side bow and the 2 bow middle bow up and over the sports bar until the header rests on the top of the windshield frame 5...

Страница 147: ...not close the latches 8 If the swing gate brackets were removed install them by hooking the rear edge of the bracket on the interior side of the body channel Then rotate it rearward and over the chann...

Страница 148: ...bow 10 Partially install the sail panel retainers into the body side channel leaving the last 3 in 7 6 cm toward the rear window loose on both sides Pulling down on the rear roof bow 3 bow will aid to...

Страница 149: ...e zipper but close only about 1 in 2 5 cm 12 Insert the front retainer of the window into the door channel making sure the retainer is fully seated and properly positioned on the door frame Failure to...

Страница 150: ...ginning at the front and working to the rear of the vehicle Finish by closing the zipper completely and attaching the Velcro along the top and rear of the window Repeat this step for the opposite side...

Страница 151: ...Slide the swing gate bar over the receiver at the bottom inside of the rear window The spongy part of the seal should be down and pointed outward to seal with the swing gate when closed 3 UNDERSTANDIN...

Страница 152: ...ndow by starting both zipper ends at the lower left corner of the rear window opening Ensure that the zippers are properly started and aligned before zipping to prevent damage 150 UNDERSTANDING THE FE...

Страница 153: ...kets 18 Apply downward pressure on the top corner of the rear soft top bow 3 bow then complete attaching the sail panel retainers into the body side channel 19 Open the doors and insert the roof retai...

Страница 154: ...camping supplies and or luggage etc Also it was not designed as a structural member of the vehicle and thus cannot properly carry any addi tional loads other than environmental rain snow etc If the t...

Страница 155: ...he windows are dirty Grit may scratch the window Do not move your vehicle until the top has been either fully attached to the windshield frame or fully lowered Continued CAUTION Continued Do not lower...

Страница 156: ...AUTION Failure to follow these cautions may cause interior water damage stains or mildew on the top material It is recommended that the top be free of water prior to opening it Operating the top openi...

Страница 157: ...NOTE Do not remove any of the three attachment knobs unless you are planning on installing the hard top 3 UNDERSTANDING THE FEATURES OF YOUR VEHICLE 155...

Страница 158: ...ader Bow 6 Body Side Retainer 11 Plastic Retainer 2 2 Bow 7 Quarter Window 3 3 Bow 8 Check Strap 4 4 Bow 9 Front Retainer Quarter Window 5 Sail Panel 10 Bottom Retainer Quarter Window 156 UNDERSTANDIN...

Страница 159: ...1 Zipper Start 2 Zipper Finish 3 Swing Gate Bar 4 Swing Gate Brackets 5 Sail Panels 3 UNDERSTANDING THE FEATURES OF YOUR VEHICLE 157...

Страница 160: ...rized dealer 1 If your vehicle has half doors remove each half door window by opening the door and lifting the half door window out NOTE Stow half door windows carefully outside of the vehicle never i...

Страница 161: ...loops on the windshield frame 5 Open the swing gate 6 Before unzipping the rear window release the first 3 in 7 6 cm of both sail panels from the channel Remove the swing gate bar by pulling it strai...

Страница 162: ...disengage it from the zipper on the top cover Stow the windows carefully to avoid scratch ing 7 Undo the Velcro that runs along the top and rear edge of the side window 8 Beginning from the rear lower...

Страница 163: ...y side channel at the rear corners of the vehicle NOTE When releasing the sail panel retainers it is helpful to pull down on the rear roof bow 11 Fold the sail panels so that they rest on top of the s...

Страница 164: ...is being installed To remove the swing gate brackets pull the front of the bracket forward while rolling the entire bracket back in toward the vehicle to disengage 13 Grasp the front side bow behind t...

Страница 165: ...fabric rearward Gently rest the header on top of the rear portion of the deck 15 Fold the top material so that the plastic retainers form a W as shown Enter the vehicle and move the material into two...

Страница 166: ...e 17 Before lowering the top open the swing gate to prevent possible damage to the rear center high mounted brake light Grasp the folded side bows and slide the top along the door frame track to the r...

Страница 167: ...he top from flapping outside of the vehicle 20 Once the top is fully down use the Velcro straps provided to secure the top to the vehicle by wrapping the strap around the side bows and through the slo...

Страница 168: ...der Bow 6 Body Side Retainer 11 Plastic Retainer 2 2 Bow 7 Quarter Window 3 3 Bow 8 Check Strap 4 4 Bow 9 Front Retainer Quarter Window 5 Sail Panel 10 Bottom Retainer Quarter Window 166 UNDERSTANDING...

Страница 169: ...1 Zipper Start 2 Zipper Finish 3 Swing Gate Bar 4 Swing Gate Brackets 5 Sail Panels 3 UNDERSTANDING THE FEATURES OF YOUR VEHICLE 167...

Страница 170: ...he door frames if removed Refer to Door Frame in this section 2 Undo the straps used to secure the top in the down position and store in secure location 3 Open the swing gate 4 Grasp the folded side b...

Страница 171: ...the knuckles into the door frame tracks and slide the top forward 6 Ensure that the top locks into the Sunrider locking mechanisms that are located above the front of the rear doors 3 UNDERSTANDING TH...

Страница 172: ...rs do not get trapped between the top and the door frame Also make certain the feet at both ends of the 2 bow forward most bow seat prop erly on the side bows above the front doors They should cradle...

Страница 173: ...ets were removed install them by hooking the rear edge of the bracket on the interior side of the body channel Then rotate it rearward and over the channel until it snaps onto the exterior part of the...

Страница 174: ...roof bow 4 bow Partially install the sail panel retainers into the body side channel leaving the last 3 in 7 6 cm toward the rear window loose on both sides Pulling down on the rear roof bow 4 bow wil...

Страница 175: ...rt the zipper but close only about 1 in 2 5 cm 14 Insert the front retainer of the window into the door channel making sure the retainer is fully seated and properly positioned on the door frame Failu...

Страница 176: ...ginning at the front and working to the rear of the vehicle Finish by closing the zipper completely and attaching the Velcro along the top and rear of the window Repeat this step for the opposite side...

Страница 177: ...Slide the swing gate bar over the receiver at the bottom inside of the rear window The spongy part of the seal should be down and pointed outward to seal with the swing gate when closed 3 UNDERSTANDIN...

Страница 178: ...arted and aligned before zipping to prevent damage 18 Run the first zipper fully around to the right side of the window 19 Grasp the swing gate bar and position it into the swing gate brackets 20 Comp...

Страница 179: ...e channels in the door frame above the doors starting at the front and working toward the rear of the vehicle 22 Ensure the plastic retainer is tucked in properly at the B pillar and not pinching the...

Страница 180: ...ating the top opening a door or lowering a window while the top is wet may allow water to drip into the vehicle s interior NOTE If you are going to be driving faster than 40 mph 64 km h with the Sunri...

Страница 181: ...stic retainer Pull down and roll the retainer out of the channel Repeat this on the other side 2 Unclip and move the sun visors to the side 3 Release the header latches from the loops on the windshiel...

Страница 182: ...he top back Make sure the material is folded back as shown NOTE The Sunrider latch on the door rail should not be activated for Sunrider use If activated the soft top must be reinstalled starting from...

Страница 183: ...clip and move the sun visors to the side 3 Grasp the front header and pull it to the front of the vehicle 4 Hook the header latches to the loops on the wind shield frame close latches and return the s...

Страница 184: ...is recom mended that you remove the rear window of the vehicle To Open 1 Above the front of the rear door place your finger up into the cutout in the plastic retainer and pull down rolling both the f...

Страница 185: ...3 Release the header latches from the loops on the windshield frame 4 Grasp the front side bow behind the header and lift the top 3 UNDERSTANDING THE FEATURES OF YOUR VEHICLE 183...

Страница 186: ...iners form a W as shown Enter the vehicle and move the material into two folds Ensure that the straps are securely stowed 7 Close the front header latches 8 Secure the top by using the two provided st...

Страница 187: ...ther objects Do not drive your vehicle on road with the windshield down and the side bars removed as you lose the protec tion these structural elements can provide If required for certain off road use...

Страница 188: ...t drive your vehicle on road with the wind shield down Continued WARNING Continued Do not drive your vehicle unless the windshield is securely fastened either up or down Eye protection such as goggles...

Страница 189: ...e the two top hex bolts 13 mm and the one side hex bolt 13 mm visible through the trim Do not remove plastic corner trim sun visor bolts or sport bar covering 3 Open the sport bar Velcro covering 4 Re...

Страница 190: ...tore the side bars in your vehicle use four cinch straps available from your authorized dealer Attach the straps through the slots located on the floor behind the folded rear seat at the front of the...

Страница 191: ...in the center console or securely behind the rear seat NOTE It may be necessary to use a battery terminal puller tool in order to separate the wiper arms from the shaft after the nuts have been remove...

Страница 192: ...center of the windshield frame Tighten the strap to secure the windshield in place Raising the Windshield and Replacing Side Bars 1 Raise the windshield 2 Loosely attach the rear of the side bar to th...

Страница 193: ...ower side bolt will not align until the top two bolts are installed 4 Tighten all side bar attachment bolts 5 Install the lower windshield plates with the six black round headed Torx head screws using...

Страница 194: ...ter of the switch up to the On position will activate the wiper Rotating the switch ring beyond the On or Off position will activate the rear washer The washer pump will continue to operate as long as...

Страница 195: ...atically turns off after approximately 10 minutes For an addi tional five minutes of operation press the button a second time NOTE To prevent excessive battery drain use the rear window defroster only...

Страница 196: ......

Страница 197: ...Buttons 212 Trip Conditions 212 Compass Temperature Display 213 Sales Code REQ AM FM Stereo Radio And 6 Disc CD DVD Changer MP3 WMA AUX Jack 217 Operating Instructions Radio Mode 217 Operation Instruc...

Страница 198: ...tes On Playing MP3 Files 240 Operation Instructions Auxiliary Mode 243 Sales Code RES RSC AM FM Stereo Radio With CD Player MP3 AUX Jack And Sirius Radio 244 Operating Instructions Radio Mode 244 Oper...

Страница 199: ...nstructions uconnect phone If Equipped 260 Operating Instructions Video Entertainment System VES If Equipped 261 CD DVD Maintenance 261 Radio Operation And Cellular Phones 261 Climate Controls 262 Man...

Страница 200: ...EL FEATURES 1 Air Outlet 6 Climate Controls 2 Instrument Cluster 7 Power Outlet 3 Horn 8 Lower Switch Bank 4 Radio 9 Auxiliary Power Outlet Cigar Lighter 5 Glove Compartment 198 UNDERSTANDING YOUR INS...

Страница 201: ...INSTRUMENT CLUSTER 4 UNDERSTANDING YOUR INSTRUMENT PANEL 199...

Страница 202: ...he light stays on or comes on while driving turn off some of the vehicle s non essential electrical devices or increase engine speed if at idle If the charging system light remains on it means that th...

Страница 203: ...stop the vehicle and shut off the engine as soon as possible A chime will sound when this light turns on Do not operate the vehicle until the cause is corrected This light does not indicate how much o...

Страница 204: ...elt during each stop The dual brake system provides a reserve braking capac ity in the event of a failure to a portion of the hydraulic system A leak in either half of the dual brake system is indicat...

Страница 205: ...t shows only that the parking brake is applied It does not show the degree of brake application 12 Anti Lock Brake ABS Light After the ignition is turned on the Anti Lock Brake System ABS light illumi...

Страница 206: ...e critically hot until the light goes out 17 Vehicle Security Light If Equipped This light will flash at a fast rate for approxi mately 15 seconds when the vehicle security alarm is arming and then wi...

Страница 207: ...badly burned by steam or boiling coolant You may want to call an authorized dealer ship for service if your vehicle overheats If you decide to look under the hood yourself see Section 7 of this manua...

Страница 208: ...If your vehicle has tires of a different size than the size indicated on the vehicle placard or tire inflation pressure label you should determine the proper tire inflation pressure for those tires As...

Страница 209: ...he installation of replacement or alternate tires or wheels on the vehicle that prevent the TPMS from functioning properly Always check the TPMS malfunction telltale after replacing one or more tires...

Страница 210: ...essure LoW tirE When the appropriate condition exists the odometer display will toggle between LoW and tirE for three cycles Change Oil Message Your vehicle is equipped with an engine oil change indic...

Страница 211: ...at monitors engine and automatic transmission con trol systems The light will illuminate when the ignition is in the ON position before engine start If the bulb does not come on when turning the key f...

Страница 212: ...ndicator Light This light will illuminate when the O D OFF button has been selected and overdrive has been turned off The O D OFF button is located on the center console 28 Sway Bar Indicator Light If...

Страница 213: ...possible If the light continues to flash when the engine is running immediate service is required and you may experience reduced performance an elevated rough idle or engine stall and your vehicle may...

Страница 214: ...puter displays Press and hold the left button on the instrument cluster for two to three seconds to switch from English to Metric displays Reset Change Display Press and hold the left button on the in...

Страница 215: ...odometer to Trip A or Trip B Press and hold the right button while the odometer trip odometer is displayed to reset Trip A Shows the total distance traveled for Trip A since the last reset Trip B Show...

Страница 216: ...such devices may interfere and cause false com pass readings Automatic Compass Calibration The self calibrating feature of the compass eliminates the need to calibrate the compass for normal condition...

Страница 217: ...large metal objects until the CAL symbol is extinguished When the CAL symbol is no longer displayed the compass is calibrated and should display correct head ings Verify proper calibration by checkin...

Страница 218: ...bout five seconds then the trip computer will store the variance value in memory and the compass will resume normal operation NOTE The U S Metric display will change from En glish to Metric or Metric...

Страница 219: ...ess the ON VOLUME control knob a second time to turn off the radio Electronic Volume Control The electronic volume control turns continuously 360 degrees in either direction without stopping Turning t...

Страница 220: ...vehicle is not equipped with or this feature is not available on your vehicle a Not Equipped With uconnect message will display on the radio screen Phone Button uconnect phone If Equipped Press this b...

Страница 221: ...quency in the direction of the arrows This feature operates in AM FM or Satellite if equipped frequencies TUNE Control Turn the rotary TUNE SCROLL control knob clockwise to increase or counterclockwis...

Страница 222: ...USIC TYPE Button Pressing this button once will turn on the Music Type mode for five seconds Pressing the MUSIC TYPE button or turning the TUNE SCROLL control knob within five seconds will allow the p...

Страница 223: ...ction only operates when in the FM mode If a preset button is activated while in the Music Type Program Type mode the Music Type mode will be exited and the radio will tune to the preset station SETUP...

Страница 224: ...SELECT will change the viewing angle if supported by the DVD disc if equipped NOTE The available selections for each of the above entries varies depending upon the disc These selections can only be m...

Страница 225: ...the language is supported by the disc You can select a language not listed by scrolling down and selecting other Enter the country code using the TUNE SCROLL control knob to scroll up and down to sel...

Страница 226: ...ode SET Button To Set the Pushbutton Memory When you are receiving a station that you wish to commit to pushbutton memory press the SET button The symbol SET 1 will now show in the display window Sele...

Страница 227: ...r it will not play the disc Customers may take their vehicle to an authorized dealer to change the region code of the player a maximum of five times CAUTION The radio may shut down during extremely ho...

Страница 228: ...utton for five seconds and all CDs will be ejected from the radio The disc can be ejected with the radio and ignition OFF SEEK Button CD MODE Press the right SEEK button for the next selection on the...

Страница 229: ...WMA DVD Video DVD R DVD RW DVD R DVD RW and CDDA MP3 Supported Medium Formats File Systems The medium formats supported by the radio are ISO 9660 Level 1 and Level 2 and includes the Joliet extension...

Страница 230: ...on MP3 WMA files named with the MP3 WMA extension may cause play back problems The radio is designed to recognize the file as an invalid MP3 WMA and will not play the file When using the MP3 WMA encod...

Страница 231: ...s may take longer to load than non multisession discs Number of files and folders Loading times will increase with more files and folders To increase the speed of disc loading it is recommended to use...

Страница 232: ...X jack is an audio input jack which allows the user to plug in a portable device such as an MP3 WMA player cassette player or microphone and utilize the vehicle s audio system to amplify the source an...

Страница 233: ...ed Refer to uconnect phone in Section 3 Operating Instructions uconnect studios Satellite Radio If Equipped Refer to uconnect studios Satellite Radio in this section Operating Instructions Video Enter...

Страница 234: ...a Global Positioning System GPS based Navigation system Refer to your uconnect tunes REN or RER user s manual for detailed operating instructions Operating Instructions Voice Recognition System VR If...

Страница 235: ...is displayed To move the minute backward touch the screen where the word Min with the arrow pointing downward is displayed 6 To save the new time setting touch the screen where the word Save is displa...

Страница 236: ...how Time if Radio is Off are displayed to change the current setting Changing the Time Zone 1 Turn on the radio 2 Touch the screen where the time is displayed The clock setting menu will appear on the...

Страница 237: ...y Push the ON VOLUME control knob to turn on the radio Push the ON VOLUME control knob a second time to turn off the radio Electronic Volume Control The electronic volume control turns continuously 36...

Страница 238: ...right side TUNE SCROLL control knob to set the minutes The minutes will begin to blink 4 Adjust the minutes using the right side TUNE SCROLL control knob Press the TUNE SCROLL control knob to save ti...

Страница 239: ...level between the front and rear speakers Push the rotary TUNE SCROLL control knob again to exit setting tone balance and fade AM FM Button Press the buttons to select either AM or FM mode SET RND But...

Страница 240: ...ructions CD MODE For CD And MP3 Audio Play NOTE The ignition switch must be in the ON or ACC position to operate the radio This radio is capable of playing compact discs CD recordable compact discs CD...

Страница 241: ...ypes one side is a DVD the other side is a CD should not be used and they can cause damage to the player EJECT Button Ejecting a CD Press the EJECT button to eject the CD If you have ejected a disc an...

Страница 242: ...or FM mode SET RND Button Random Play Button Press this button while the CD is playing to activate Random Play This feature plays the selections on the compact disc in random order to provide an inte...

Страница 243: ...o may be unable to display the file name and folder name and will assign a number instead With a maximum number of files exceeding 20 folders will result in this display With 200 files exceeding 50 fo...

Страница 244: ...addition variable bit rates VBR are also supported The majority of MP3 files use a 44 1 kHz sampling rate and a 192 160 128 96 or VBR bit rate MPEG Specification Sampling Frequency kHz Bit Rate kbps M...

Страница 245: ...on disc enable the Disc at Once option before writing to the disc Operation Instructions Auxiliary Mode The auxiliary AUX jack is an audio input jack which allows the user to plug in a portable device...

Страница 246: ...Push the ON VOLUME control knob a second time to turn off the radio Electronic Volume Control The electronic volume control turns continuously 360 degrees in either direction without stopping Turning...

Страница 247: ...utton uconnect phone If Equipped Press this button to operate the uconnect phone feature if equipped Refer to uconnect phone in Section 3 If your vehicle is not equipped with or this feature is not av...

Страница 248: ...es the tuner to search for the next frequency in the direction of the arrows This feature operates in either AM or FM frequencies TUNE Control Turn the rotary TUNE SCROLL control knob clockwise to inc...

Страница 249: ...SIC TYPE Button Pressing this button once will turn on the Music Type mode for five seconds Pressing the MUSIC TYPE button or turning the TUNE SCROLL control knob within five seconds will allow the pr...

Страница 250: ...Music Type name The Music Type function only operates when in the FM mode If a preset button is activated while in the Music Type Program Type mode the Music Type mode will be exited and the radio wil...

Страница 251: ...th this exception Press the SET RND button twice and SET 2 will show in the display window Each button can be set for SET 1 and SET 2 in both AM and FM This allows a total of 12 AM and 12 FM stations...

Страница 252: ...the ignition ON and the radio ON the unit will switch from radio to CD mode and begin to play when you insert the disc The display will show the track number and index time in minutes and seconds Pla...

Страница 253: ...l allow faster scrolling through the tracks in CD and MP3 modes TIME Button Press this button to change the display from a large CD playing time display to a small CD playing time display RW FF Press...

Страница 254: ...The radio uses the following limits for file systems Maximum number of folder levels 8 Maximum number of files 255 Maximum number of folders The radio display of file names and folder names is limite...

Страница 255: ...ta to an MP3 file the bit rate and sampling frequencies in the following table are supported In addition variable bit rates VBR are also supported The majority of MP3 files use a 44 1 kHz sampling rat...

Страница 256: ...t Once option before writing to the disc LIST Button CD Mode for MP3 Play Pressing the LIST button will bring up a list of all folders on the disc Scrolling up or down the list is done by turning the...

Страница 257: ...ice s volume up If the AUX audio sounds distorted turn the device s volume down TIME Button Auxiliary Mode Press this button to change the display to time of day The time of day will display for five...

Страница 258: ...8 539 7474 or visit the Sirius web site at www sirius com or at www siriuscanada ca for Cana dian residents Electronic Serial Number Sirius Identification Number ESN SID Please have the following info...

Страница 259: ...n in the radio while in the Satellite radio mode Satellite Antenna To ensure optimum reception do not place items on the roof around the rooftop antenna location or strap items to the trunk lid around...

Страница 260: ...t stopping until you release it SCAN Button When Equipped Pressing the SCAN button causes the tuner to search for the next channel pausing for eight seconds before con tinuing to the next To stop the...

Страница 261: ...sing the SEEK button when the Music Type function is active the radio will be tuned to the next channel with the same selected Music Type name If a preset button is activated while in the Music Type P...

Страница 262: ...SET but ton the channel will continue to play but will not be stored into pushbutton memory You may add a second channel to each pushbutton by repeating the above procedure with this exception Press...

Страница 263: ...re temperatures may become too high NOTE If you experience difficulty in playing a particu lar disc it may be damaged i e scratched reflective coating removed a hair moisture or dew on the disc oversi...

Страница 264: ...desired interior condi tions Mode Control The mode control allows you to choose from several pat terns of air distribution as identified by the symbols Panel Air is directed through the outlets in the...

Страница 265: ...shield This setting is good for maintaining comfort while reducing moisture on the windshield Defrost Air is directed through the windshield and side window demist outlets Use this mode with maxi mum...

Страница 266: ...onditioning and venti lation system in this vehicle consist of a series of rotary knobs These comfort controls can be set to obtain desired interior conditions The instrument panel features four airfl...

Страница 267: ...er outlets for added comfort The warmer air goes to the floor outlets This feature gives improved comfort during sunny but cool conditions Floor Air is directed through the floor outlets and side wind...

Страница 268: ...elp dry the windshield To improve fuel economy use these modes only when necessary Blower Control Use this control to regulate the amount of air forced through the system in any mode you select The fa...

Страница 269: ...ght will illuminate when you are in Recirculation mode Only use the Recirculation mode to temporarily block out any outside odors smoke or dust and to cool the interior rapidly upon initial start up i...

Страница 270: ...ditioning compressor will not engage until the engine has been running for about 10 seconds MAX A C For maximum cooling select ei ther the Panel or Bi Level position using the mode control Then press...

Страница 271: ...lp prevent contaminates cigarette smoke perfumes etc from sticking to the windows Contaminates increase the rate of window fogging Summer Operation Air conditioned vehicles must be protected with a hi...

Страница 272: ...ns Vacation Storage Anytime you store your vehicle or keep it out of service i e vacation for two weeks or more run the air conditioning system at idle for about five minutes in the fresh air and high...

Страница 273: ...F Or 29 C 276 If Engine Fails To Start 276 After Starting 278 Engine Block Heater If Equipped 279 Manual Transmission If Equipped 279 Shifting 280 Downshifting 281 Reverse Shifting 282 Automatic Trans...

Страница 274: ...y Bar Disconnect If Equipped 295 On Road Driving Tips 297 Off Road Driving Tips 298 Side Step Removal If Equipped 298 The Basics Of Off Road Driving 299 When To Use 4L Low Range 300 Simultaneous Brake...

Страница 275: ...8 Trailer Sway Control TSC 329 Tire Safety Information 330 Tire Markings 330 Tire Identification Number TIN 334 Tire Loading And Tire Pressure 335 Tires General Information 339 Tire Pressure 339 Tire...

Страница 276: ...rbon Monoxide Warnings 356 Adding Fuel 357 Fuel Filler Cap Gas Cap 357 Vehicle Loading 359 Certification Label 359 Trailer Towing 361 Common Towing Definitions 361 Trailer Hitch Classification 364 Tra...

Страница 277: ...r or not the clutch pedal is pressed to the floor This feature enhances off road performance by allowing the vehicle to start when in 4L without having to press the clutch pedal The 4WD Indicator Ligh...

Страница 278: ...nition switch to the LOCK position wait 10 to 15 seconds then repeat the Normal Starting procedure Extreme Cold Weather below 20 F or 29 C To ensure reliable starting at these temperatures use of an e...

Страница 279: ...ip Start Manual Transmission Only If the engine fails to start after you have followed the Normal Starting or Extreme Cold Weather proce dures it may be flooded Push the accelerator pedal all the way...

Страница 280: ...t Then turn the ignition switch to the START position and release it as soon as the starter engages The starter motor will disengage automatically in 10 seconds Once this occurs release the accelerato...

Страница 281: ...rical cord could cause electrocution Use the heater when temperatures below 0 F 18 C are expected to last for several days MANUAL TRANSMISSION IF EQUIPPED WARNING You or others could be injured if you...

Страница 282: ...ays use 1st gear when starting from a standing position if under heavy load or when pulling a trailer Recommended Vehicle Shift Speeds To utilize your manual transmission efficiently for both fuel eco...

Страница 283: ...t time provides better acceleration when you desire to resume speed Downshift progressively Do not skip gears to avoid overspeeding the engine and clutch WARNING Do not downshift for additional engine...

Страница 284: ...plete stop Press the clutch and pause briefly to allow the gear train to stop rotating Beginning from the NEUTRAL position move the shift lever in one quick smooth motion straight across and into the...

Страница 285: ...AL if the engine speed is higher than idle speed If your foot is not firmly on the brake pedal the vehicle could accelerate quickly forward or in reverse You could lose control of the vehicle and hit...

Страница 286: ...the parking brake 3 Using a flat bladed screwdriver carefully remove the shift lock manual override cover which is located on the PRNDL bezel above the PARK position 4 Press and maintain firm pressur...

Страница 287: ...briefly limited to only second gear operation Normal operation will resume once the transmission temperature has risen to a suitable level DO NOT race the engine when shifting from PARK or NEUTRAL pos...

Страница 288: ...is for moving the vehicle backward Use only after the vehicle has come to a complete stop NEUTRAL This range is used when vehicle is standing for pro longed periods with engine running Engine may be...

Страница 289: ...mprove performance and extend transmission life by reducing excessive shifting and heat buildup If the transmission overheats a HOTOIL message will be displayed in the odometer and a chime will sound...

Страница 290: ...in low gear with no upshift This gear provides engine compression braking at low speeds CAUTION Before moving the shift lever out of PARK you must turn the ignition from LOCK so the steering wheel and...

Страница 291: ...OUR WHEEL DRIVE OPERATION COMMAND TRAC OR ROCK TRAC IF EQUIPPED Operating Instructions Precautions The transfer case provides four mode positions 2H Two wheel drive high range 4H Four wheel drive high...

Страница 292: ...front or rear wheels are spinning The transfer case is not equipped with a synchronizer and the front and rear driveshaft speeds must be equal for a shift to take place Shifting while only the front o...

Страница 293: ...ee the information below 2H Position This range is used for normal street and highway driving on hard surfaced roads 4H Position This range locks the front and rear driveshafts together forcing the fr...

Страница 294: ...ra tor pedal after completing the shift Apply a constant force when shifting the transfer case lever 4H to 4L or 4L to 4H With the vehicle rolling at 2 to 3 mph 3 to 5 km h shift an automatic transmis...

Страница 295: ...raction differs between the two rear wheels the differential automatically proportions the usable torque by providing more torque to the wheel that has traction Trac Lok is especially helpful during s...

Страница 296: ...only the Rear Axle Lock Indicator Light will illuminate press the bottom of the switch again to lock the front axle the Front Axle Lock Indicator Light will illuminate When the rear axle is locked pr...

Страница 297: ...down to lock the rear axle the Rear Axle Lock Indicator Light will illuminate press the switch up to unlock the rear axle NOTE The indicator lights will flash until the axle is fully locked or unlock...

Страница 298: ...oad mode during normal driving conditions WARNING Do not disconnect the stabilizer bar and drive on hard surfaced roads or at speeds above 18 mph 29 km h you may lose control of the vehicle which coul...

Страница 299: ...his alignment may require that the vehicle be driven onto level ground or rocked from side to side To return to on road mode press the SWAY BAR switch again WARNING If the stabilizer sway bar will not...

Страница 300: ...facto rily in off road conditions If at all possible avoid sharp turns or abrupt maneuvers As with other vehicles of this type failure to operate this vehicle correctly may result in loss of control o...

Страница 301: ...so always keep a firm grip on the steering wheel and maintain a good driving posture Avoid sudden accelerations turns or braking In most cases there are no road signs posted speed limits or signal lig...

Страница 302: ...neous use of the brake and throttle two footed driving When climbing rocks logs or other stepped objects using light brake pressure with light throttle will keep the vehicle from jerking or lurching T...

Страница 303: ...et out and determine how deep it is if there are any hidden obstacles and if the vehicle can be safely recovered if stuck Sand Soft sand is very difficult to travel through with full tire pressure Whe...

Страница 304: ...ring the vehicle to a complete stop and then inch the vehicle forward until it makes contact with the object Apply the throttle lightly while holding a light brake pressure and ease the vehicle up and...

Страница 305: ...to maintaining your vehicle s mobility Approach these obstacles at a 45 degree angle and let each tire go through the obstacle independently You need to use caution when crossing large obstacles with...

Страница 306: ...n to recover the vehicle Depend ing on what you are in contact with jack the vehicle up and place a few rocks under the tires so the weight is off of the high point when you let the vehicle down You c...

Страница 307: ...ou start up the hill Do not race forward into a steep grade the abrupt change of grade could cause you to lose control If the front end begins to bounce ease off the throttle slightly to bring all fou...

Страница 308: ...ng Descending a grade too fast could cause you to lose control and be seriously injured Driving Across an Incline If at all possible avoid driving across an incline If it is necessary know your vehicl...

Страница 309: ...drive through areas which are designated and approved You should tread lightly and avoid damage to the environment You should know your vehicle s abilities and be able to recover it if something goes...

Страница 310: ...f murky or muddy waters check for hidden obstacles Make sure you will not be intruding on any wildlife and you can recover the vehicle if necessary The key to a safe crossing is the water depth curren...

Страница 311: ...ater currents in depths greater than the vehicle s running ground clearance You should never attempt to cross flowing water which is deeper than the vehicle s running ground clearance Even the slowest...

Страница 312: ...nd sus pension Retighten them if required and torque to the values specified in the Service Manual Check for accumulations of plants or brush These things could be a fire hazard They might hide damage...

Страница 313: ...eeds and during parking maneuvers NOTE Increased noise levels at the end of the steering wheel travel are considered normal and do not indicate that there is a problem with the power steering system U...

Страница 314: ...chemicals can damage your power steering components Such damage is not covered by the New Vehicle Limited Warranty WARNING Fluid level should be checked on a level surface and with the engine off to p...

Страница 315: ...ter button then lower the lever completely NOTE The instrument cluster Brake Warning Light indicates only that the parking brake is applied You must be sure the parking brake is fully applied before l...

Страница 316: ...ll turn the front wheels toward the curb on a downhill grade and away from the curb on an uphill grade The parking brake should always be applied whenever the driver is not in the vehicle ANTI LOCK BR...

Страница 317: ...ON again to restore Anti Lock Brake System function WARNING Pumping of the Anti Lock Brakes will diminish their effectiveness and may lead to an accident Pumping makes the stopping distance longer Jus...

Страница 318: ...equipped with an advanced electronic brake control system that includes Anti Lock Brake Sys tem ABS Traction Control System TCS Brake Assist System BAS Hill Start Assist HSA Electronic Roll Mitigatio...

Страница 319: ...d stability A feature of the TCS system functions similar to a limited slip differential and controls the wheel spin across a driven axle If one wheel on a driven axle is spinning faster than the othe...

Страница 320: ...an prevent accidents The capabilities of a BAS equipped vehicle must never be exploited in a reck less or dangerous manner which could jeopardize the user s safety or the safety of others Hill Start A...

Страница 321: ...anual transmission equipped vehicles Gear selection matches vehicle uphill direction i e vehicle facing uphill is in forward gear vehicle back ing uphill is in REVERSE gear WARNING There may be situat...

Страница 322: ...ing gravity act on the vehicle as the HSA will prevent the vehicle from rolling Instead use the appropriate gear for moving in the desired direction Towing with HSA HSA will provide assistance when st...

Страница 323: ...raight Apply park ing brake on manual transmission vehicle 2 Start the engine 3 With the engine running the brake applied and the clutch out rotate the steering wheel 180 counterclock wise from center...

Страница 324: ...Stability Program for a complete explanation of the available ESP modes WARNING Many factors such as vehicle loading road condi tions and driving conditions influence the chance that wheel lift or ro...

Страница 325: ...es lose traction and the ESP system becomes active The ESP TCS Indicator Light also flashes when TCS is active If the ESP TCS Indicator Light begins to flash during acceleration ease up on the acceler...

Страница 326: ...t all driving situations The ESP should only be turned to Partial Off or Full Off for specific reasons as noted below Partial Off This mode is entered by momentarily pressing the ESP OFF switch When i...

Страница 327: ...P and TCS stability features are turned off except for the limited slip feature described in the TCS section After five seconds a chime will sound the ESP TCS Indicator Light will illuminate and the E...

Страница 328: ...section are turned off until the vehicle reaches a speed of 40 mph 48 km h At 40 mph 48 km h the normal ESP stability function returns but TCS remains off When the vehicle speed drops below 35 mph 40...

Страница 329: ...available A steering wheel ESP button maneuver must be performed to permanently disable ESP and defeat the functionality of the ESP switch Repeating the procedure will return the system to normal ESP...

Страница 330: ...to the left counterclock wise 8 Press and hold the ESP OFF button for seven seconds 9 Turn the steering wheel back to center 10 Press and hold the ESP OFF button for seven seconds 11 Cycle the igniti...

Страница 331: ...tivation Trailer Sway Control TSC TSC uses sensors in the vehicle to recognize an exces sively swaying trailer and will take the appropriate actions to attempt to stop the sway The system may reduce e...

Страница 332: ...location and adjust the trailer load to eliminate trailer sway TIRE SAFETY INFORMATION Tire Markings 1 U S DOT Safety Stan dards Code TIN 4 Maximum Load 2 Size Designation 5 Maximum Pressure 3 Servic...

Страница 333: ...uck Metric tire sizing is based on U S design standards The size designation for LT Metric tires is the same as for P Metric tires except for the letters LT that are molded into the sidewall preced in...

Страница 334: ...ire based on U S design standards T Temporary spare tire 31 Overall diameter in inches in 215 Section width in millimeters mm 65 Aspect ratio in percent Ratio of section height to section width of tir...

Страница 335: ...ions i e tire pressure vehicle loading road conditions and posted speed limits Load Identification blank Absence of any text on the sidewall of the tire indicates a Standard Load SL Tire Extra Load XL...

Страница 336: ...ies that the tire is in compliance with the U S Department of Transportation tire safety standards and is approved for highway use MA Code representing the tire manufacturing location two digits L9 Co...

Страница 337: ...Tire Loading and Tire Pressure Tire Placard Location Tire Placard Location Two Door Models Tire Placard Location Four Door Models 5 STARTING AND OPERATING 335...

Страница 338: ...pecified on the Tire and Loading Information placard and in the Vehicle Loading section of this manual NOTE Under a maximum loaded vehicle condition gross axle weight ratings GAWRs for the front and r...

Страница 339: ...0 lbs 295 kg 5 Determine the combined weight of luggage and cargo being loaded on the vehicle That weight may not safely exceed the available cargo and luggage load capacity calculated in Step 4 6 If...

Страница 340: ...338 STARTING AND OPERATING...

Страница 341: ...ressure Safety WARNING Under inflation increases tire flexing and can re sult in over heating and tire failure Over inflation reduces a tire s ability to cushion shock Objects on the road and chuck ho...

Страница 342: ...need for earlier tire replacement Under inflation also increases tire rolling resistance and results in higher fuel consumption Ride Comfort and Vehicle Stability Proper tire inflation contributes to...

Страница 343: ...m entering the valve stem which could damage the Tire Pressure Monitoring Sensor Inflation pressures specified on the placard are always cold tire inflation pressure Cold tire inflation pressure is de...

Страница 344: ...ures for High Speed Operation The manufacturer advocates driving at safe speeds within posted speed limits Where speed limits or condi tions are such that the vehicle can be driven at high speeds main...

Страница 345: ...ause of sidewall flexing Consult your authorized dealer for radial tire repairs Tire Spinning When stuck in mud sand snow or ice conditions do not spin your vehicle s wheels above 35 mph 55 km h WARNI...

Страница 346: ...o the tread wear indicators the tire should be replaced Life of Tire The service life of a tire is dependent upon varying factors including but not limited to Driving style Tire pressure Distance driv...

Страница 347: ...e of your vehicle We recommend that you refer to your original equipment or contact an authorized tire dealer with any questions you may have on tire specifications or capability WARNING Do not use a...

Страница 348: ...these recommendations to guard against damage and excessive tire and chain wear Use chains on P225 75R16 tires only P255 75R17 P255 70R18 and LT255 75R17 tires do not provide adequate clearance Use SA...

Страница 349: ...ion levels and contribute to a smooth quiet ride Refer to the Maintenance Schedule in Section 8 of this manual for the proper maintenance intervals More fre quent rotation is permissible if desired Th...

Страница 350: ...ll not turn off until the tire pressure is at or above recommended cold placard pressure Once the Tire Pressure Monitor ing Telltale Light has been illuminated the tire pressure must be increased to t...

Страница 351: ...rket tire sealants or balance beads if your vehicle is equipped with a TPMS as damage to the sensors may result Continued CAUTION Continued After inspecting or adjusting the tire pressure always reins...

Страница 352: ...our tires regularly and to maintain the proper pressure The Tire Pressure Monitor System TPMS consists of the following components Receiver Module Four Tire Pressure Monitoring Sensors Tire Pressure M...

Страница 353: ...es emitting the same Radio Frequencies as the TPM sensors 2 Installing some form of aftermarket window tinting that affects radio wave signals 3 Lots of snow or ice around the wheels or wheel housings...

Страница 354: ...nd off for 75 seconds and then remain on solid Once you repair or replace the original road tire and reinstall it on the vehicle in place of the spare tire the TPMS will update automatically and the T...

Страница 355: ...consid ering service for the vehicle Over 40 auto manufacturer s worldwide have issued and endorsed consistent gasoline specifications the World wide Fuel Charter WWFC to define fuel properties neces...

Страница 356: ...acturer While MTBE is an oxygenate made from Methanol it does not have the negative effects of Methanol E 85 Usage In Non Flex Fuel Vehicles Non FFV vehicles are compatible with gasoline contain ing 1...

Страница 357: ...that gasoline without MMT be used in your vehicle The MMT content of gasoline may not be indi cated on the gasoline pump therefore you should ask your gasoline retailer if the gasoline contains MMT It...

Страница 358: ...d as octane enhancers is not recommended Most of these products contain high concentrations of methanol Fuel system damage or vehicle performance problems resulting from the use of such fuels or addit...

Страница 359: ...prevent carbon monoxide and other poisonous exhaust gases from entering the vehicle ADDING FUEL Fuel Filler Cap Gas Cap The gas cap is located on the driver s side of the vehicle If the gas cap is los...

Страница 360: ...rly fitting aftermarket cap can cause the MIL to illuminate due to fuel vapors escaping from the system To avoid fuel spillage and overfilling do not top off the fuel tank after filling NOTE When the...

Страница 361: ...es the month day and hour of manufacture The bar code that appears on the bottom of the label is your VIN Gross Vehicle Weight Rating GVWR The GVWR is the total permissible weight of your vehicle incl...

Страница 362: ...ht of a vehicle is defined as the total weight of the vehicle with all fluids including vehicle fuel at full capacity conditions and with no occupants or cargo loaded into the vehicle The front and re...

Страница 363: ...uld cause you to lose control Also overloading can shorten the life of your vehicle TRAILER TOWING In this section you will find safety tips and information on limits to the type of towing you can rea...

Страница 364: ...ont and rear axles Distribute the load over the front and rear axles evenly Make sure that you do not exceed either front or rear GAWR WARNING It is important that you do not exceed the maximum front...

Страница 365: ...ufacturers directions it provides for a more level ride offering more consistent steering and brake control thereby enhancing towing safety The addition of a friction hydraulic sway control also dampe...

Страница 366: ...Max GTW towable for your given drivetrain Trailer Hitch Classification Definitions Class Max Trailer Hitch Industry Standards Class I Light Duty 2 000 lbs 907 kg Class II Medium Duty 3 500 lbs 1 587...

Страница 367: ...Wt See Note 3 8L Manual 3 21 2 Door X Model 4WD 5 049 lbs 2 290 kg 25 sq ft 2 32 sq m 1 000 lbs 453 kg 100 lbs 45 kg 3 8L Manual 3 73 2 Door X Model 4WD 6 049 lbs 2 744 kg 25 sq ft 2 32 sq m 2 000 lb...

Страница 368: ...2 sq m 2 000 lbs 907 kg 200 lbs 91 kg 3 8L Automatic 3 73 2 Door Sahara Model 4WD 6 233 lbs 2 827 kg 25 sq ft 2 32 sq m 2 000 lbs 907 kg 200 lbs 91 kg 3 8L Manual 4 10 2 Door Rubicon Model 4WD 6 365 l...

Страница 369: ...c 3 73 4 Door Sahara Model 2WD 7 893 lbs 3 580 kg 32 sq ft 2 97 sq m 3 500 lbs 1 587 kg 350 lbs 159 kg 3 8L Manual 3 21 4 Door X Model 4WD 5 431 lbs 2 463 kg 32 sq ft 2 97 sq m 1 000 lbs 453 kg 100 lb...

Страница 370: ...sq m 1 000 lbs 453 kg 100 lbs 45 kg 3 8L Manual 3 73 4 Door Sahara Model 4WD 8 125 lbs 3 685 kg 32 sq ft 2 97 sq m 3 500 lbs 1 587 kg 350 lbs 159 kg 3 8L Automatic 3 73 4 Door Sahara Model 4WD 8 127 l...

Страница 371: ...kg 32 sq ft 2 97 sq m 3 500 lbs 1 587 kg 350 lbs 159 kg Refer to local laws for maximum trailer towing speeds NOTE The trailer tongue weight must be considered as part of the combined weight of occupa...

Страница 372: ...can cause the trailer to sway severely side to side which will cause loss of control of vehicle and trailer Failure to load trailers heavier in front is the cause of many trailer accidents Consider t...

Страница 373: ...idelines are recom mended NOTE Trailer towing requires special rear axle lubri cant Refer to Fluids Lubricants and Genuine Parts in Section 7 for the correct fluid type CAUTION Avoid towing a trailer...

Страница 374: ...ing brake on the tow vehicle Put the tow vehicle automatic transmission in PARK With a manual transmission shift the transmis sion into 1st gear And with four wheel drive vehicles make sure the transf...

Страница 375: ...placement proce dures Replacing tires with a higher load carrying capacity will not increase the vehicle s GVWR and GAWR limits Towing Requirements Trailer Brakes Do not interconnect the hydraulic bra...

Страница 376: ...d have an accident Continued WARNING Continued Towing any trailer will increase your stopping distance When towing you should allow for ad ditional space between your vehicle and the ve hicle in front...

Страница 377: ...r to avoid excessive clutch slippage Automatic Transmission The DRIVE range can be selected when towing How ever if frequent shifting occurs while in this range the O D OFF feature should be selected...

Страница 378: ...y areas or shift the transmission to DRIVE position 2 on more severe grades Refer to Transmission Shifting in this section Electronic Speed Control If Equipped Do not use in hilly terrain or with heav...

Страница 379: ...wing Four Wheel Drive Models NOTE The transfer case must be shifted into N Neu tral automatic transmission must be shifted into PARK and manual transmission must be placed in gear not in NEUTRAL for r...

Страница 380: ...ansmission 4 Shift the transfer case lever into N Neutral 5 Start the engine 6 Shift the automatic transmission into DRIVE or the manual transmission into gear 7 Release the brake pedal and ensure tha...

Страница 381: ...ge 1 Turn the engine off 2 Shift the automatic transmission into NEUTRAL or press clutch pedal on a manual transmission 3 Shift the transfer case lever into the desired position 4 Start the engine 5 S...

Страница 382: ......

Страница 383: ...lasher 382 If Your Engine Overheats 382 Jacking And Tire Changing 383 Jack Location 384 Spare Tire Stowage 384 Preparations For Jacking 384 Jacking Instructions 385 Jump Starting 388 Emergency Tow Hoo...

Страница 384: ...ing flasher will continue to operate with the ignition key removed and the vehicle locked NOTE With extended use the Hazard Warning flasher may wear down your battery IF YOUR ENGINE OVERHEATS In any o...

Страница 385: ...in removing heat from the engine cooling system JACKING AND TIRE CHANGING WARNING Getting under a jacked up vehicle is dangerous The vehicle could slip off the jack and fall on you You could be crushe...

Страница 386: ...ockwise NOTE If you have added aftermarket accessories to the spare tire mounted carrier it cannot exceed a gross weight of 50 lbs 23 kg including the weight of the spare tire Preparations For Jacking...

Страница 387: ...remain in the vehicle when the vehicle is being jacked Jacking Instructions WARNING Carefully follow these tire changing warnings to help prevent personal injury or damage to your vehicle Always park...

Страница 388: ...e valve stem facing the ground Turn on the Hazard Warning flasher 1 Remove the spare tire jack and tools from the stored location 2 Loosen but do not remove the wheel lug nuts by turning them to the l...

Страница 389: ...g nuts and wheel 7 Position the spare wheel tire on the vehicle and install the lug nuts with the cone shaped end toward the wheel Lightly tighten the lug nuts clockwise To avoid the risk of forcing t...

Страница 390: ...in a start from a booster battery or the battery in another vehicle This type of start can be dangerous if done improperly so follow this procedure carefully WARNING Battery fluid is a corrosive acid...

Страница 391: ...he other end of the same cable to the positive terminal of the discharged battery WARNING Do not permit vehicles to touch each other as this could establish a ground connection and personal injury cou...

Страница 392: ...e by pushing or towing Do not connect the cable to the negative post of the discharge battery The resulting electrical spark could cause the battery to explode Continued WARNING Continued During cold...

Страница 393: ...mage your vehicle Tow straps are recommended when towing the vehicle chains may cause vehicle damage WARNING Stand clear of vehicles when pulling with tow hooks Tow straps and chains may break causing...

Страница 394: ......

Страница 395: ...pection And Maintenance Programs 397 Replacement Parts 398 Dealer Service 398 Maintenance Procedures 399 Engine Oil 400 Engine Oil Filter 402 Engine Air Cleaner Filter 403 Maintenance Free Battery 403...

Страница 396: ...ce Care And Protection From Corrosion 422 Fuses 430 Totally Integrated Power Module 430 Vehicle Storage 436 Replacement Bulbs If Equipped 437 Bulb Replacement 437 Headlamp 437 Front Park Turn Signal 4...

Страница 397: ...luid Reservoir 2 Battery 8 Engine Coolant Reservoir 3 Automatic Transmission Dipstick 9 Air Cleaner Filter 4 Engine Oil Fill 10 Coolant Pressure Cap 5 Engine Oil Dipstick 11 Power Steering Fluid Reser...

Страница 398: ...ally be drivable and not need towing see your authorized dealer for service as soon as possible CAUTION Prolonged driving with the Malfunction Indica tor Light on could cause further damage to the emi...

Страница 399: ...functioning and is not on when the engine is running and that the OBD II system is ready for testing Normally the OBD II system will be ready The OBD II system may not be ready if your vehicle was re...

Страница 400: ...would in order for your OBD II system to update A recheck with the above test routine may then indicate that the system is now ready Regardless of whether your vehicle s OBD II system is ready or not...

Страница 401: ...NANCE PROCEDURES The pages that follow contain the required maintenance services determined by the engineers who designed your vehicle Besides those maintenance items specified in the fixed maintenanc...

Страница 402: ...rication of your vehicle s engine the engine oil must be maintained at the correct level The best time to check the engine oil level is about five minutes after a fully warmed up engine is shut off or...

Страница 403: ...tion for all engines under all types of operating conditions the manufacturer recommends engine oils that are API Cer tified and meet the requirements of Chrysler Material Standard MS 6395 American Pe...

Страница 404: ...ed maintenance intervals for oil and filter changes are followed Materials Added to Engine Oils The manufacturer strongly recommends against the ad dition of any additives other than leak detection dy...

Страница 405: ...necessary for repair or maintenance Make sure that no one is near the engine compartment before starting the vehicle with the air cleaner removed Failure to do so can result in serious personal injur...

Страница 406: ...er to the battery Do not use a fast charger to provide starting voltage Air Conditioner Maintenance For best possible performance your air conditioner should be checked and serviced by an authorized d...

Страница 407: ...l and Refrigerants Refrigerant Recovery and Recycling R 134a Air Conditioning Refrigerant is a hydrofluoro carbon HFC that is endorsed by the Environmental Protection Agency EPA and is an ozone saving...

Страница 408: ...sher fluid when using the wipers to remove salt or dirt from a dry windshield Avoid using the wiper blades to remove frost or ice from the windshield Keep the blade rubber out of contact with petroleu...

Страница 409: ...on Exhaust System The best protection against carbon monoxide entry into the vehicle body is a properly maintained engine exhaust system If you notice a change in the sound of the exhaust system or if...

Страница 410: ...ant to keep the engine properly tuned to assure proper catalyst operation and prevent possible catalyst damage CAUTION Damage to the catalytic converter can result if your vehicle is not kept in prope...

Страница 411: ...tune up to manufacturer s specifica tions should be obtained immediately To minimize the possibility of catalytic converter dam age Do not shut off the engine or interrupt the ignition when the transm...

Страница 412: ...condenser if equipped or radiator for any accumulation of bugs leaves etc If dirty clean by gently spraying water from a garden hose vertically down the face of the A C con denser if equipped or the b...

Страница 413: ...ubricants and Genu ine Parts in this section for the correct fluid type CAUTION Mixing of engine coolant antifreeze other than the specified HOAT engine coolant antifreeze may result in engine damage...

Страница 414: ...ic Additive Technology HOAT engine coolant antifreeze When adding engine coolant antifreeze The manufacturer recommends using MOPAR Antifreeze Coolant 5 Year 100 000 Mile Formula HOAT Hybrid Organic A...

Страница 415: ...the cooling system pressure cap are a safety precaution Never add engine coolant antifreeze when the en gine is overheated Do not loosen or remove the cap to cool an overheated engine Heat causes pres...

Страница 416: ...endant of this As long as the engine operating temperature is satisfactory the coolant bottle need only be checked once a month When additional engine coolant antifreeze is needed to maintain the prop...

Страница 417: ...rosion protection of your engine which contains aluminum components Make sure that the radiator and coolant recovery bottle hoses are not kinked or obstructed Keep the front of the radiator clean If y...

Страница 418: ...ehicle is serviced If necessary add fluid to bring level to the full level mark on the side of the reservoir of the brake master cylinder With disc brakes fluid level can be expected to fall as the br...

Страница 419: ...ompresses This condition does not apply adequate pressure to the brakes to function properly Continued WARNING Continued Do not allow petroleum based fluid to contami nate the brake fluid all brake se...

Страница 420: ...transmission overheats a HOTOIL message will be displayed in the odometer and a chime will sound To properly check the automatic transmission fluid level the following procedure must be used 1 Operat...

Страница 421: ...C it may not register on the dipstick Do not add fluid until the temperature is elevated enough to produce an accurate reading 7 Check for leaks Release the parking brake NOTE To prevent dirt and wat...

Страница 422: ...fluid type Fluid Level Check Check the fluid level by removing the fill plug The fluid level should be between the bottom of the fill hole and a point not more than 3 16 in 4 76 mm below the bottom of...

Страница 423: ...replacing the plugs do not overtighten them You could damage them and cause them to leak Selection of Lubricant Use only manufacturer s recommended fluid Refer to Fluids Lubricants and Genuine Parts...

Страница 424: ...tighten if required to torque values specified in the Service Manual Also check for accumulations of vegetation or brush that could become a fire hazard or conceal damage to fuel lines brake hoses axl...

Страница 425: ...from your vehicle The most common causes are Road salt dirt and moisture accumulation Stone and gravel impact Insects tree sap and tar Salt in the air near sea coast localities Atmospheric fallout in...

Страница 426: ...e lower edges of the doors rocker panels and tailgate are kept clear and open If you detect any stone chips or scratches in the paint touch them up immediately The cost of such repairs is considered t...

Страница 427: ...tic car washes that use acidic solutions or harsh brushes that may damage the wheels protective finish Stain Repel Fabric Cleaning Procedure If Equipped Stain Repel seats may be cleaned in the followi...

Страница 428: ...CAUTION When installing hanging air fresheners in your ve hicle read the installation instructions carefully Some air fresheners will damage the finish of painted or decorated parts if allowed to dire...

Страница 429: ...If the belts need cleaning use MOPAR Total Clean a mild soap solution or lukewarm water Do not remove the belts from the vehicle to wash them Replace the belts if they appear frayed or worn or if the...

Страница 430: ...aterial Continued CAUTION Continued Avoid high pressure car washes as they can dam age the top material Also increased water pres sure may force past the weather strips It is recommended that the top...

Страница 431: ...ater then wipe with a soft and slightly moist clean cloth 4 When removing frost snow or ice never use a scraper or de icing chemicals Use warm water only if you must clean the window quickly 5 Debris...

Страница 432: ...nd may dam age the windows FUSES Totally Integrated Power Module The Totally Integrated Power Module TIPM is located in the engine compartment near the battery This center contains cartridge fuses min...

Страница 433: ...el J10 30 Amp Pink Headlamp Wash Relay Manifold Tuning Valve J11 30 Amp Pink Sway Bar J13 60 Amp Yellow Ignition Off Draw IOD Main Cavity Cartridge Fuse Mini Fuse Description J14 40 Amp Green EBL Rear...

Страница 434: ...TT ACC SELECT M8 20 Amp Yellow Front Heated Seat M9 20 Amp Yellow Rear Heated Seat If Equipped Cavity Cartridge Fuse Mini Fuse Description M10 20 Amp Yellow Ignition Off Draw Vehicle Entertainment Sys...

Страница 435: ...er Tow Export Only Cavity Cartridge Fuse Mini Fuse Description M15 20 Amp Yellow COL MOD IR SNS Heater Ventilation Air Conditioning Automatic Temperature Control HVAC ATC Rear View Mirror RR VW MIR Ca...

Страница 436: ...ue Cabin Compartment Node Interior Light CCN INT LIGHT Switch Bank SW BANK M21 20 Amp Yellow Auto Shut Down ASD 3 Cavity Cartridge Fuse Mini Fuse Description M22 10 Amp Red Right Horn RT HORN HI LOW M...

Страница 437: ...ne Controller GPEC M34 10 Amp Red Park Assist PRK ASST Heater Ventila tion Air Conditioning Module HVAC MOD Headlamp Wash HDLP WASH Com pass COMPAS Cavity Cartridge Fuse Mini Fuse Description M35 10 A...

Страница 438: ...it that must be corrected VEHICLE STORAGE If you are leaving your vehicle dormant for more than 21 days you may want to take steps to protect your battery You may Remove Cartridge fuse 15 in the Power...

Страница 439: ...ommercial bulb types that can be purchased from your local authorized dealer If a bulb needs to be replaced visit your authorized dealer or refer to the applicable Service Manual BULB REPLACEMENT NOTE...

Страница 440: ...lock position CAUTION Do not touch the new bulb with your fingers Oil contamination will severely shorten bulb life If the bulb comes in contact with any oily surface clean the bulb with rubbing alcoh...

Страница 441: ...erneath 2 Turn the bulb 1 4 turn counterclockwise CAUTION Do not touch the new bulb with your fingers Oil contamination will severely shorten bulb life If the bulb comes in contact with any oily surfa...

Страница 442: ...The stop lamp is mounted on a bracket that extends upward from the tailgate behind the spare tire If service is needed obtain the LED Cover Assembly from your local authorized dealer 1 Remove the spar...

Страница 443: ...or Models 22 5 Gallons 85 Liters Engine Oil with Filter 3 8 Liter Engine 6 Quarts 5 7 Liters Cooling System 3 8 Liter Engine MOPAR Antifreeze Engine Coolant 5 Year 100 000 Mile Formula or equivalent 1...

Страница 444: ...Hybrid Organic Additive Technology Engine Oil Use API Certified SAE 5W 20 Engine Oil meeting the requirements of Chrysler Material Standard MS 6395 Refer to your engine oil filler cap for correct SAE...

Страница 445: ...API GL 5 or equivalent Axle Differential Rear 226 RBI Model 44 MOPAR Gear Axle Lubricant SAE 80W 90 API GL 5 or equivalent For trailer towing use MOPAR Synthetic Gear Axle Lubricant SAE 75W 140 or equ...

Страница 446: ......

Страница 447: ...MAINTENANCE SCHEDULES CONTENTS Emissions Control System Maintenance 446 Maintenance Schedule 446 Required Maintenance Intervals 448 8 M A I N T E N A N C E S C H E D U L E S...

Страница 448: ...omotive part that has been certified pursuant to U S EPA or in the State of Califor nia California Air Resources Board regulations MAINTENANCE SCHEDULE The oil change indicator system will remind you...

Страница 449: ...Cluster Description section of this manual At Each Stop for Fuel Check the engine oil level about five minutes after a fully warmed engine is shut off Checking the oil level while the vehicle is on le...

Страница 450: ...nd lines Check the manual transmission fluid level CAUTION Failure to perform the required maintenance items may result in damage to the vehicle Required Maintenance Intervals Refer to the Maintenance...

Страница 451: ...of the following Dusty or off road conditions Inspect the engine air cleaner filter replace if necessary Inspect the brake linings replace if necessary Inspect exhaust system Perform the first inspec...

Страница 452: ...Schedule Change the engine oil and engine oil filter Rotate tires If using your vehicle for any of the following Dusty or off road conditions Inspect the engine air cleaner filter replace if necessar...

Страница 453: ...for any of the following trailer towing snow plowing heavy loading taxi police delivery service commercial service off road desert operation or more than 50 of your driving is at sustained high speeds...

Страница 454: ...police taxi fleet off road or frequent trailer towing Inspect the front suspension tie rod ends and boot seals for cracks or leaks and all parts for damage wear improper looseness or end play replace...

Страница 455: ...s for cracks or leaks and all parts for damage wear improper looseness or end play replace if necessary Odometer Reading Date Repair Order Dealer Code Signature Authorized Chrysler Dealer 54 000 Miles...

Страница 456: ...0 F 32 C Change the automatic transmission fluid and main sump filter if using your vehicle for any of the following police taxi fleet or frequent trailer towing Change the transfer case fluid if usin...

Страница 457: ...or off road conditions Inspect the engine air cleaner filter replace if necessary Inspect the brake linings replace if necessary Inspect the front rear axle fluid change if using your vehicle for poli...

Страница 458: ...ilter Rotate tires If using your vehicle for any of the following Dusty or off road conditions Inspect the engine air cleaner filter replace if necessary Inspect the brake linings replace if necessary...

Страница 459: ...snow plowing heavy loading taxi police delivery service commercial service off road desert operation or more than 50 of your driving is at sustained high speeds during hot weather above 90 F 32 C Ins...

Страница 460: ...als for cracks or leaks and all parts for damage wear improper looseness or end play replace if necessary Odometer Reading Date Repair Order Dealer Code Signature Authorized Chrysler Dealer 102 000 Mi...

Страница 461: ...police taxi fleet off road or frequent trailer towing Inspect the front suspension tie rod ends and boot seals for cracks or leaks and all parts for damage wear improper looseness or end play replace...

Страница 462: ...ge the transfer case fluid if using your vehicle for any of the following police taxi fleet off road or frequent trailer towing Change the manual transmission fluid if using your vehicle for any of th...

Страница 463: ...enance Service Schedule Change the engine oil and engine oil filter Rotate tires If using your vehicle for any of the following Dusty or off road conditions Inspect the engine air cleaner filter repla...

Страница 464: ...y or off road conditions Inspect the engine air cleaner filter replace if necessary Inspect the brake linings replace if necessary Inspect the front rear axle fluid change if using your vehicle for po...

Страница 465: ...for any of the following trailer towing snow plowing heavy loading taxi police delivery service commercial service off road desert operation or more than 50 of your driving is at sustained high speed...

Страница 466: ...ork for which you have the knowledge and the right equipment If you have any doubt about your ability to perform a service job take your vehicle to a competent mechanic Failure to properly inspect and...

Страница 467: ...u Need Assistance 467 Chrysler LLC Customer Center 468 Chrysler Canada Inc Customer Center 468 In Mexico Contact 468 Customer Assistance For The Hearing Or Speech Impaired TDD TTY 469 Service Contract...

Страница 468: ...Department Of Transportation Uniform Tire Quality Grades 473 Treadwear 473 Traction Grades 473 Temperature Grades 474 466 IF YOU NEED CONSUMER ASSISTANCE...

Страница 469: ...nd of the day discuss the situation with the service advisor and list the items in order of priority At many authorized dealers you may obtain a rental vehicle at a minimal daily charge If you need a...

Страница 470: ...ion to the manufacturer s customer cen ter should include the following information Owner s name and address Owner s telephone number home and office Authorized dealership name Vehicle Identification...

Страница 471: ...gh cost of unexpected repairs after the manufacturer s New Vehicle Limited Warranty expires The manufacturer stands behind only the manufacturer s service contracts If you purchased a manufacturer s s...

Страница 472: ...nent wear contain or emit chemi cals known to the State of California to cause cancer and birth defects or other reproductive harm WARRANTY INFORMATION U S Vehicles Only See the Warranty Information B...

Страница 473: ...about motor vehicle safety from http www safercar gov In Canada If you believe that your vehicle has a safety defect you should contact the Customer Service Department imme diately Canadian customers...

Страница 474: ...echnicians to find and fix problems on computer controlled ve hicle systems and features They show exactly how to find and correct problems the first time using step by step troubleshooting and drivab...

Страница 475: ...imes as well on the government course as a tire graded 100 The relative performance of tires depends upon the actual conditions of their use however and may depart significantly from the norm due to v...

Страница 476: ...d to sudden tire failure The grade C corresponds to a level of performance which all passenger car tires must meet under the Federal Motor Vehicle Safety Standard No 109 Grades B and A repre sent high...

Страница 477: ...INDEX 10...

Страница 478: ...ag Maintenance 57 Airbag Side 54 Alarm Light 204 Alarm Security Alarm 17 Alterations Modifications Vehicle 8 Antenna Satellite Radio 257 Antifreeze Engine Coolant 441 Anti Lock Brake System ABS 314 31...

Страница 479: ...Recommendations New Vehicle 72 Bulb Replacement 437 Bulbs Light 75 Capacities Fluid 441 Caps Filler Fuel 357 Power Steering 312 Car Washes 423 Carbon Monoxide Warning 73 356 Cargo Light 96 Cargo Vehi...

Страница 480: ...Flush and Refill 411 Inspection 410 Points to Remember 414 Pressure Cap 413 Selection of Coolant Antifreeze 411 441 Corrosion Protection 422 Cruise Light 205 Cupholders 107 Customer Assistance 467 Da...

Страница 481: ...Electronic Stability Program 322 Traction Control System 317 Electronic Roll Mitigation ERM 321 Electronic Speed Control Cruise Control 102 Electronic Stability Program ESP 322 Electronic Throttle Co...

Страница 482: ...xhaust Gas Caution 73 356 Exhaust System 73 407 Extender Seat Belt 47 Exterior Finish Care 423 Exterior Lights 75 Fabric Care 426 427 Fabric Top 427 Filters Air Cleaner 403 Engine Oil 402 Finish Care...

Страница 483: ...355 Octane Rating 353 Requirements 441 Tank Capacity 441 Fuel System Caution 356 358 Fuses 430 Gas Cap Fuel Filler Cap 357 396 Gasoline Fuel 353 Gasoline Reformulated 353 Gasoline Oxygenate Blends 354...

Страница 484: ...107 Hood Release 93 Hydraulic Clutch Fluid 420 Ignition 12 Key 12 Ignition Key Removal 12 Illuminated Entry 19 Immobilizer Sentry Key 14 Infant Restraint 60 Inflation Pressure Tires 340 Inside Rearvi...

Страница 485: ...hes 75 Lead Free Gasoline 353 Leaks Fluid 75 Light Bulbs 75 Lights 75 94 Airbag 57 74 203 Alarm 204 Anti Lock 203 Anti Lock Warning 203 Back Up 439 Brake Assist Warning 210 328 Brake Warning 201 Bulb...

Страница 486: ...r 201 Security Alarm Theft Alarm 204 Service 437 Side Marker 439 Theft Alarm Security Alarm 204 Tire Pressure Monitoring TPMS 206 Traction Control 210 Turn Signal 75 96 201 438 439 Voltage 200 Warning...

Страница 487: ...ressure System 347 Mopar Parts 398 470 Multi Function Control Lever 94 New Vehicle Break In Period 72 Occupant Restraints 38 Octane Rating Gasoline Fuel 353 Odometer 207 Trip 206 207 Off Pavement Driv...

Страница 488: ...23 Power Door Locks 32 Steering 311 312 Windows 34 Pregnant Women and Seat Belts 47 Preparation for Jacking 384 Pretensioners Seat Belts 45 Radial Ply Tires 343 Radio Operation 261 Radio Satellite uco...

Страница 489: ...4 Restraints Occupant 38 Rotation Tires 347 Safety Checks Inside Vehicle 74 Safety Checks Outside Vehicle 75 Safety Defects Reporting 470 Safety Exhaust Gas 73 Safety Information Tire 330 Safety Tips...

Страница 490: ...eplacement 15 Service Assistance 467 Service Contract 469 Service Manuals 471 Setting the Clock 218 232 236 245 Shift Lock Manual Override 284 Shifting 283 Automatic Transmission 285 Manual Transmissi...

Страница 491: ...Bar Disconnect Electronic 295 Swing Gate Rear 36 System Remote Starting 24 Tachometer 204 Temperature Gauge Engine Coolant 204 Tether Anchor Child Restraint 65 Theft System Arming 18 Theft System Disa...

Страница 492: ...r Clutch 289 Tow Hooks Emergency 391 Towing 361 391 Disabled Vehicle 391 Guide 365 Recreational 377 Weight 365 Trac Lok Rear Axle 293 Traction Control 317 Traction Control Light 210 Trailer Sway Contr...

Страница 493: ...s 473 Upholstery Care 426 Vehicle Certification Label 359 Vehicle Identification Number VIN 8 Vehicle Loading 336 359 Vehicle Modifications Alterations 8 Vehicle Storage 270 436 Viscosity Engine Oil 4...

Страница 494: ...Windshield Folding 185 Windshield Washers 98 406 Fluid 406 Windshield Wiper Blades 406 Windshield Wipers 98 Wiper Rear 192 492 INDEX...

Страница 495: ...nection This connection should not be fused Antennas for two way radios should be mounted on the roof or the rear area of the vehicle Care should be used in mounting antennas with magnet bases Magnets...

Страница 496: ......
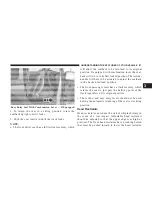
Отзывы: