


7 HomeRunner RBI User Manual – Rev 1.03a
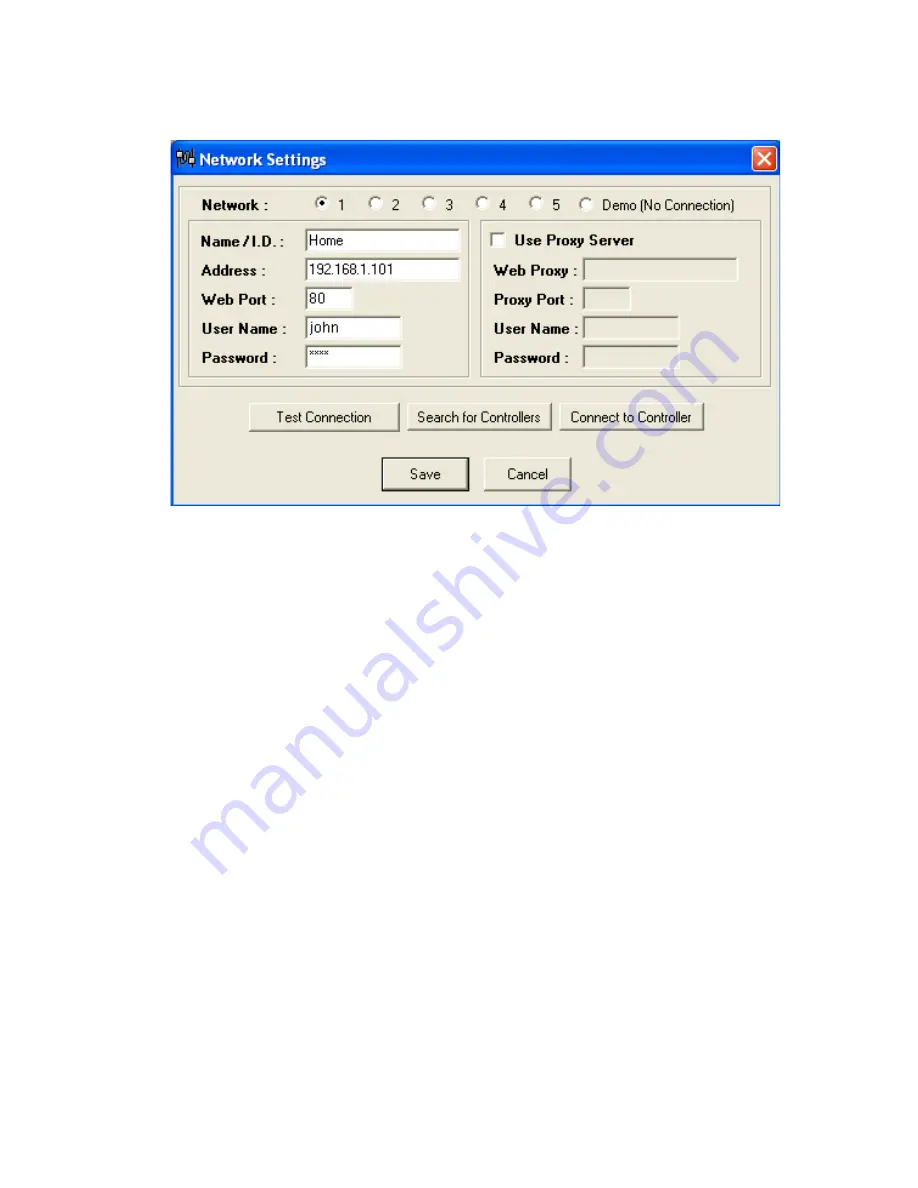
Network Settings
The first thing you will need to set is the IP address of your
H
ome
R
unner RBI controller.
1.
Click the
Network
button on the toolbar or press
“Ctrl+K”
on your keyboard to access the
Network Settings window.
2.
Select
Network 1
then click
“Search for Controllers”
to identify the IP address of your
HomeRunner RBI
. Enter a
Name/I.D.
(i.e. Home) for reference. You can also manually enter
your
HomeRunner RBI
controller’s IP Address, Web port (default = 80), and User Name /
Password (default = Home / Runner) if you know them.
3.
Click
"Test Connection"
to confirm that you have entered the correct information and to
verify a successful connection.
HomeRunner RBI
can store up to 5 different network settings (plus one “Demo” setting) which can
be selected either through the Network Settings screen or from actions assigned to user created
buttons. Each setting can be given an optional name (i.e. Home, Office, etc.) and must contain the IP
address of the
HomeRunner RBI
, including the web port (typically port 80) and the User Name and
Password. If you are accessing your
HomeRunner RBI
from behind a proxy server, check the "Use
Proxy Server" box and enter the appropriate proxy server information. The “Demo” setting can be
used to demonstrate the
HomeRunner RBI
software application without actually controlling devices
or connecting to the
HomeRunner RBI
controller.
HomeRunner RBI
uses standard HTTP requests
(the same way a web browser is used to access the
HomeRunner RBI
) to perform most functions and
any settings required for your web browser to connect to the
HomeRunner RBI
would need to be
specified here as well.


