72
AUDIO CLOCK SETUP
Audio clock setup is available through the Advanced Settings interface of the SDP-75.
To access the clock settings page:
1.
Click on the
Gears
button
in the top menu to open the Advanced Settings user interface.
2.
Go to the
Setup/Clock
tab of the graphical user interface.
The
Clock
page of the
Setup
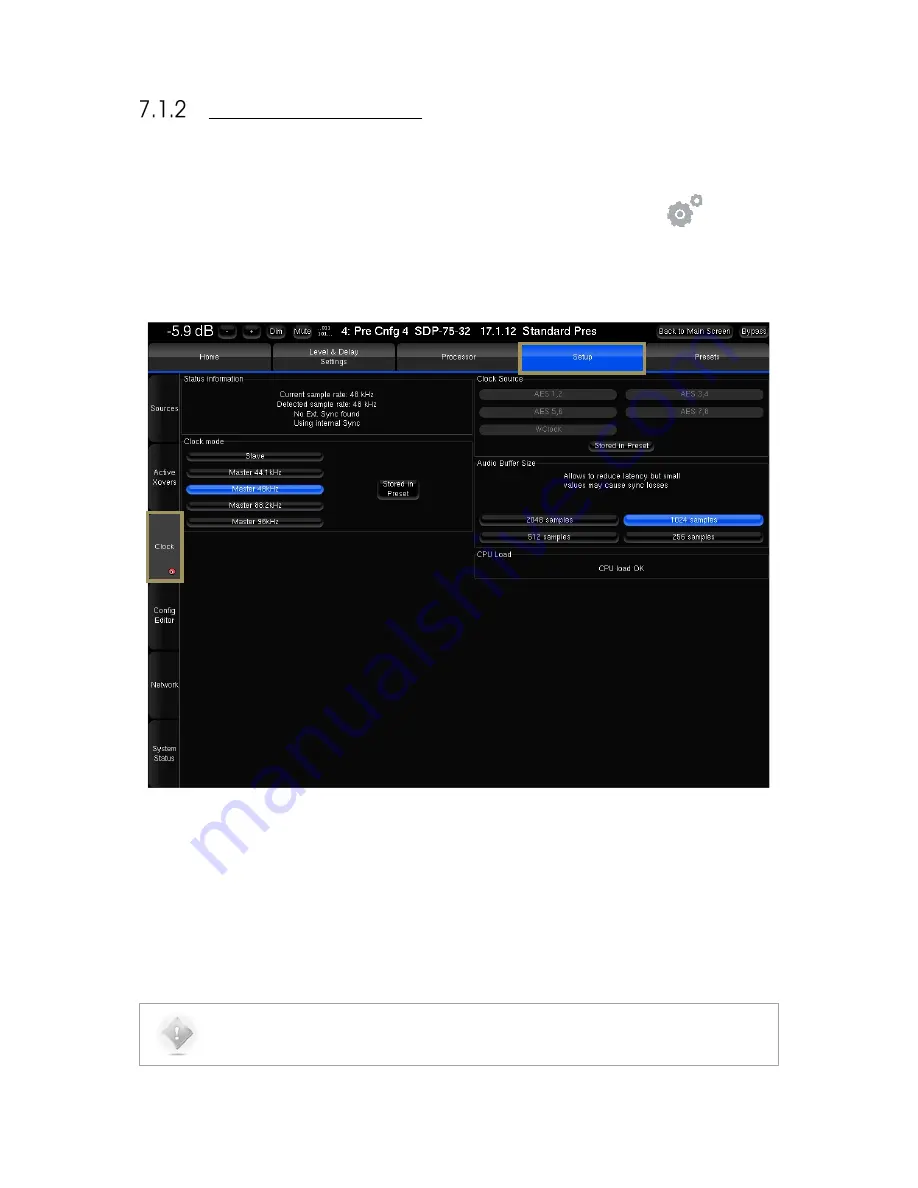
tab includes all the clock settings:
Figure 49: Clock settings page in the Advanced Settings
The
Setup/Clock
page includes:
•
Status Information:
the same information provided in the Clock page of the main user interface.
•
Clock Mode:
slave or master modes.
•
Clock Source:
one of the digital inputs or the internal Word Clock of the SDP-75.
•
Audio Buffer Size:
different buffer sizes, used to reduce latency. The buffer can be reduced to 512 samples to
reduce audio latency, but this may cause sync problems. Only recommended for advanced users.
NOTE:
Default buffer size is 1024 samples. It is recommended to keep this value to avoid any problems.
Содержание SDP-75
Страница 1: ...v 4 0 SDP 75 3D SURROUND PROCESSOR USER MANUAL...
Страница 2: ...1...
Страница 3: ...2 SDP 75 USER GUIDE Software version v4 0 Last update August 2 2017...
Страница 4: ......
Страница 81: ...80 Figure 57 Focusing on specific graphs...
Страница 110: ...109 Figure 73 Microphone reference position Point the front red LED to the center of the speakers...
Страница 130: ...129 Figure 95 Access to the Bass Management options...
Страница 155: ...154 CONNECTION ORDER...
Страница 156: ...155 Thankyouforyourattention PleaseenjoyyourSound...
Страница 157: ...156...


