10
1
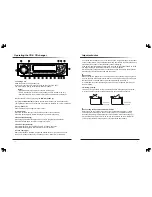
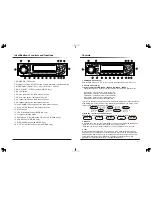
. Manual/Seek tuning buttons (15):
Press this button quickly to activate the Seek
mode. The Seek mode will automatically seek and stop at the next station of sufficient
signal strength. Press and hold tuning buttons for 2 seconds to enter manual tuning
mode. The unit will revert back to Seek mode after 10 seconds without use.
2. Manual Station store:
Select the desired band and tune to a radio station to be
memorized. Choose the preset button memory location span 1-6 into which the station
is to be stored and press and hold that preset button for 2 seconds.
The station will now be entered into the preset memory. 6 stations can be memorized
on each of the FM1, FM2, FM3, AM1, AM2.
3. A.PS - Auto store function (18)
Press and hold button (18) for approximately 2 seconds until you hear a beep which
confirms the memory function is engaged. The unit will "SEARCH" for six strong
stations and automatically store them on buttons 1 - 6.
You can override the preset station on any button by manually setting a new frequency.
4. Scan (16)
In Radio mode, press the SCAN (16) button to scan strong stations for previewing.
At the desired station press the "SCAN (16)" button again to stop scanning.
5. Program Memory Scan
Momentarily press A.PS and the unit will scan for stored stations.
Momentarily press it again to stop scanning.
Station Tuning
4
2
5
13
3
6
1
7
8
9
10
11
12
14
15
17
18
16
8.DIS
9.
A
.P
S
PWR
2 INT
3 RPT
4 RDM
1
5
MODE
7.SCN
FLIP DOWN / COMPACT DISC PLAYER HI - POWER 4x45Watts
MR-17.3
0. LD
MUT
6
SH.
SR
BD/FN
MARINE
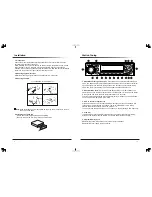
1. Precautions
Choose the mounting location carefully so that the unit will not interfere with the
normal driving functions of the boat.
Avoid installing the unit where it would be subject to high temperature, such as from
direct sunlight or hot air, or where it would be subject to dust, dirt or excessive
vibration. Use only the supplied mounting hardware for a safe and secure installation.
Be sure to remove the front panel before installing the unit.
2. Mounting angle adjustment
Adjust the mounting angle to less than 20 degrees from horizontal.
3. Mounting example
<< Installation in the cabinet >>
Note:
Keep the release key in a safe place as you may need it in future to remove
the unit from the boat.
Installation
1
2
4
Release Key
Half Cabinet
Tap
Bend these claws, if necessary.
3
4. Attaching the Trim Ring
- Attach the Trim Ring to the Radio after installing.
- Be sure to insert the Trim Ring in the correct direction.
5


