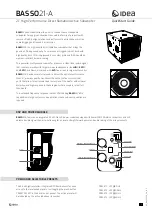
4
Powered Subwoofer
SUB 6/10
TEST PROCEDURE
Equipment Needed:
n
Function generator/signal
generator/sweep generator
n
Integrated Amplifier
n
Multimeter
n
Cables - Line level (RCA) and Speaker cables
UUT = Unit Under Test
General Function
1. Connect both left and right line level inputs (RCA) to
signal generator and UUT. When using a mono
source make sure the cable is inserted into the right
input jack and the “mono/stereo” switch is set to
“mono”. Turn Frequency Response control to
maximum (300 Hz).
2. Turn on generator and adjust to
50mV, 50 Hz.
3. Plug in UUT; red LED should be ON. Turn volume
knob full clockwise to turn unit ON for maximum
output.
4. Green LED should light, immediate bass response
should be heard and felt from port tube openings.
5. Turn off generator, turn volume knob all the way
down to OFF, disconnect RCA cables.
6. Connect two pairs of speaker cables to high level
input terminal on UUT. Cables should be connected
to an integrated amplifier fed by the signal generator.
Observe polarity of speaker cables.
7. Turn on generator and adjust so that speaker level
output is
1.2V, 50 Hz
.
8. Turn volume knob full clockwise to turn unit ON for
maximum output.
9. Green LED should light, immediate bass response
should be heard and felt from port tube opening.
Sweep Function
1. Follow steps 1-4 above, using a sweep generator
as a signal source.
2. Sweep generator from
20Hz to 300Hz
. Listen to the
cabinet and drivers for any rattles, clicks, buzzes or
any other noises. If any noises are heard, remove
driver and test.
Driver Function
1. Carefully pry metal grille out of its recess with a
sharp pointed instrument - USE CAUTION. Remove
all 8-32 x 2” Philips mounting screws; remove woofer
and detach both terminals.
2. Check DC resistance of driver; it should be
Sub6 = 3.4 ohms, Sub10 = 3.0 ohms
.
3. Connect a pair of speaker cables to driver terminals.
Cables should be connected to an integrated
amplifier fed by a signal generator. Turn on
generator and adjust so that speaker level output
is
5.0V
.
4. Sweep generator from
20Hz to 1kHz
. Listen to
driver for any rubbing, buzzing or other unusual
noises.
SUB6/10 POWERED SUB WOOFER TEST SETUP
Содержание CONTROL SUB 6
Страница 6: ...5...
Страница 7: ...6 Powered Subwoofer SUB 6 10 SUB 6 10 EXPLODED ASSEMBLY VIEW refer to pages 7 and 10...
Страница 8: ...7...
Страница 9: ...8...
Страница 16: ...SUB 6 10 PACKAGING VIEW Control Sub 6 10 15...
Страница 17: ...PRINTED CIRCUIT BOARDS 1 Control Sub 6 10 16...
Страница 18: ...PRINTED CIRCUIT BOARDS 2 Control Sub 6 10 17...
Страница 19: ...PRINTED CIRCUIT BOARDS 3 Control Sub 6 10 18...
Страница 20: ...INTEGRATED CIRCUIT DIAGRAM Control Sub 6 10 19...
Страница 21: ...INTEGRATED CIRCUIT DIAGRAM Control Sub 6 10 20...
Страница 22: ...21...
Страница 23: ...SUB6 WIRING DIAGRAM Control Sub 6 10 22...
Страница 24: ...SUB10 WIRING DIAGRAM Control Sub 6 10 23...
Страница 25: ...2 1 P U SUB 6 10 SCHEMATIC DIAGRAM Control Sub 6 10 24...
Страница 26: ...25...
Страница 27: ...26...