manualshive.com logo in svg
background image

INSTALLATION 

WARNING:

Playing loud music in

an automobile can hinder your ability
to hear traffic and permanently dam-
age your hearing. We recommend 
listening at low or moderate levels
while driving your car. JBL accepts 
no liability for hearing loss, bodily
injury or property damage resulting
from the use or misuse of this product.

INSTALLATION 
WARNINGS AND TIPS:

• Always wear protective eyewear 

when using tools.

• Disconnect the vehicle’s negative (–) 

battery terminal before starting the 
installation.

• Check clearances on both sides of 

a planned mounting surface. Be 
sure that screws or wires will not 
puncture brake lines, fuel lines or 
wiring harnesses, and that wire 
routing will not interfere with the safe
operation of the vehicle.

• When making electrical connections, 

make sure they are secure and 
properly insulated.

• If BassPro II’s fuse must be replaced, 

be sure to use the same type of fuse 
and current rating as that of the 
original.

CHOOSING A MOUNTING
LOCATION FOR
BASSPRO II:

Choose a mounting location that 
doesn’t interfere with cargo, the fold-
down rear seat or the trunk lid. The
best location is usually a corner of 
the trunk or cargo area, as shown 
in 

Figures 1 and 2.

Securely mount BassPro II to the 
mounting surface using the four
enclosed self-tapping screws.
Choose a mounting location in the 
front of the vehicle for the remote 
level control.

Figure 1.

Figure 2.

Figure 3. 

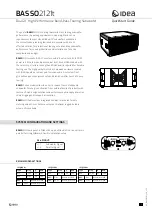
Bottom view of BassPro II.

2

Содержание BassProTM II

Страница 1: ...nstructions explain how to install BassPro II in a general sense they do not show specific installation methods that may be required for your particular vehicle If you do not have the necessary tools...

Страница 2: ...ure brake lines fuel lines or wiring harnesses and that wire routing will not interfere with the safe operation of the vehicle When making electrical connections make sure they are secure and properly...

Страница 3: ...ter knob and connector as a single assembly Choose a mounting location that allows easy access to the control and provides 1 3 4 clearance behind the mounting surface Drill a 9 32 hole in the mounting...

Страница 4: ...of the bat tery s positive terminal BassPro right side panel Chassis Ground Bare Metal Source Unit Battery Fuse 20 A 18 Remote Turn On Route all power wires through a grom met in the vehicle s firewa...

Страница 5: ...ot supplied Splices not supplied Figure 9 Line level connections with two outputs single full range or subwoofer Figure 8 High level connections Connect BassProII s high level inputs to either the fro...

Страница 6: ...ste and to avoid audible distortion 6 If you elect not to install the Remote Bass Control adjust the GAIN control to the maximum level that provides undistorted output from the BassProII with the head...

Страница 7: ...to feed audio signals to BassProII 3 Incorrect GAIN control setting Output sounds muddy or distorted 1 GAIN is set too high 2 Bass level is set too high on head unit 3 Head unit output is distorted or...

Страница 8: ...Declaration of Conformity We Harman Consumer International 2 route de Tours 72500 Chateau du Loir France declare in own responsibility that the product described in this owner s manual is in complian...

Отзывы: