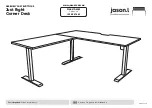


C
A
2
3
C
x6
A
5 x5
1
9
2.5x2.5
A
7
6
1
4
1
3
D
x16
D
12
5
A
4 x4
G
4
2
10
2
4
3
13
A
5
4
A
7
6
G
G
A
A
9
STEP3
STEP4
STEP5
STEP6
Install Transmission Rod
Unscrew
Insert
Tighten
Spin
Unscrew
Insert
Insert
Insert
Tighten
Spin
The rotation angle should not exceed
one third of a turn.
Insert the long and short transmission rods (6) (7) into the left, middle
and right columns (1) (2) (3) respectively, and use the 2.5 x 2.5 allen
key (A) to screw the long and short transmission rods (6) (7) .
Install Supporting Plates
Connect the long supporting plate (9) to the columns (1) (3), connect the short
supporting plate(10) to the column(2). fix them with the screw (C) and tighten the
screw by 5X5 allen key(A).
Install Tabletop, Control Box
and Handset
Not provided
Adjust the length of the beam (4) (5) according
to the size of the table board
The distance between the two sides
shall not be longer than 200 mm
Connect the tabletop and the handset (13) with screws (D),
fix the control box (12)on the tabletop with its own screws,
and tighten it with a pistol drill.
The control box shall be placed
near the middle of the table to
ensure that the motor wire can be
connected to the control box.
Tighten the Beam Screw and the
Drive Rod Nut
Use the 4 x 4 allen key (A) to tighten the 8 screws on the long
and short beams (4) (5), and use the nut wrench (G) to tighten
the nuts on the long and short transmission rods (6) (7).
Self-owned
screw
Page 3 of 4


