manualshive.com logo in svg
background image

Programmable Keyboard

SERIES JP8031

OPERATION

MANUAL

ISO 9002 Certified

Lead with technology

Win customers with service

Содержание JP8031 series

Страница 1: ...Programmable Keyboard SERIES JP8031 OPERATION MANUAL ISO 9002 Certified Lead with technology Win customers with service...

Страница 2: ......

Страница 3: ...opied in whole or in part without the written consent of Jarltech Every effort has been made to ensure that the information in this manual is accurate Jarltech is not responsible for printing or cleri...

Страница 4: ......

Страница 5: ...t interference by one or more of the following measures Reorient or relocate the receiving antenna Increase the separation between the equipment and receiver Connect the equipment into an outlet on a...

Страница 6: ...6...

Страница 7: ...Your 8031 3 Programming Your Keyboard 2 Preparation for Programming 1 Before You Install Contents Appendix I Keyboard Layout Appendix II Specifications Appendix III Scan Code mode and ALT mode Appendi...

Страница 8: ...8...

Страница 9: ...oard layout key functions and key data strings are completely programmable Each keyboard is capable of two concurrent keyboard maps with switching between the maps controlled by one designated key Go...

Страница 10: ...ng list Before You Install Please ensure that your keyboard shipment is complete Jarltech keyboard Model 8031 includes 1 pce 8031 programmable keyboard 1 pce Operation Manual 1 pce keyboard wedge Y ca...

Страница 11: ...that it conforms with the specifications listed in Appendix II and then go to Step 4 Step 3 Using internal power source This chapter describes the connection of Jarltech Series 8031 keyboards to a ho...

Страница 12: ...munication port on your computer Provide power to the DC jack on the DB9F connector using either a cable connection to the 12V DC power plate or an external adapter Connect the 9 pin female DB9M side...

Страница 13: ...your computer to avoid any accidental damage to the keyboard Refer to the keyboard installation shown in Diagram 2 2 Unplug the QWERTY keyboard cable from your computer Plug the QWERTY keyboard cable...

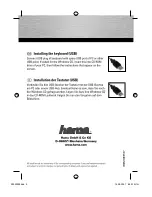
Страница 14: ...14 Preparation for Programming Diagram2 2 Keyboard Port...

Страница 15: ...ey allows length 60 characters It also a multi language supported keyboard Download the programming tool from Jarltech web site HTTP WWW JARLTECH COM Then run setup exe of the setup file the install s...

Страница 16: ...owing the main item includes Create Load Save Auto Save function for creating a new map file load map file from a created file and also save defined file to a file The using file will be show on the b...

Страница 17: ...in RS232 mode Step4 Detect Firmware Version This select allows user detect JP 8031 firmware and it can only be executing via RS232 mode Step5 Reset JP 8031 ToDefault Setting The select allows user re...

Страница 18: ...board setting See picture 3 3 In the JP 8031 Main Settings as picture shown at bellowing customer may set all configuration items of the keyboard The results will be shows as a list on the first progr...

Страница 19: ...the output data from 8031 will go through the interface which is selected by user Buzzer Sound When Buzzer Sound is enabled it s enabled all sound of JP 8031 Keyboard which includes key sound card rea...

Страница 20: ...rate and the RS232 parameters are required for the proper functioning of both the host and the auxiliary RS232 port Step6 2 MSR setting See picture 3 4 The setting allows user defining MSR settings i...

Страница 21: ...able AUX port1 AUX port 2 Buffer full warning sounds When buffer queues with full data and couldn t send them out system will give beeps for warning Step6 4 Prefix Suffix See Picture 3 6 This setting...

Страница 22: ...MSR ISO Standard Field Splitting See Picture 3 7 The setting allows user define configuration of MSR ISO Standard Field Splitting The default settings are disable ProgrammingYourKeyboard Picture3 6 P...

Страница 23: ...ion EX The levels of key lock when the setting is enabled Step6 8 Keyboard Layout Scan Code See picture 3 8 The setting allows user define Key board scan code layout of each language Please select lan...

Страница 24: ...peating speed Step7 4 Map Changing The 8031 has two maps for designs This keyboard allows use defining a key to switch maps once a key be enabled for map changing function then the keyboard map will b...

Страница 25: ...l 1 and level 2 Note Jarltech JP 8031 allow user setting key lock with 6 level key lock Step7 8 Current String Property The field allows use key in characters or string to be contents of one key i e w...

Страница 26: ...it your expect In keyboard mode the capital characters cannot be type on the field and you may click Shift ON before the string to set them on ie shift on abcd shift off abcd The result will be ABCDab...

Страница 27: ...27 Picture 3 9 ProgrammingYourKeyboard...

Страница 28: ...for record There are two interfaces for 8031 programming You may select keyboard interface when you are working with Windows 95 98 ME and ensured connected Keyboard to 8031 Another interface is RS232...

Страница 29: ...and maps to be new keyboard setting and map and they are including maps configuration The following window will appear when you selected this item and after you press Start button the 8031 programming...

Страница 30: ...match the interface you require Step 1 Connect 8031 to computer The Jarltech keyboard connections for RS232 or keyboard wedge interface are the same as those described in Chapter 2 Please refer to Di...

Страница 31: ...er User may use it with the 8031 programming tool as Chapter3 step6 defined Step 3 Connect K BDevice to 8031 Keyboard port Female The K B port on the rear panel of the 8031 is available for an Keyboar...

Страница 32: ...lt circuit for optional key lock Once you set the key lock s level of 8031 programming tool You may use it to control what level s lock for each key The 8031 keyboard supports key locks level from lev...

Страница 33: ...selection is correct perhaps the computer RS232 interface is defective Check the cable connections of the keyboard and adaptors if used e g PS 2 keyboard plug Does the keyboard beep correctly when the...

Страница 34: ...AppendixI A JP 8031 Keyboard layout There are two keyboard layout of Jarltech 8031 keyboard 1 QWERTY Keyboard Layout Appendix I JP 8031WPXX you may find the layout from programming tool for definitio...

Страница 35: ...35 2 Key Matix The keyboard layout as Key Matrix design Appendix I JP 8031WSXX you may find the layout from programming tool for definition...

Страница 36: ...larity as follows Keyboard interface 5V DC from host computer Dimensions 330mm L x 195mm W x 55mm H Weight 1170g One internal connector for TTL signal magnetic stripe reader One Internal connect for K...

Страница 37: ...Ground Keyboard Host port 1 Keyboard data 3 5 V 4 Ground 5 Keyboard clock Specifications of Connecter and Switcher Connector Pin Assignments Appendix II Switcher SW1 ON Enable RS232 Host Data In Disab...

Страница 38: ...e mode if you design a key A the software will get data A or a that depends on the Caps lock status 2 ALT mode code Sometimes user cannot use Scan Code for special application design so there s a ALT...

Страница 39: ...d through the RS232 port A 1 Check if your connection of hardware is correct 2 Check if your setting in 8031 programming tool is correct 3 Try to disable the mouse driver May be this com port is occup...

Страница 40: ...Copyright 2002 Jarltech International Inc Printed in Taiwan ISSUED April 2002 V2 0 JARLTECH CS POLICY SERVICE QUALITY TO YOUR HEART...

Отзывы: