background image

49

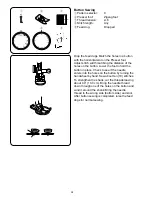
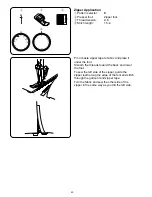
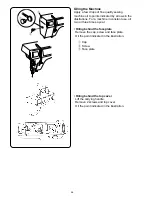
Esta puntada es resistente, útil y decorativa.
Esta puede reforzar las telas elásticas y tejidas.
Puede usarla para coser prendas de ropa interior
elástico o dobladillar decorativamente la tela elástica.
Puede usar también para acolchar telas en la labor de
retazos.

Cosa este patrón en una costura que ya está unida y
aplanada.

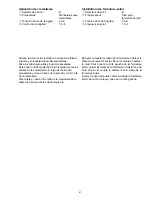
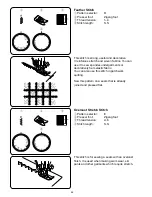
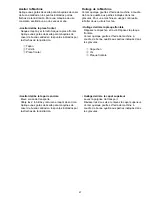
Ce point est résistant, utile et décoratif.
II peut renforcer l’étoffe extensible et tissée. Vous pouvez
vous servir de ce point pour coudre le sous-vêtements
en spandex, ou border décorativement, le tissu
élastique. Vous pouvez également utiliser ce point pour
le piquage en patchwork.

Appliquer ce motif sur la couture qui a été déjà jointe et
pressée à plat.

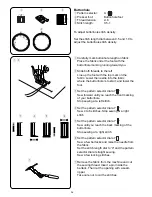
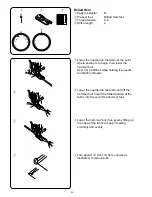
Puntada de pluma

q

Selector de patrón:

D

w

Prensatelas:

Prensatelas para
zig-zag

e

Tensión del hilo de la aguja:

1 a 4

r

Control de la longitud:

S.S.

Point d’épines

q

Sélecteur de point:

D

w

Pied presseur:

Pied zig-zag

e

Tension du fil de l’aiguille:

1 à 4

r

Longueur du point:

S.S.

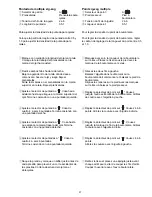
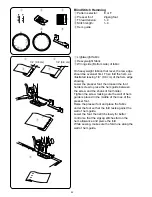
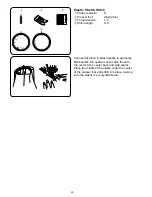
Puntada elástica de remate o sobrehilado

q

Selector de patrón:

E

w

Prensatelas:

Prensatelas para
zig-zag

e

Tensión del hilo de la aguja:

2 a 6

r

Control de la longitud:

S.S.

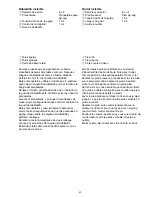
Surfilage extensible

q

Sélecteur de point:

E

w

Pied presseur:

Pied zig-zag

e

Tension du fil de l’aiguille:

2 à 6

r

Longueur du point:

S.S.

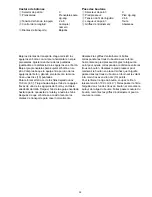
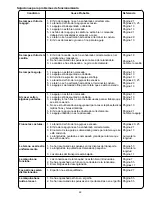
Esta puntada de costura es para coser costuras de
remate o sobrehilado. Esta puntada es usada cuando
se cosen trajes de baño, pantalones de esquiar y
otras prendas que requieren de material elástico.

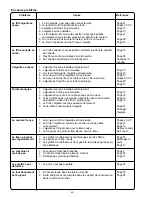
Ce point est utilisé pour coudre et surjeter en même
temps. II est très pratique pour la réalisation de
maillots de bain, de pantalons de ski et autres
vêtements extensibles.

Содержание TB-12

Страница 1: ...INSTRUCTION BOOK MANUAL DE INSTRUCCIONES LIVRE D INSTRUCTIONS Model Modelo Mod le TB 12...

Страница 2: ...al 3 Never operate this sewing machine if it has a damaged cord or plug if it is not working properly if it has been dropped or damaged or dropped into water 4 Never operate the appliance with any air...

Страница 3: ...ometerla a ajustes el ctricos o mec nicos 4 No utilice nunca la m quina si tiene bloqueada alguna v a de ventilaci n Mantenga las v as de ventilaci n de esta m quina y el pedal de control libres de pe...

Страница 4: ...les orifices d a ration sont colmat s Tenir les orifices d a ration de cette machine coudre et le curseur d escamotage du pied de biche exempts de toute accumulation de peluches poussi res et de morc...

Страница 5: ...ead Tension for a Straight Stitch 22 Adjust the Needle Thread Tension for a Zigzag Stitch 24 Pattern Selector Dial 26 Stitch Length Dial 26 Reverse Stitch Control 26 SETION 3 BASIC SEWING Straight Sti...

Страница 6: ...nsi n del hilo de la aguja para puntada zig zag 25 Perilla de selecci n de patr n 27 Perilla de longitud de puntada 27 Control de puntada reversa 27 SECCI N 3 OPERACIONES B SICAS DE COSTURA Costura de...

Страница 7: ...3 R glage de la tension du fil de l aiguille pour le point zig zag 25 Cadran de s lection du point 27 Cadran de r glage de la longueur du point 27 Bouton de marche arri re 27 PARTIE 3 COUTURE DE BASE...

Страница 8: ...utter 2 Needle plate 3 Extension table Accessory storage box 4 Lower thread guide 5 Reverse stitch cotrol 6 Stitch length dial 7 Pattern selector dial 8 Presser foot 9 Needle 0 Needle clamp screw 1 Fo...

Страница 9: ...superior 6 Volante 7 Bouton de blocage 8 Recept cule para cord n el ctrico 9 Elevador del prensatelas SECCI N 1 COMPONENTES PRINCIPALES PARTIE 1 PIECES MAITRESSES Identification des pi ces q Arr t du...

Страница 10: ...ndard Accessories q Bobbins w Felt e Needle set r Large screwdriver t Small screwdriver y Seam ripper Buttonhole opener u Oil i Buttonhole foot o Zipper foot 0 Hemmer foot 1 Hem guide q w e r t y u i...

Страница 11: ...las para ojales o Prensatelas para cremalleras 0 Prensatela para dobladillo 1 Gu a de dobladillo q Canettes w Feutre e Jeu d aiguitles r Gros tournevis t Petit tournevis y D coud vite Ouvre boutonni r...

Страница 12: ...ine plug Before connecting the power cord make sure the voltage and frequency shown on the ma chine conform to your electrical power 1 Turn off the power switch w 2 Insert the machine plug t into the...

Страница 13: ...ue siempre la m quina con el interruptor de corriente y desenchufe la clavija de toma de corriente cuando Deje la m quina desatendida Vaya a poner o quitar alguna pieza Limpie la m quina No ponga nada...

Страница 14: ...ser foot lifter w Normal up position e Highest position The presser foot lifter raises and lowers the presser foot You can raise it about 1 4 0 6 cm higher than the normal up position for easy removal...

Страница 15: ...l e Posici n m s alta La palanca de elevaci n del prensatelas se emplea para subir y bajar el prensatelas Usted puede subirlo aproximadamente 0 6 cm 1 4 m s de la posici n elevada normal para que le r...

Страница 16: ...the thumb screw q by turning it counterclockwise with a screwdriver To attach Match the hole in the foot holder w with the threaded hole in the presser bar e Fit the thumb screw q into the hole Tight...

Страница 17: ...oj Retrait et installation du support de pied q Vis de blocage w Support de pied e Barre du pied presseur Retrait Retirez la vis de blocage q en la tournant dans le sens antihoraire l aide du tournevi...

Страница 18: ...e Knits Percale Denim Tweed Gabardine Coating Drapery and Uphol stery Fabric 9 or 11 11 or 14 14 or 16 Light weight Medium weight Heaavy weight Flat side Lado plano M plat Needle Aguja Aiguille z x q...

Страница 19: ...r s dans les jerseys et les soies naturelles ou artificielles En general para materiales finos aguja e hilo fino y para pesados aguja e hilo grueso Comprobar siempre sobre una peque a pieza del tejido...

Страница 20: ...To remove the bobbin case w from the shuttle pull open the latch of the bobbin case Pull the bobbin case w straight out of the shuttle Changing Presser Foot To remove Turn the handwheel toward you to...

Страница 21: ...rtez le porte canette w en le tirant tout droit de la navette Cambio de prensatelas Para remover Girar manualmente hacia uno mismo el volante que la aguja alcance su posici n m s elevada mediante la p...

Страница 22: ...utside Put the bobbin on the bobbin winder spindle b Push it to the right n With the free end of the thread held in your hand depress the foot control Stop the machine when it has made few turns and c...

Страница 23: ...o Ajuste el bot n de moci n pare para embragar y restablecer el movimiento de la aguja Nota Devuelva el huso del enrollador de la bobina a su posici n normal cuando la m quina se detenga z Tourner le...

Страница 24: ...he thread through the slot of the case c Continue to draw the thread under the tension spring and through the opening Pull out about 4 10 cm of thread q Tension spring v Holding the latch open positio...

Страница 25: ...hilo q Resorte tensor x Tire del hilo a trav s de la ranura z Coloque la canilla en el portacanillas asegur ndose que el hilo se alimente en el sentido a las agujas del reloj y salga de la bobina v O...

Страница 26: ...the check spring holder v Firmly draw the thread up and from left to right over the take up lever then down into the take up lever eye b Then down through the lower thread guides n Slide the thread b...

Страница 27: ...ortant de la bobine comme illustr z Passez le fil travers le guide fil x Tenez le fil de l aiguille et passez le sous le guide fil c En retenant le fil pr s de la bobine tirez le vers le bas et de la...

Страница 28: ...cked between two layers of fabric as illustrated magnified to show detail If you look at the top and bottom of a seam notice that there are no gaps Each stitch is smooth and even When adjusting the ne...

Страница 29: ...ois s entre les deux paisseurs de tissu comme illustr gauche agrandi pour montrer les d tails En regardant le dessus et le dessous de la couture vous remarquerez qu il n y a pas d interruption Les poi...

Страница 30: ...de of fabric Minimize the amount of needle thread visible on the wrong side Bottom side of the fabric without causing excessive puckering or causing bobbin thread to show on the right side Top side of...

Страница 31: ...a o haciendo que el hilo de la canilla se vea en la parte de arriba de la tela Los resultados pueden variar seg n la tela hilo y condiciones de costura Tension correcte q Endroit du tissu w Envers du...

Страница 32: ...Turn the stitch length dial to set the setting mark at the desired stitch length The higher the number the longer the stitch length q Setting mark Adjust the dial in the 0 5 4 range when you sew the z...

Страница 33: ...entras m s grande sea el n mero m s larga ser la puntada q Marca indicadora Ajuste la perilla entre 0 5 y 4 cuando cosa con puntada de zigzag Coloque la perilla en S S para coser con el patr n de punt...

Страница 34: ...to the back and cut them with the thread cutter The threads are now the proper length to begin sewing the next seam CAUTION Do not place fingers near the presser foot when guiding fabric or the needl...

Страница 35: ...z le pied presseur Retirez le tissu tirez les fils vers l arri re et coupez les l aide du coupe fil Les fils sont ainsi coup s la bonne longueur pour le d but de la prochaine couture CUIDADO No coloqu...

Страница 36: ...ng and darning It can also be used to decorate with trims appliques and cut work or as a decorative stitch SECTION 4 UTILITY STITCHING Overcasting q Pattern selector C w Presser foot Zigzag foot e Thr...

Страница 37: ...elas Prensatelas para zig zag e Tensi n del hilo de la aguja 2 5 r Longitud de puntada 0 5 a 4 SECCI N 4 COSTURA FUNCIONAL Puntada de sobrehilado o remate q Selector de patr n C w Prensatelas Prensate...

Страница 38: ...hand stitches fall at the edge of the fabric Trim the excess close to the stitches Be careful not to cut the stitches Knit Stitch q Pattern selector G w Presser foot Zigzag foot e Thread tension 2 6...

Страница 39: ...au bord du tissu Puntada de dobladillo q Selector de patr n G w Prensatelas Prensatelas para zig zag e Tensi n del hilo de la aguja 2 a 6 r Control de la longitud S S Point de surjet q S lecteur de p...

Страница 40: ...ended where both elasticity and strength are necessary to ensure comfort and durability Straight Stretch q Pattern selector B w Presser foot Zigzag foot e Thread tension 2 6 r Stitch length S S q w e...

Страница 41: ...et l lasticit sont n cessaires au confort et la r sistance Puntada recta triple q Selector de patr n B w Prensatelas Prensatelas para zig zag e Tensi n del hilo de la aguja 2 a 6 r Control de la long...

Страница 42: ...c Set the pattern selector dial at Sew forward until you reach the front marking of your buttonhole Stop sewing at a left stitch v Set the pattern selector dial at Sew 4 to 6 stitches Stop sewing at a...

Страница 43: ...lle gauche Point zig zag multiple q Selecteur de point A w Pied presseur Pied boutonni re e Tension du fil de l aiguille 2 6 r Longueur du point 0 5 1 Puntada de m ltiple zig zag q Selector de patr n...

Страница 44: ...on the button Lower the foot to hold the button in place Check to see if the needle enters into the holes on the button by turning the handwheel by hand Sew about ten 10 stitches To strengthen the sh...

Страница 45: ...dejando unos 10 0 cm 4 0 Traiga hacia abajo el hilo de la aguja a trav s de uno de los agujeros del bot n y enr llelo alrededor del tallo Traiga el hilo de la aguja ensartada hasta la parte opouesta...

Страница 46: ...tape to fabric and place it under the foot Smooth the threads toward the back and lower the foot To sew the left side of the zipper guide the zipper teeth along the edge of the foot and stitch throug...

Страница 47: ...s Para coser el lado izquierdo de la cremallera gu e los dientes de la cremallera a lo largo del borde del prensatelas y cosa a trav s de la prenda y de la cinta de la cremallera Gire la tela y cosa e...

Страница 48: ...the presser foot then loosen the foot holder screw to place the hem guide between the screw and the shank of foot holder Tighten the screw making sure the wall of hem guide is placed in the middle of...

Страница 49: ...du tissu Sur les tissus pais qui s effilochent on devrait d abord surfiler les bords bruts Puis pliez l ourlet comme illustr en laissant appara tre 0 6 cm 1 4 Abaisser le pied presseur puis d visser l...

Страница 50: ...the hemmer foot Sew 3 or 4 stitches while holding the needle and bobbin threads x Lower the needle into the fabric and lift the hemmer foot Insert the folded portion of the fabric into the curl of the...

Страница 51: ...ille dans le tissu l endroit o la couture doit commencer Puis abaissez le pied ourleur Cousez 3 ou 4 points tout en tenant les fils de l aiguille et de la canette x Abaissez l aiguille dans le tissu e...

Страница 52: ...slightly Allow the needle to just clear the folded edge of the fabric at zigzag stitches If you sew rows of shell stitches space the rows at least 5 8 1 5 cm apart You can also sew shell stitches on...

Страница 53: ...de seda ligeros en cualquier direcci n Utilisez un tissu l ger comme du jersey Pliez le tissu et piquez sur le biais Vous aurez peut tre besoin d augmenter l g rement la tension du fil sup rieur Laiss...

Страница 54: ...undergarments or decoratively hem elastic fabric You can also use this stitch in patchwork quilting Sew this pattern on a seam that is already joined and pressed flat Overcast Stretch Stitch q Pattern...

Страница 55: ...r n D w Prensatelas Prensatelas para zig zag e Tensi n del hilo de la aguja 1 a 4 r Control de la longitud S S Point d pines q S lecteur de point D w Pied presseur Pied zig zag e Tension du fil de l a...

Страница 56: ...itch length S S q w e r Choose this stitch to attach elastic to garments Mark elastic into quarters and match these to the center front center back and side seams Place the middle of the elastic under...

Страница 57: ...partes iguales y haga que las marcas coincidan con las costuras central trasera central delantera y laterales Coloque el centro del el stico en el centro del pie prensatelas y cosa Aseg rese de que e...

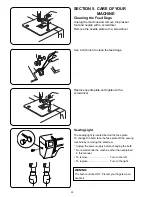
Страница 58: ...crewdriver SECTION 5 CARE OF YOUR MACHINE Sewing Light The sewing light is located behind the face plate To change the bulb take the face plate off the sewing machine by removing the setscrew Unplug t...

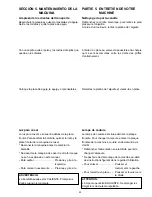
Страница 59: ...e la placa frontal Para cambiar la bombilla quite el tornillo y la placa frontal de la m quina de coser Desconecte la m quina antes de cambiar la bombilla No desarme la m quina de coser de otra forma...

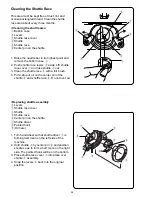
Страница 60: ...ttle so as to form a half moon on the right side The pointed hook will be on the bottom 3 Place shuttle race cover e into place over shuttle i assembly 4 Snap the levers w back into the original posit...

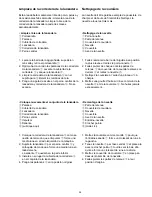
Страница 61: ...iginal Coloque nuevamente el conjunto de la lanzadera w Palanca e Cubierta de corredera r Lanzadera t Corredera de lanzadera y Perno central u Impulsor i Saliente o Lubrique aqu Nettoyage de la coursi...

Страница 62: ...or a machine in constant use oil two or three times a year Oiling behind the face plate Remove the cap screw and face plate Oil the point indicated in the illustration q Cap w Screw e Face plate Oilin...

Страница 63: ...es gravures Pour une machine en usage continuelle lubrifier deux ou trois fois l an Huilage derri re la plaque frontale D posez le capuchon et la vis D posez la plaque frontale Verser quelque gouttes...

Страница 64: ...he needle is too fine for the fabric being sewn 1 The needle is incorrectly inserted 2 The needle is bent or blunt 3 The needle and or threads are not suitable for the work being sewn 4 A blue needle...

Страница 65: ...ulado las pelusas en la rea de la lanzadera 3 La canilla se ha estropeado o no gira correctamente 1 La aguja no est bien colocada 2 La aguja est despuntada o doblada 3 El tornillo de sujeci n de la ag...

Страница 66: ...e 3 La canette est ab m e et fonctionne mal 1 L aiguille n est pas install e correctement 2 L aiguille est tordue ou mouss e 3 La vis de blocage de l aiguille est desserr e 4 La tension du fil de l ai...

Страница 67: ...731 402 184 E S F Printed in Taiwan...

Отзывы: