JanomeFlyer.com
32
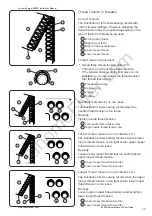
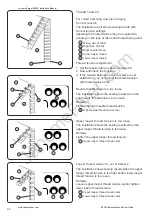
Thread Tension
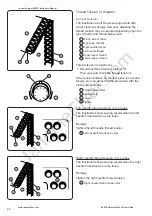
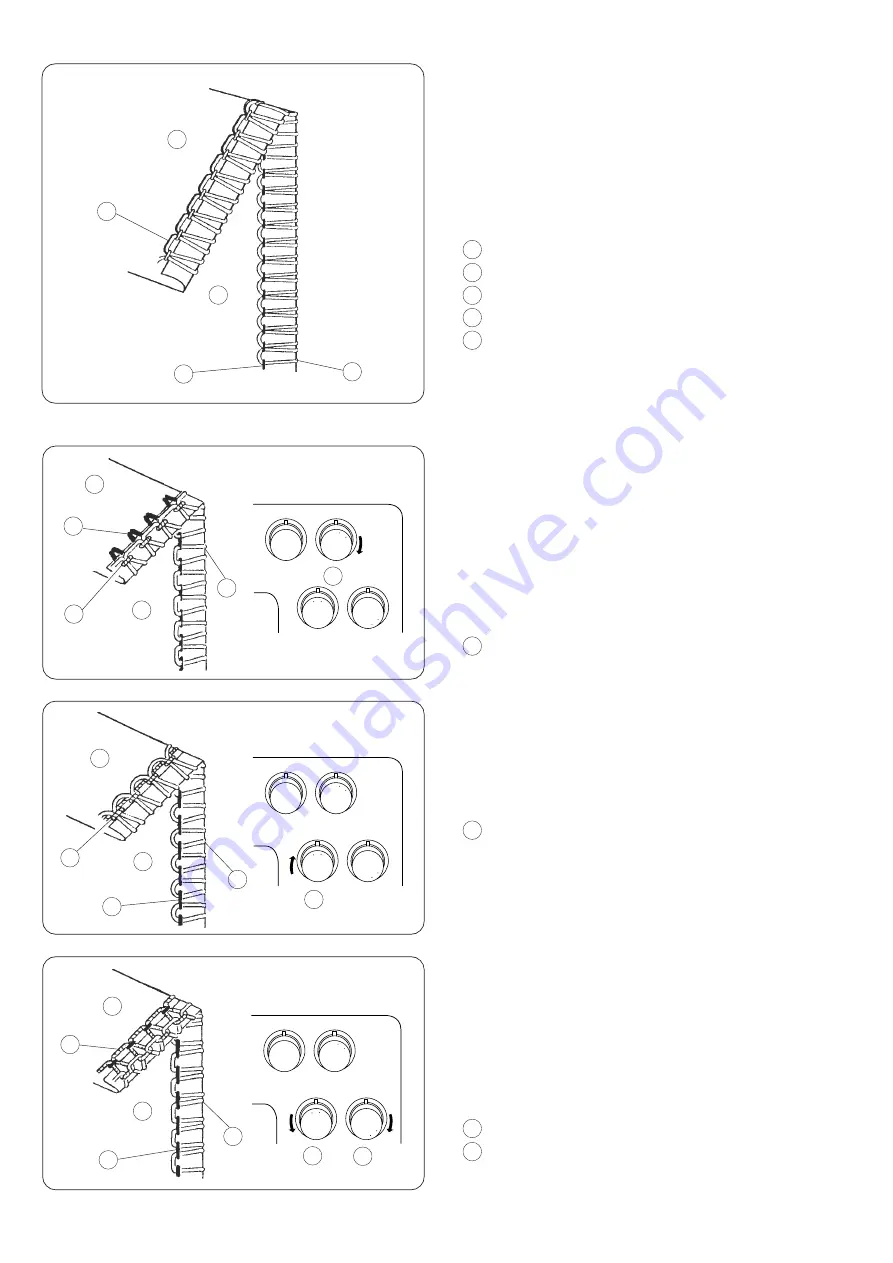
For rolled hemming and picot edging
Correct tension
The illustration at left shows sewing results with
correct tension settings.
Adjusting the thread tension may be required de-
pending on the type of fabric and thread being used.
1
Wrong side of fabric
2
Right side of fabric
3
Right needle thread
4
Upper looper thread
5
Lower looper thread
Thread tension adjustment
1. Set the tension dial as shown on page 60.
2. Sew and check the tensions.
3. If the tension balance on the test piece is not
satisfactory, you can adjust the thread tension
with thread tension dial.
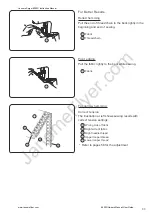
Needle thread tension is too loose
The illustration shows the sewing results when the
right needle thread tension is too loose.
Remedy:
Tighten the right needle thread tension.
6
Right needle thread tension dial
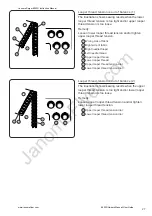
Upper looper thread tension is too loose
The illustration shows the sewing results when the
upper looper thread tension is too loose.
Remedy:
Tighten the upper looper thread tension.
7
Upper looper thread tension dial
Looper thread tension is out of balance
The illustration shows sewing results when the upper
looper thread tension is too tight and/or lower looper
thread tension is too loose.
Remedy:
Loosen upper looper thread tension and/or tighten
lower looper thread tension.
7
Upper looper thread tension dial
8
Lower looper thread tension dial
8
3
4
5
6 7
9
0
1
2
8
3
4
5
6
7
9
0
1
2
8
3
4
5
6 7
9
0
1
2
8
3
4
5
6
7
9
0
1
2
8
3
4
5
6 7
9
0
1
2
8
3
4
5
6
7
9
0
1
2
8
3
4
5
6 7
9
0
1
2
8
3
4
5
6
7
9
0
1
2
8
3
4
5
6 7
9
0
1
2
8
3
4
5
6
7
9
0
1
2
8
3
4
5
6 7
9
0
1
2
8
3
4
5
6
7
9
0
1
2
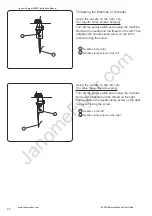
1
2
5
3
4
1
2
5
3
4
1
2
5
3
4
1
2
5
3
4
7
8
7
6
Janome Serger 8002D Instruction Manual
www.janomeflyer.com
8002D Owners Manual/ User Guide

