


50
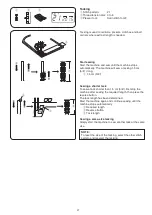
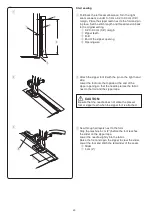
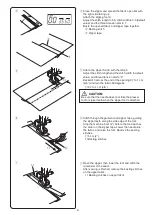
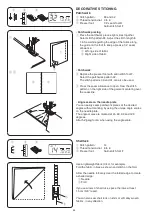
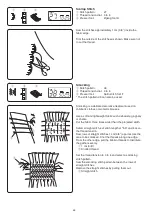
For the best sewing results, carefully align and guide the
fabric when you sew with decorative stitches.
Use a tear-way backing if necessary.
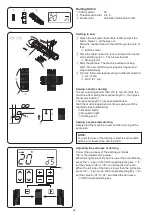
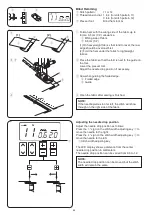
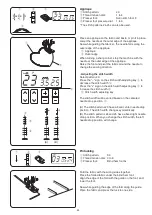
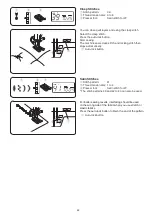
Decorative Stitches
q
Stitch pattern:
44
w
Thread tension dial: 3 to 6
e
Presser foot:
Satin stitch foot F
* Stitch patterns 45 to 49 can also be used.
q
w
e
4
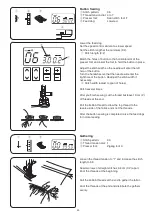
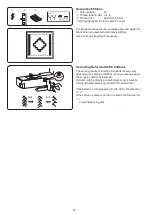
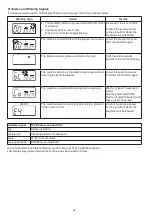
Correcting Deformed Stitch Patterns
The sewing results of stretch stitch patterns may vary
depending on sewing conditions, such as sewing speed,
fabric type, number of layers etc.
If stretch stitch patterns are deformed, correct them by
turning the feed balancing dial with the screwdriver.
If the pattern is compressed, turn the dial in the direction
of “+”.
If the pattern is drawn out, turn the dial in the direction of
“–”.
q
Feed balancing dial
(+)
(–)
q
Содержание MXL50
Страница 1: ...Instruction Book...
Страница 2: ......
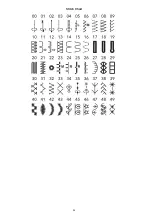
Страница 56: ...54 Stitch Chart...
Страница 57: ......
Страница 58: ......
Страница 59: ......
Страница 60: ...812 800 054 EN...


