background image

35

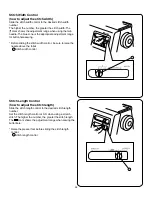
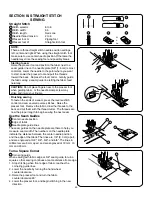
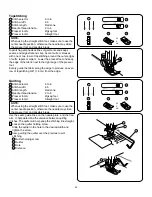
Seleccionador de puntadas (como seleccionar
puntadas)

q

Pantalla de guía de costura

w

Indicador rojo

e

Seleccionador de puntada

Gire el seleccionador de puntada hasta que el indicador rojo
alcance la puntada deseada.
La fila inferior de puntadas del panel indicador de patrones es
seleccionado cuando el control de largo de puntada se fija en la
posición de estiramiento de la puntada.
El ancho recomendado de la puntada, y el largo se muestran  en
la pantalla de guía de costura.
Cuando usted gira el seleccionador de puntada, la información en
la pantalla cambia automáticamente.
Por favor use el color en la pantalla de guía de costura que
corresponde al color de la puntada seleccionada.

NOTA:

Para evitar daño en la aguja o la tela, asegúrese que la aguja
está hacia arriba y fuera de la tela mientras selecciona la
puntada.

Los patrones de puntada están codificados por colores, para
recomendar la zona a elegir en el control de longitud de puntada.

Zonas de longitud de puntada:

Rojo:

Recta, zigzag y puntadas de uso general

Verde: Puntadas decorativas geométricas
Azul:

Ojal integrado.

Oro:

Puntadas extensibles.

NOTA:

Sólo la puntada extensible está disponible en el patrón #9.
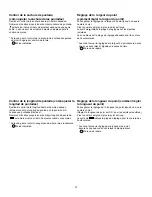
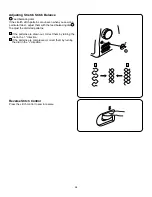
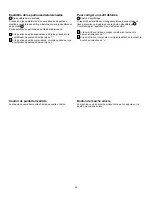
Escoja el control de ancho de puntada en S.S

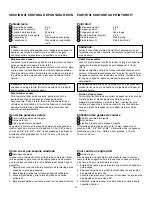
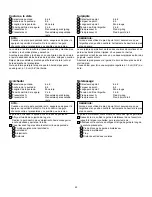
Bouton de sélection de points (sélectionner les
points)

q

Écran guide de couture

w

Marque rouge

e

Bouton de sélection de points

Tourner le bouton de sélection de points, jusqu'à ce que la
marque rouge atteigne le point recherché.
Pour sélectionner les points situés sur la rangée inférieure du
panneau indicateur de motifs, la commande de longueur du point
doit être réglée sur la position point extensible.
La largeur et la longueur de point recommandées s'affichent à
l'écran guide de couture.
Lorsqu'on tourne le bouton de sélection de points, les informations
de l'écran changent automatiquement.
Veuillez utiliser la couleur de l'écran guide de couture
correspondant à la couleur du point choisi.

REMARQUE:

Pour éviter tout endommagement de l'aiguille ou du tissu,
s'assurer que l'aiguille est en position levée et ne touche pas le
tissu, lors de votre choix de point

Les motifs de points sont couplés à un code de couleurs
caractérisant une zone de réglage recommandée pour la
commande de longueur du point.

Zones de longueur du point:

Rouge: Droit, zigzag et points utilitaires
Vert:

Points décoratifs géométriques

Bleu:

Boutonnière intégrée

Doré:

Points extensibles

REMARQUE:

Pour le motif # 9, le point extensible est le seul qui soit
disponible. Régler la commande de largeur du point sur S.S..

Содержание MS 5027Pinkribbon

Страница 1: ...I n s t r u c t i o nMa n u a l MS5 0 2 7P i n kr i b b o n...

Страница 2: ...cal or me chanical adjustment 4 Never operate the appliance with any air opening blocked Keep ventilation openings of this sewing machine and foot controller free from accumulation of lint dust and lo...

Страница 3: ...arla o someterla a ajustes el ctricos o mec nicos 4 No utilice nunca el aparato si tiene bloqueada alguna v a de ventilaci n Mantenga las v as de ventilaci n de esta m quina de coser y el pedal de con...

Страница 4: ...es ou m caniques 4 Il ne faut jamais faire fonctionner cette machine si les orifices d a ration sont colmat s Tenez les orifices d a ration de cette machine coudre et le curseur d escamotage du pied d...

Страница 5: ...gth 4 mm Maximum Stitch width 6 5 mm Maximum Stitch package Stitch functions 54 Built in stitches 31 Buttonhole 1 step built in buttonhole Machine dimensions W 16 3 415 mm x D 6 8 173 mm x H 11 8 300...

Страница 6: ...elector 34 Stitch Length Zones 34 Stitch Width Control 36 Stitch Length Control 36 Adjusting Stretch Stitch Balance 38 Reverse Stitch Control 38 SECTION III STRAIGHT STITCH SEWING Straight Stitch 40 S...

Страница 7: ...flojo 33 Seleccionador de puntadas 35 Zonas de longitud de puntada 35 Control de la anchure de puntada 37 Control de la longitud de puntada 37 Equilibrio de los patrones distorsionados 39 Control de p...

Страница 8: ...ge de la largeur du point 37 R glage de la longueur du point 37 Pour corriger un motif d form 39 Bouton de marche arri re 39 PARTIE III COUTURE AU POINT DROIT Point droit 41 D but d une couture 41 TAB...

Страница 9: ...e button 7 Extension table Accessory box 8 Buttonhole pitch balance adjusting lever 9 Start stop button 0 Up down control button 1 Speed control lever 2 Carrying handle 3 Handwheel 4 Stitch pattern se...

Страница 10: ...ente 7 Enchufe de la m quina 8 Placa de identificaci n 9 Palanca de mando para los dientes del transporte 0 Brazo libre 1 Palanca de ojales 2 Palanca de elevaci n del prensatelas 3 Tornillo del enmang...

Страница 11: ...threader Quilter Light bulb Seam ripper Buttonhole opener Large screwdriver Oil Lint brush Large spool holder Small spool holder Buttonhole guide plate Buttonhole base plate Template Round end small...

Страница 12: ...illa Camiser a redonda grande Plantilla Sastrer a Prensatelas para ojal Prensatelas para entubar Prensatelas recogedor Prensatelas para alforzas Prensatelas para dobladillo 2mm Prensatelas para frunci...

Страница 13: ...e power cord make sure the voltage and frequency shown on the machine conform to your electrical power 1 Turn off the power switch r 2 Insert the foot control plug q machine plug w into the machine 3...

Страница 14: ...de coser coloque una pieza de tela debajo del el prensatelas y haga funcionar la m quina sin hilo durante unos pocos minutos Es normal que aparezcan salpicaduras de aceite l mpielas y cosa normalment...

Страница 15: ...p down Needle Button w Up down needle button Press this button to bring the needle up or down You can set the needle position with this button up or down when the machine stops Speed Control Lever e S...

Страница 16: ...quierda Commandes de la machine q Bouton de marche arr t w Bouton de mont e descente de l aiguille e Commande de la vitesse Bouton de marche arr t q Bouton de marche arr t Appuyer sur le bouton pour m...

Страница 17: ...wers the presser foot You can raise it about 1 4 0 6 cm higher than the normal up position for easy removal of the presser foot or to help you place heavy fabric under the foot Thread Cutter q Thread...

Страница 18: ...Brazolibre Estuche de accesorios Abre la tapa del estuche de accesorios gir ndola hacia usted Los accesorios de costura est n localizados convenientemente en el estuche 1 Levier de r glage de la press...

Страница 19: ...needle and the flat surface should be consistent Never use a bent or blunt needle A damaged needle can cause permanent snags or runs in knits fine silks and silk like fabrics 1 3 2 1 3 2 1 1 To Remov...

Страница 20: ...onado en posici n longitudinal apoyado en su base con el pasador justo por debajo de la enclavadura del enmangue Baje la palanca de elevacion del prensatelas para fijar el prensatelas en el enmangue 1...

Страница 21: ...tretch stitch page 76 Stretch patching page 76 Herring bone stretch page 78 Decorative stretch patterns page 78 Straight stitch foot Foot H Use this foot for straight stitching only with the center ne...

Страница 22: ...s para cremalleras Prensatelas E Este prensatelas se coloca para coser cada uno de los lados de las cremalleras Los bordes del prensatelas gu an a lo largo de la cremallera para mantener la puntada re...

Страница 23: ...ot C This foot is specially constructed for stitching and or overcasting seams The small brush and wire guides help control the fabric hold the raw edge in place and keep it from puckering especially...

Страница 24: ...rrugue Es perfecto para acolchados y telas de cuadros Para C mo usar el prensatelas de doble arrastre p gina 45 Acolchador La gu a de acolchado le ayuda a coser l neas rectas de puntadas Para Acolchad...

Страница 25: ...often caused by damaged needles Always purchase a good quality thread It should be strong smooth and consistent in thickness Heavy Denim Sailcloth Ticking Denim 16 100 Double Faced Wool Heavy Coating...

Страница 26: ...cuencia para comprobar que no est n embotadas o despuntadas Las agujas da adas suelen causar enganches y carreras irreparables en tejidos de punto sedas finas y imitaci n de seda Adquiera siempre hilo...

Страница 27: ...cots les soies fines et les toffes semblables la soie sont d finitifs et sont souvent provoqu s par des aiguilles ab m es Achetez toujours du fil de bonne qualit II doit tre solide lisse et d paisseur...

Страница 28: ...21 blank page p gina blanca page blanche...

Страница 29: ...ttach the large spool holder and press it firmly against the spool of thread The small spool holder is used with narrow or small spools of thread 1 3 2 1 3 1 Additional spool pin Additional spool pin...

Страница 30: ...uina o para costura con doble aguja Coloque el portacarretes adicional en el alojamiento y ponga el fieltro y un carrete de hilo en el portacarretes adicional Remplissage de la canette Porte bobine ho...

Страница 31: ...ns and then cut the thread close to the hole in the bobbin Depress the foot control again When the bobbin is fully wound it stops automatically Return the bobbin winder to its original position by mov...

Страница 32: ...o se muestra Empuje la volante manual a la izquierda La m quina no coser hasta que el embrague est engranado con la m quina REMARQUE La but e d enroulement de la canette peut tre r gle selon la quanti...

Страница 33: ...the bobbin holder Draw the thread to the left sliding it between the tension spring blades Continue to draw the thread lightly until the thread slips into notch Pull out about 6 15 0 cm of thread Att...

Страница 34: ...por encima de la placa de aguja Observe el esquema de enhebrado situado en la tapa de acceso a canilla y compruebe si ha enhebrado correctamente 1 2 1 2 Retrait de la canette Bouton de d gagement du c...

Страница 35: ...and down into the take up lever eye Slide the thread behind the needle bar thread guide on the left Thread the needle from front to back or use a needle threader Needle threader q Knob w Hook e Guide...

Страница 36: ...ar con las agujas 11 a 16 o con una aguja 11 azul Se recomienda un hilo de tama o 50 a 100 1 5 4 3 2 Enfilage de la machine Enfilage de la machine Faites monter le levier releveur tendeur de fil le pl...

Страница 37: ...fness and thickness of the fabric number of fabric layers type of stitch 1 5 4 3 2 Tension is too tight Needle thread Top thread Bobbin thread Bottom thread To loosen tension Right side Top side of fa...

Страница 38: ...proximadamente 10 0 a 15 0 cm 4 a 6 Saque el hilo de la canilla tirando del hilo de la aguja 1 4 3 2 R glage de la tension du fil de l aiguille pour le point droit Tension correcte Fil de l aiguille F...

Страница 39: ...ausing the bobbin thread to show on the right side Top side of the fabric Results vary with fabric thread and sewing conditions Tension is too tight Right side Top side of fabric Wrong side Bottom sid...

Страница 40: ...jo de la tela y se sentir desigual Tense la tensi n del hilo de la aguja girando hacia abajo el ajuste de tensi n del hilo 1 2 1 2 1 2 R glage de la tension du fil de l aiguille pour le point zig zag...

Страница 41: ...tch length control is set at the stretch stitch position Recommended stitch width stitch length are shown in the sewing guide display When you turn the stitch selector the information in the display c...

Страница 42: ...t disponible en el patr n 9 Escoja el control de ancho de puntada en S S Bouton de s lection de points s lectionner les points q cran guide de couture w Marque rouge e Bouton de s lection de points To...

Страница 43: ...onhole Raise the presser foot before sliding the stitch length control Stitch length control Stitch Width Control how to adjust the stitch width Slide the stitch width control to the desired stitch wi...

Страница 44: ...r el control aseg rese de alzar el pie prensatelas Marca indicativa 1 R glage de la longueur du point comment r gler la longueur du point Faites glisser le r glage de la longueur du point jusqu ce que...

Страница 45: ...ng dial If the stretch stitch patterns are uneven when you sew on a particular fabric adjust them with the feed balancing dial To adjust the distorted patterns If the patterns are drawn out correct th...

Страница 46: ...da hacia el signo Si los patrones est n comprimidos corr jalos girando el eje equilibrador de puntada hacia el signo 1 1 Bouton de marche arri re La machine coud en marche arri re tant que I on appuie...

Страница 47: ...abric Needle plate guide lines The seam guides on the needle plate are there to help you measure seam width The numbers on the needle plate indicate the distance between the center needle position and...

Страница 48: ...de poner la aguja en la posici n del centro De lo contrario la aguja chocar contra el prensatelas y es posible que se rompa Uso de las gu as de costura Centro de la posici n de la aguja Borde de la t...

Страница 49: ...straight stitch foot make sure to use the center needle position otherwise the needle may strike the presser foot and possibly break 1 6 5 4 3 2 Quilting Stitch selector 6 to 8 Stitch width 6 5 Stitc...

Страница 50: ...lojamiento hasta conseguir el ancho deseado y apriete el tornillo Cosa llevando la gu a sobre la anterior l nea de puntada Tornillos sujetador del acolchador Acolchador Alojamiento Distancia Les surpi...

Страница 51: ...ng by feeding fabrics with both upper and lower feed dogs The walking foot is great for fine fabrics knits leather and matching plaids 1 5 4 3 2 Using 1 4 Seam Foot Stitch selector 7 Stitch width 6 5...

Страница 52: ...y lineas en colchas o manteles 1 5 4 3 2 Utilisation du pied niveleur Vis de blocage Support du pied Levier Pince aiguille Barre du pied presseur Le pied griffes est un accessoire particulier permett...

Страница 53: ...a bottom seam 5 8 2 2 cm from the right edge to the estimated zipper bottom stop position Sew in reverse a few stitches to lock Increase the stitch length to 4 set needle thread tension to 0 and sew b...

Страница 54: ...de la puntada 2 Tensi n del hilo de la aguja 2 a 6 Presnsatelas E Prensatelas para cremalleras 1 4 3 2 C mo colocar el prensatelas para cremalleras Enclavadura Pasador Para coser el lado izquierdo Par...

Страница 55: ...distance from the basting stitch line Turn fabric 90 and sew a seam the entire length of zipper tape Before reaching pull tab stop the machine with needle in fabric and raise the foot Use seam ripper...

Страница 56: ...s de coser ambos lados de la cremallera utilice un abrecosturas para abrir la puntada de hilvanado La couture des fermeture glissi re suite Soulever et rel cher le pied puis le fixer nouveau du c t ga...

Страница 57: ...or 6 to 8 Stitch width 6 5 Stitch length Any Needle thread tension 2 to 6 Pressure adjusting lever 0 Presser foot A Zigzag foot Presser foot F Satin stitch foot Feed dogs Dropped NOTE If the fabric is...

Страница 58: ...vu lva la presi n ajustando la palanca al 3 NOTA Si la tela es muy delgada o est en muy mal estado utilice un trozo de tela separada debajo del agujero para reforzarlo 1 2 Comment monter et descendre...

Страница 59: ...ctor 5 Stitch width 1 to 6 5 Stitch length Red zone Needle thread tension 3 to 5 Presser foot A Zigzag foot 1 5 4 3 2 The satin stitch is often used to decorate and overcast the raw edge on blankets l...

Страница 60: ...de puntada 2 a 6 5 Longitud de puntada 0 5 a 1 Tensi n del hilo de la aguja 3 a 8 Prensatelas F Prensatelas para puntada decorativa Palanca del ajuste de la presi n 1 o 2 Le point lanc est souvent ut...

Страница 61: ...h tailor s chalk Form each pattern with a satin stitch adjusting the stitch width 1 5 4 3 2 6 Monogramming Stitch selector 5 Stitch width 3 Stitch length 0 5 to 1 Needle thread tension 1 to 4 Presser...

Страница 62: ...OTA El ancho m ximo de puntada para el patr n 9 es de 3 5 mm 1 4 al fijar el control de la anchura de puntada en 6 5 B tissez les appliques sur le tissu ou collez les avec de la colle pour tissu therm...

Страница 63: ...bin thread to the right top side of the fabric At medium speed stitch along the marked outline guiding the fabric carefully by hand After embroidery is completed raise the feed dogs for normal sewing...

Страница 64: ...zig zag 1 5 4 3 2 Bordado Selector de puntada 5 Anchura de la puntada 1 a 6 5 Longitud de la puntada Cualquier n mero Tensi n del hilo de la aguja 2 a 6 Los dientes de transporte Bajados Prensatelas...

Страница 65: ...tension 3 to 8 Presser foot A Zigzag foot Presser foot C Overedge foot Brush holder seam guide When using an Overedge foot make sure to set the stitch width at 5 or more otherwise the needle may hit t...

Страница 66: ...0 puntadas 5 Cosa la otra fila de agujeros de ser aplicable Siga los pasos anteriores para recortar el exceso de hebras en ambos lados de la tela Ce point est utile pour le montage des v tements et po...

Страница 67: ...edge of the fabric fold Adjust the screw so that at the leftmost position of the stitch the needle just pierces the edge of the fold If the needle pierces too far left the stitches will show on the ri...

Страница 68: ...bruto Por ltimo d blelas de la forma indicada en la ilustraci n Parte de abajo de la tela 0 4 a 0 7 cm 1 4 a 7 16 Tela ligera Tela gruesa 5 6 7 8 PARTIE V POINTS UTILITAIRES ET D CORATIFS 1 5 4 3 2 O...

Страница 69: ...o stitching 1 5 4 3 2 Lace Work Stitch selector 10 Stitch width 2 to 3 Stitch length 1 Needle thread tension 1 to 4 Presser foot A Zigzag foot 1 5 4 3 2 Multiple Zigzag Stitch Stitch selector 4 Stitch...

Страница 70: ...cm 5 8 del borde Despu s de coser recorte el margen sobrante Tenga cuidado de no cortar las puntadas Repriser Placez la d chirure sous l aiguille de mani re ce que le point attrape les deux c t s La d...

Страница 71: ...selector 3 Stitch width 3 to 6 5 Stitch length Red zone Needle thread tension 3 to 8 Presser foot A Zigzag foot Use a lightweight fabric tricot for example Fold the fabric in bias and stitch on the fo...

Страница 72: ...n espacio entre ellas de al menos 1 5 cm 5 8 Tambi n podr coser con puntadas en forma de concha en telas de punto y tejidos de seda ligeros en cualquier direcci n Point coquille S lecteur de point 11...

Страница 73: ...pieces of fabric to create an open work appearance and add design interest Fold under each fabric edge 1 2 1 3 cm and press Pin the two edges to paper or tear away backing 1 8 0 3 cm apart Sew slowly...

Страница 74: ...de caja de dos puntos Selector de patr n 13 Anchura de la puntada 3 a 6 5 Longitud de la puntada 1 a 2 Tensi n del hilo de la aguja 3 a 8 Prensatelas A Prensatelas para zig zag Ce point est utilis po...

Страница 75: ...2 Overedge Stitch Stitch selector 1 Stitch width 3 to 6 5 Stitch length 1 to 3 Needle thread tension 3 to 8 Presser foot A Zigzag foot Presser foot C Overedge foot When using an Overedge foot make sur...

Страница 76: ...as decorativas Selector de patr n 14 a 18 Anchura de la puntada 3 a 6 5 Longitud de puntada Zona verde Tensi n del hilo de la aguja 3 a 8 Prensatelas A Prensatelas para zig zag Prensatelas F Prensatel...

Страница 77: ...der Thread take up lever Needle bar thread guide Twin needle optional item Turn off the power switch Insert the additional spool pin into its hole Place a piece of felt and a spool on the additional s...

Страница 78: ...lados de la barra de aguja Cambie la aguja por una doble aguja Hile cada una de las agujas de adelante a atr s 1 5 4 3 2 6 7 Aiguilles jumel es Option S lecteur de point 13 18 Largeur du point 1 2 5...

Страница 79: ...ms as well as to eliminate puckering on knits and stretch fabrics Also use when constructing items requiring extra strength such as backpacks This strong durable stitch is recommended where both elast...

Страница 80: ...5 Longitud de la puntada Posici n oro de puntada el stica Tensi n del hilo de la aguja 2 a 6 Prensatelas A Prensatelas para zig zag Prensatelas H Prensatelas para puntada recta 1 5 4 3 2 6 Ce point s...

Страница 81: ...vely prevents skipped stitching 1 5 4 3 6 Smocking Stitch selector 4 Stitch width 3 to 6 5 Stitch length Gold stretch stitch position Needle thread tension 2 to 6 Presser foot A Zigzag foot Presser fo...

Страница 82: ...nilla por el extremo no anudado para distribuir uniformemente los frunces y asegure los hilos Cosa con las puntadas decorativas que desee entre las l neas fruncidas Quite los hilos de puntada recta qu...

Страница 83: ...at for sewing spandex swim wear Place the fabric under the presser foot A so that the stitches are made over the raw edge 1 5 4 3 2 Serging Stitch selector 11 Stitch width 3 to 6 5 Stitch length Gold...

Страница 84: ...a 6 5 Longitud de la puntada Posici n oro de puntada el stica Tensi n del hilo de la aguja 2 a 6 Prensatelas A Prensatelas para zig zag 6 On utilise ce point pour r parer les coudes et les genoux us...

Страница 85: ...as a hemming stitch for blankets tablecloths and draperies Place the fabric right side up and sew so that the rightmost needle position is 3 8 1 0 cm from the edge Then trim close to stitching Be care...

Страница 86: ...18 Anchura de la puntada 3 a 6 5 Longitud de la puntada Posici n oro de puntada el stica Tensi n del hilo de la aguja 2 a 6 Prensatelas A Prensatelas para zig zag 1 5 4 3 2 Point d pine extensible S l...

Страница 87: ...automatic buttonhole foot The button holder on the foot takes a button up to 1 0 2 5 cm in diameter Make a test buttonhole on an extra piece of the fabric to check your settings Use interfacing on str...

Страница 88: ...ra de la puntada 3 a 6 5 Longitud de la puntada 0 25 a 1 0 Tensi n del hilo de la aguja 2 a 6 Prensatelas R Prensatelas para ojal autom tico PARTIE VII BOUTONNI RE 1 2 Pr paration la couture Rainure B...

Страница 89: ...hole foot Depress the foot control to sew a buttonhole The machine will stop when the buttonhole is completed To sew another buttonhole you must reset the machine Reset by shifting the stitch selector...

Страница 90: ...enzo Deslizador No deber haber holgura Soporte del resorte Diferencia Apr s avoir cousu une boutonni re d placez le point sur le point suivant en tournant le s lecteur de point en direction de ou puis...

Страница 91: ...it the button through the test buttonhole lengthen the buttonhole by pulling the button holder back to create a gap Gap 2 1 5 4 If the sides of the buttonhole are not balanced do the following If the...

Страница 92: ...a para hacer el lado derecho del ojal m s denso Palanca ajustadora de densidad de ojales 6 1 Si le bouton est tr s pais faites une boutonni re d essai S il est difficile de passer le bouton dans l ouv...

Страница 93: ...t of the automatic buttonhole foot R to hold them tight Lower the needle into the garment where the buttonhole will start and lower the foot Spur Forks 4 3 2 Depress the foot control gently and sew th...

Страница 94: ...rd n Quite la tela de la m quina y corte los hilos de costura Hilo de la aguja Hilo superior Hilo de la canilla Hilo inferior 2 2 4 3 1 1 3 2 Boutonni res passepoil es Suivez la m me proc dure que pou...

Страница 95: ...Stitch selector BH Stitch width 3 to 6 5 Stitch length 0 25 to 1 0 Needle thread tension 2 to 6 Presser foot B Buttonhole foot 1 3 2 6 Sew the front bartack and left row then stop Click the buttonhol...

Страница 96: ...a puntada 0 25 a 1 0 Tensi n del hilo de la aguja 2 a 6 Prensatelas B Prensatelas para ojales Pour coudre Si le diam tre du bouton est sup rieur 2 5 cm 1 0 la boutonni re doit tre r alis e manuellemen...

Страница 97: ...he actual length of buttonholes to be sewn You can find the most suitable buttonhole length easily by matching a button with the patterns 1 5 4 3 2 6 9 8 7 10 12 11 Automatic Buttonhole Option For mor...

Страница 98: ...rfio Palanca Dentada Placa base Pie prensatelas para ojales REMARQUE Les boutonni res repr sent es sur les gabarits sont grandeur nature Vous d terminerez facilement la boutonni re qui convient le mie...

Страница 99: ...Buttonhole foot 1 3 2 6 8 7 Needle thread Top thread Bobbin thread Bottom thread Two round holes Rectangular hole Two pins fitting with the two round holes Hook Lever Base plate Remove the extension...

Страница 100: ...angular Dos pasadores que caben en los dos agujeros redondos Garfio Palanca Placa base 1 5 4 3 2 8 7 6 1 5 4 3 2 Boutonni re automatique suite Pour coudre S lecteur de point 5 Largeur du point 2 Longu...

Страница 101: ...g the needle thread Place the bobbin and needle threads to the left side of the guide plate Leave 3 to 4 7 0 to 10 0 cm of thread Automatic Buttonhole Continued Guide slot Guide block Buttonhole guide...

Страница 102: ...la ranura gu a de la plantilla y ajuste el bloque gu a en el centro de la ranura gu a 1 5 4 3 2 6 7 8 4 5 4 3 2 6 7 4 1 9 4 1 5 4 3 2 6 4 3 6 Fil de l aiguille Fil de canette Pied boutonni re Pignon F...

Страница 103: ...ing on the buttonhole foot Line up the fabric edge with the measure marking on the guide plate just in front of the buttonhole foot as shown Pierce the fabric with the needle at the beginning of the b...

Страница 104: ...omo muestra en la ilustraci n Punce la tela con la aguja al principio del ojal 1 3 2 R glage de la densit du point Points serr s pour les tissus fins Longueur du point entre 3 et 4 Points l ches pour...

Страница 105: ...ease button to the right 1 3 2 1 3 2 SECTION VIII CARE OF YOUR MACHINE Replacing the Light Bulb NOTE Unplug the machine Do not dismantle the machine other than as explained in this section Do not stor...

Страница 106: ...ez le couvercle en pressant vers la droite le bouton de d gagement de la plaque 1 3 2 SECCION VIII MANTENIMIENTO DEL LA MAQUINA Desenchufe la m quina y abra la tapa Extraiga la bombilla del recept cul...

Страница 107: ...nd position the bobbin holder so that the notch fits next to the stopper in the hook race Line up the triangle marks The notch fits next to the stopper Brush out dust and lint inside the bobbin holder...

Страница 108: ...de aguja y saque la canilla Placa de aguja 1 2 4 3 6 5 6 5 4 3 2 1 1 2 3 4 Lubrification de la machine Ouvrez le couvercle frontal et lubrifiez les deux points indiqu s au moins une fois par an Une o...

Страница 109: ......
Страница 110: ...as pelusas en el rea de la lanzadera 3 La canilla se ha estropeado o no gira correctamente 1 La aguja no est bien colocada 2 La aguja est despuntada o doblada 3 El tornillo de sujeci n de la aguja est...

Страница 111: ...es dans la navette 3 La canette est ab m e et fonctionne mal 1 L aiguille n est pas install e correctement 2 L aiguille est tordue ou mouss e 3 La vis de blocage de l aiguille est desserr e 4 La tensi...

Отзывы: