


Pairing and Operation of the BT-03+/BT-04 Headsets in
Helmet-to- Helmet Intercom Mode.
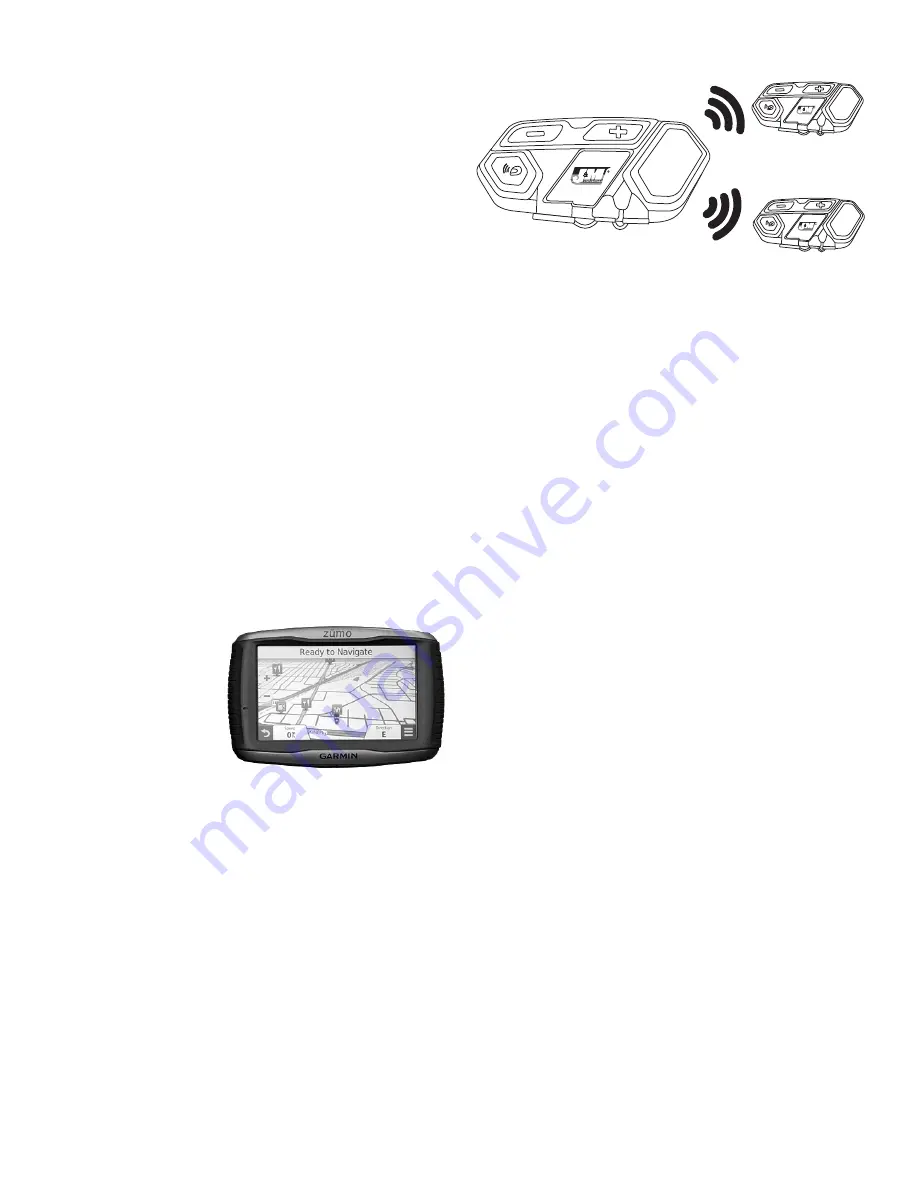
1. Press and hold intercom/search mode button (C) and multifunction
button (F) together until both headsets turn-on.
2. Put headset #1 into intercom linking mode by depressing & holding the
multifunction button (F) for approximately 4 seconds until the multi-
function button LED rapidly alternates between red/blue flashing.
3. Now put headset #2 into pairing mode by pressing and holding the
intercom mode button (C) for approximately 4 seconds until the multi-
function button LED rapidly alternates between red/blue flashing.
4. Then physically move BOTH headsets to within 4” of each other to
ensure that they will ONLY pair to each other in simple secured pairing
mode. (SSP)
5. Headsets are paired together when both red/blue flashing turns to a
slow pulsing blue on each headset.
6. Now momentarily press the intercom/search mode button (C) once on
headset #1 to deactivate intercom mode.
7. Once this is complete, now either headset can activate and deactivate
intercom conversations by pressing their own individual intercom
button.
Pairing and Operation with a Bluetooth Enabled GPS
Command Center.
1. Put the BT-03+/BT-04 control head into pairing mode by pressing and
holding down on the multifunction button (F) for approximately 4 sec-
onds until you see a rapid red/blue alternating flash.
2. From the menu on the GPS command center, go into the Bluetooth sec-
tion and search for “headset”. When JMCORP_BT04 is displayed on
your screen and you are asked for a passkey, enter: 0000. Your device
should now pair with the headset.
3. If you wish to use headset
cell-phone functions simul-
taneously with your GPS
command center, you will
need to link the cell phone
direct to the GPS unit as
per the linking/operation
instructions included with
your particular unit.
4. If any one of the headsets
receives an incoming navigation command from the GPS/or cell-phone
call, the helmet-to-helmet intercom operation will be interrupted. Once
the navigation command or cell- phone call has been terminated from
the GPS, the intercom, (if active) will return.
5. Use the volume-up (B) or volume-down (A) buttons on the headset to
adjust the music volume, navigation command volume and/ or cell/
smart phone volume levels.
6. Additional music, navigation command and cell phone volume adjust-
ments can usually be made inside the GPS command center itself, but
the flexibility of these adjustments depends totally upon the particular
brand/model of the GPS unit you are using.
AUX Input Cable Operation.
1. Connect the 2.5mm plug on the end of the aux input cable and the
other end to your music device and play.
2. All music volume adjustments to be made from the aux device are to be
made on the music device itself.
Up to 3 Other J&M Bluetooth Headsets
BT-04
BT-04
BT-04
8. Operation/Linking Instructions for 2018-2019
Honda Gold Wing
Headset & Cell Phone Linking
The features, linking scenarios and operations listed below are what you
can expect with the BT-04/BT03+ software version v00.1.5.
1. Rider to link their headset to the Rider HS feed from the Bluetooth sys-
tem menu.
2. Rider to link their cell phone to the Bluetooth system on the Wing OR
plug-in their iPhone to the system USB for Apple Car-Play functions.
3. Passenger to link their headset to the Passenger HS feed from the
Bluetooth menu system.
4. Passenger to link their cell phone direct to their own BT-04 headset
(NOT to the audio system on the Wing)
5. Rider and Passenger headsets to be linked together in simple secured
pairing mode (SSP) for “Private” helmet-to-helmet intercom conversa-
tions.
How To Listen to Music
At this point both rider and passenger can take advantage of there own
music source coming from the audio system using Honda’s dual-zone tech-
nology with all headset music volume adjustments made from the handle-
bar and/or rear controls so that there is never any need to “Fiddle” with
volume adjustments on the headset.
The Passenger can also listen to their own music source available from
their linked cell phone, while still being available for helmet-to-helmet inter-
com conversations.
How To Answer Rider Cell Phone
When an incoming cell-phone call is received thru the system, the rider will
view on screen and make the selection to answer or reject the call with the
handlebar controls.
The FIRST time the Rider will talk on the phone, the BT04 headset volume
needs to be adjusted to maximum with the (up) button on the
headset, and then all subsequent volume adjustments while talking on the
Rider’s cell phone will be made with the Wing’s handlebar volume control.
How To Answer Passenger Cell Phone
When an incoming call is received by the passenger headset, the music will
mute and a ring-tone will be heard in the passenger headset only.
If the passenger wishes to answer the call, they will momentarily press their
headset’s multifunction button one time.


