


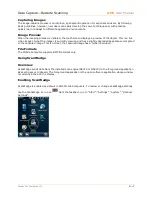

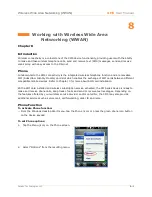


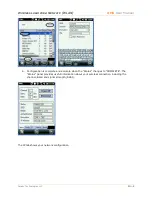
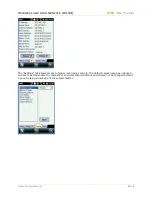


Wireless Wide Area Networking
(
WWAN
)
XM5
User Manual
Janam Technologies LLC
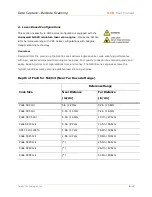
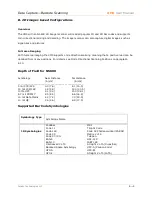
8―3
— Pressing the Volume Down button from its lowest position
toggles the control to the On, Vibrate and Off buttons,
enabling the choice of these functions for the Device
and the Phone.
— Pressing the Volume Down button from this position toggles
down through the On, Vibrate and Off selections. Pressing the
Volume Up button up through the On, Vibrate and Off selections.
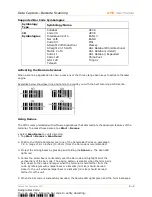
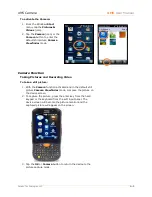
Muting/Speaker/Hold/Add Call/Contacts
Once a call has been answered call control options appear on the XM5 screen to mute, place on
speaker, hold, add a call and show contacts.
Using a Headset
For workplace efficiency, privacy and/or hands-free safety and convenience, a wired or Bluetooth
headset with microphone can be used in lieu of conventional integrated voice input/output
functionality.
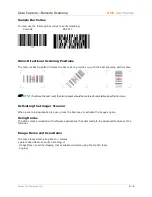
To use a wired headset:
1. Locate the wired headset with microphone receptacle cover on
the right-hand side of the device.
2. Lift the cover and insert the headset’s plug into the
uppermost (black) receptacle.
To use a Bluetooth Headset:
To use a Bluetooth headset, refer to the instructions included with the headset to be used and to
Chapter 11 for more on Bluetooth device pairing.
Содержание XM5
Страница 1: ...XM5 WEH 6 5 User Manual Technology at Work...
Страница 6: ...Introduction XM5 User Manual Janam Technologies LLC 1 2 Hardware Overview...
Страница 7: ...Introduction XM5 User Manual Janam Technologies LLC 1 3 Hardware Overview continued...
Страница 23: ...Getting Started XM5 User Manual Janam Technologies LLC 2 16...