WARNING
Read entire instructions before attempting to use this tool. Failure to follow instructions
could result in serious injury. Follow your company installation procedures at all times.
NOTICE
The components of the Live Tracer system are specifically designed to work exclusively with each other.
The use of these components individually or in combination with other non-Jameson tools or accessories
is not recommended and will not guarantee the safety or effectiveness of the system.
Live Tracer Kit Includes:
Traceable Fiberglass Rodder
Unit has 1/4” diameter rod with permanent 5/16” diameter end ferrule, Rod
has copper trace wire embedded in fiberglass core and is coated with poly
-
propylene jacket for safety and durability.
Accessory Kit
Canvas Storage Bag, Grounding Cable, 3 Screws,
11 O-Rings, Rod Lubricant, Hex Key Driver, Adhesive,
Replacement End Ferrule, Spring Leader
Stuffing Box
Designed with custom o-ring to provide seal when rod is inserted into
pressurized lines for use up to 100 psi.
Includes 5” pipe nipple with 1” NPT thread.
Replacement Accessories Available From Jameson
16-SB
Stuffing Box with 3 Screws, 5 O-Rings
16-146
End Ferrule Repair Kit
16-170
O-Ring, 12 Pack
15-WIPE
Lubricated Wipes
Required tools not included in this kit:
Gas leak detector
Transmitter and Receiver for locating
Wrenches, channel locks
Various pipe fittings (may be required to adapt 1” NPT to your
specific fitting)
Teflon tape
NOTE:
The Jameson traceable rodder has a copper wire that can be inserted underground. Jameson cannot guarantee
successful tracing for every make and model transmitter under all soil and moisture conditions. If tracing is unsuccessful,
try improving the depth of the ground spike or wetting the area around the ground spike.
Live Tracer Operation
Before Each Use:
Inspect O-ring
for any sign of tearing, cracking or pitting. Replace if damaged BEFORE EVERY USE. Jameson O-rings
are custom designed. Only Jameson-provided O-rings will guarantee proper safety and effectiveness.
Inspect rod
for damage. If rod surface is broken, replace rod. A scratched rod could cause leaking when scratch passes
through Stuffing Box O-ring. Portions of rod can be cut away and new end fitting attached if it is not necessary to replace
entire rod.
Follow your company safety procedures at all times. These instructions shall no take the precedence over any safety proce
-
dures established by your company.
1. Access PE gas pipe to be traced. Install electrofusion Tap Tee to pipe. Follow all installation and safety procedures
provided with your equipment and those established by your company.
Prepare Tap Tee Access Port
2. Follow your established procedures to attach any necessary couplers, adapters, extensions, valves or any equipment
to the access port of the tap tee. Perform all necessary tests established in your company procedures to ensure proper
fusion of the tee and all accessories.
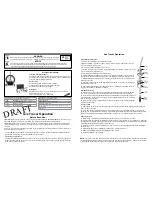
DRAFT
Rod
Stuffing
Box Cap
O-ring
1/4”
Grease
Fitting
Stuffing
Box Body
End
Ferrule
Spring
Leader
Accessory
Screws
Live Tracer Operation
Install Rod into Stuffing Box
3. Remove cap of Stuffing Box by removing the 3 screws.
4. INSPECT O-RING. If it shows any sign of tearing, cracking or pitting, replace with new O-ring.
5. Pay out rod approximately 15 feet.
6. Install rod end through Stuffing Box cap as shown.
7. Lubricate end ferrule, rod and inside O-ring with lubricated wipes provided. Install O-ring over rod.
8. Insert rod end into Stuffing Box body.
9. Attach Spring Leader Accessory to end ferrule of rod.
10. Install Stuffing Box cap with 3 screws provided. Snugly secure all screws to ensure proper O-
ring seal. Mark rod with permanent marking pen 6” from Stuffing Box to monitor retracting of rod.
11. Attach Stuffing Box to angled access port of Tap Tee. Follow your company’s procedures for at
-
taching to access port.
12. Use cutter of Tap Tee to tap into PE pipe. Retract cutter. Follow your company procedures and
those provided with Tap Tee.
13. Check for gas leaks following your company procedures. If Stuffing Box is leaking, inspect O-
rings and rod for damage. Replace as necessary.
Insert Rod for Tracing
14. Push rod into Tap Tee while holding a lubricated wipe against the rod to continuously lubricate
rod. Lack of lubrication can result in excessive push force on rod and could cause breakage.
15. Do not attempt to force rod past obstructions. Do not repeatedly pull rod back and re-insert with
a ramming motion. Do not allow rod to buckle at the entry of Stuffing Box under excessive force as
this can result in rod breakage.
16. When insertion is nearly complete, allow 2-3 coils of rod to remain on spool to prevent slippage
and potential rod damage.
Tracing the Rod
17. Attach transmitter cable clip to the end fitting at the opposite end of the rod. Follow manufacturer’s instructions for
proper set-up of transmitter.
18. It is recommended to install the ground spike at a 90 degree angle to the anticipated rod path. If you have a 1W
transmitter, use the highest frequency available. If your transmitter is greater than 1W, use the highest frequency below
45kHz. Follow proper locating practices established by your company or your locating equipment manufacturer.
Removing the Rod
19. When tracing is complete, pull the rod back through the Tap Tee and reinstall onto the rod spool.
20. A grease fitting is available on the Stuffing Box for lubrication when removing the rod. Use a standard ¼” grease gun
and synthetic non-petroleum grease to lubricate the rod. If this is not available, periodically reinsert the rod a few inches
while using the lubricating wipe and then continue removing.
21. When black mark on rod end is visible, stop removing the rod. Do not pull rod end past the O-ring as this will dam
-
age the O-ring.
22. Depressurize the Tap Tee and Stuffing Box following your company procedures.
23. Remove the Stuffing Box. Disassemble Stuffing Box from rod end.
24. Reinstall Stuffing Box cap for storage.


