6
2
DE
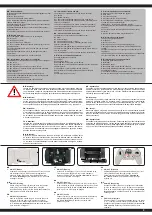
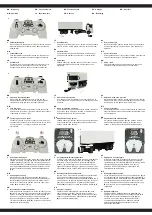
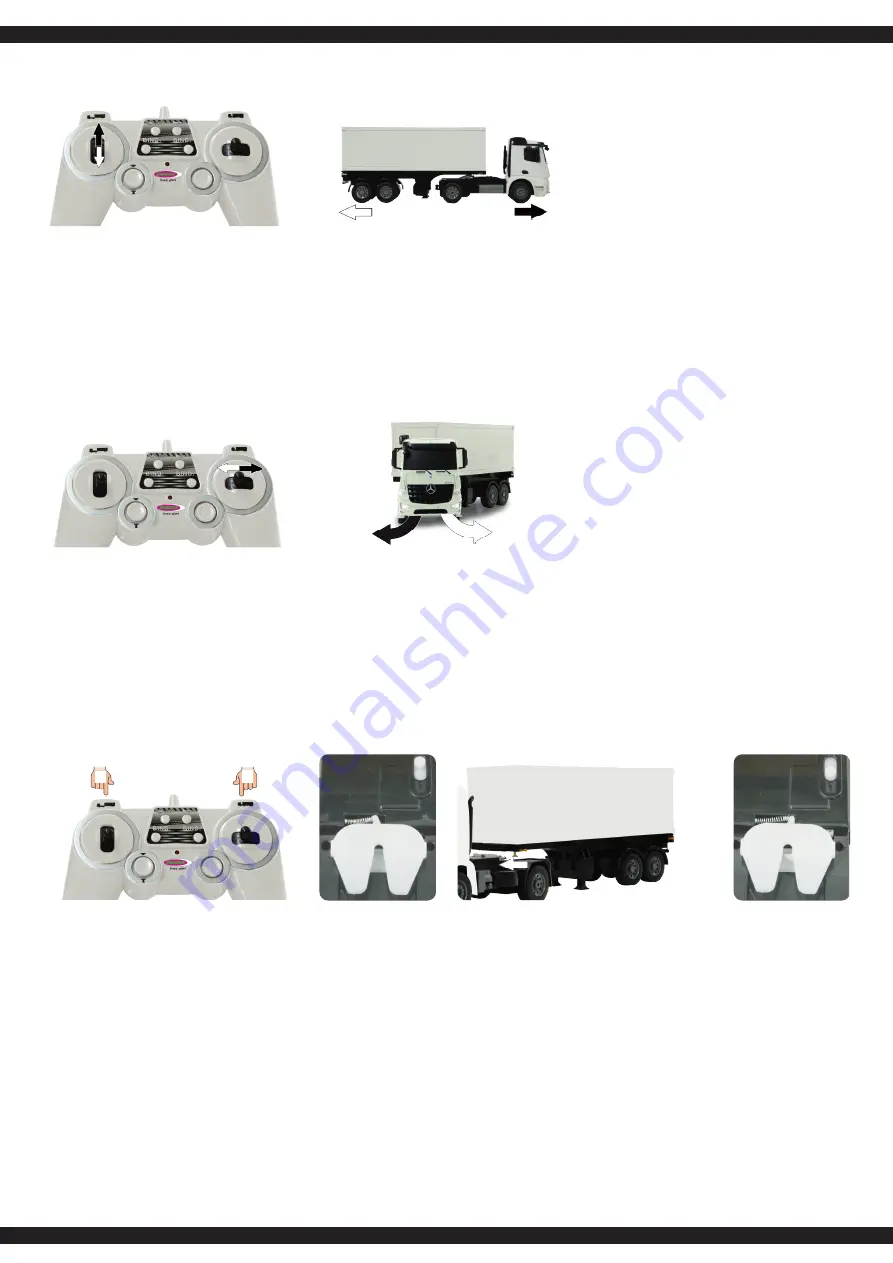
3. Vorwärts/rückwärts
Drücken Sie den Gashebel nach vorne oder zurück, wird das
Modell vorwärts bzw. rückwärts fahren, dabei leuchten die
Scheinwerfer.
GB
3. Forward/Reverse
Push the throttle stick forward or backward, the model will
drive forward or backward and the headlights will light up.
FR
3. Avant/arrière
Poussez le levier du gaz vers l‘avant ou vers l’arrière et le
modèle fera une marche avant ou une marche arriére.
Pendant que le véhicule avance, les phares s’allument.
IT
3. Avanti/indietro
Spingere l‘acceleratore in avanti o indietro e il modello andrà
avanti o indietro, mentre questo manovra i fari sono accesi.
ES
3. Adelante/atrás
Primer la palanca de gas hacia adelante o hacia atrás, el
modelo seguirá adelante o hacia atrás y los faros brillan.
CZ
3. Vpřed/zpět
Zatlačte páku plynu dopředu nebo dozadu, model se bude
pohybovat dopředu nebo dozadu a přitom budou svítit
světlomety.
PL
3. Do przodu/do tyłu
Naciśnięcie dźwigni gazu do przodu lub do tyłu spowoduje,
że model poruszy się do przodu lub do tyłu z zapalonymi
światłami.
NL
3. Vooruit / achteruit
Zet het gashendel naar voren of naar achteren, het model zal
vooruit of achteruit rijden. De koplichten branden.
SK
3. Vpred / vzad
Ak budete ťahať za páku dopredu alebo plyn späť, bude
model pohybovať dopredu späť, a to zapne lampu.
DE
4. Links bzw. Rechts abbiegen
Drücken Sie den Gashebel vor bzw. zurück und den
Richtungshebel nach links oder rechts, biegt das Modell
vorwärts bzw. rückwärts nach links oder rechts ab.
GB
4. Turn left /right
If you push the throttle stick forward or backward and the
direction stick to the left or right, the model will drive forward
or backward to the left or right.
FR
4. Tourner à gauche ou à droite
Poussez la manette du gaz vers l‘avant ou vers l’arrière en
n’oubliant pas d’actionner le levier de direction vers la droite
ou vers la gauche. Le véhicule va prendre la direction
commandée.
IT
4.
Girare a sinistra o destra
Se si tiene premuto l‘acceleratore, in avanti o indietro e la
leva di direzione a sinistra o a destra, il modello gira a destra
o sinistra.
ES
4. Giro a la izquierda o derecha
Primer la palanca de gas hacia adelante o atrás y la palanca
de dirección hacia izquierda o derecha, el modelo se gira
adelante o atrás hacia izquierda o drecha.
CZ
4. Odbočit vlevo nebo vpravo
Zatlačte páku plynu dopředu nebo dozadu a směrovou páku
doleva nebo doprava, mixér betonu pojede dopředu nebo
dozadu, doleva nebo doprava.
PL
4. Skręcanie w lewo lub w prawo
Naciśnięcie dźwigni gazu do przodu lub do tyłu oraz dźwigni
kierunkowej w lewo lub w prawo spowoduje, że model skręci
do przodu lub do tyłu bądź w lewo lub w prawo.
NL
4. Linksaf of rechtsaf
Zet het gashendel naar voren of naar achteren en het hendel
links of rechts dan rijdt het model linksaf / rechtsaf naar voren
of naar achteren.
SK
4. Ohýbanie doľava alebo doprava
Pre pohyb miešačky na betón dopredu, dozadu, doľava
alebo doprava, potiahnutím páčky plyn dopredu alebo
dozadu, a rukoväť pre nastavenie doľava alebo doprava.
3
DE
- Bedienung
GB
- Operation
FR
- Fonctionnement
IT
- Funzionamento
ES
- Funcionamiento
CZ
- Obsluha
PL
- Obsługa
NL
- Bewerking
SK
- Operácie
4
4.2
DE
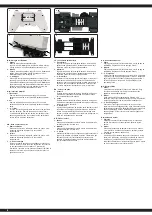
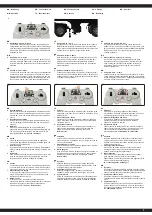
4. Ankoppeln / Abkoppen
Starten Sie den Truck. Drücken Sie die obere linke Taste
(A)
solange bis sich die Verriegelung der Haltebolzenaufnahme
geöffnet hat
(4.1)
.
Steuern Sie den Truck rückwärts an den
Auflieger
(4.2)
bis der Haltebolzen an der Aufliegerunterseite
in der Haltebolzenaufnahme ist. Durch Drücken der oberen
rechten Taste
(B)
verriegeln Sie die Haltebolzenaufnahme
(4.3)
.
GB
4. Coupling/ decoupling
Start the truck. Press the upper left button
(A)
until the
locking bolt has opened
(4.1).
Steer the truck backwards to
the trailer
(4.2)
until the locking bolt on the bottom side of
the trailer is in the holding position. Press the upper right
button
(B)
to lock the pin
(4.3).
FR
4. Accouplement / Désaccouplement
Allumez le camion. Appuyez sur la touche en haut à gauche
(A)
jusqu´á que le logement de boulon soit déverrouillé
(4.1)
.
Guidez le camion en marche arrière à la remorque
(4.2)
jusqu´à que le boulon de fixation sur le dessus de la
remorque soit placer sur la tige de maintien. En appuyant
sur la touche supérieure droite
(B)
, le logement de boulon de
fixation sera verrouillé
(4.3).
IT
4. Accoppiamento /Disaccoppiamento
Avviare il Truck. Premere il pulsante in alto a sinistra
(A)
fino
a quando si apre la serratura del perno di fissaggio
(4.1).
Manovrare il Truck verso indietro al rimorchio
(4.2)
fino a
quando il perno di fissaggio e sul fondo del rimorchio nel
supporto del perno di fissaggio. Premendo il pulsante in alto
a destra
(B)
si blocca il supporto del perno di fissaggio
(4.3).
ES
4. Acoplamiento / Desacoplamiento
Iniciar el Truck. Pulse el botón izquierdo superior
(A)
hasta
que se abre la cerradura del perno de fijación
(4.1).
Maniobrar el Truck hacia atrás al remolque
(4.2)
hasta que el
perno de fijación en la parte inferior del remolque está en el
soporte del perno de fijación. Al pulsar el botón superior
derecho
(B)
se bloque el soporte del perno de fijación
(4.3).
CZ
4. Připojení / odpojení
Zapněte vozidlo. Stiskněte horní levé tlačítko
(A)
, až se
spojo vací hák uvolní
(4.1)
. Posuňte vozidlo směrem k
návěsu dozadu
(4.2)
, až bude spojovací hák na zadní části
návěsu ve spojovací poloze. Stiskněte horní pravé tlačítko
(B)
pro zamknutí pojistky
(4.3)
.
PL
4. Sprzęganie / rozsprzęganie
Uruchomić ciężarówkę. Wciskać górny lewy przycisk
(A)
do momentu otwarcia śruby blokującej
(4.1).
Przesunąć
ciężarówkę tyłem do przyczepy
(4.2)
do momentu, aż śruba
blokująca na dole przyczepy znajdzie się w pozycji
gotowości. Wciskać górny prawy przycisk
(B)
w celu
zablokowania sworznia
(4.3).
NL
4. Aankoppelen/loskoppelen
Zet de vrachtwagen aan. Druk op de knop linksboven
(A)
tot
de vergrendeling van de borgpenhouder
(4.1)
opengaat. Rij
de achterkant van de vrachtwagen tegen de aanhanger
(4.2)
tot de borgpen aan de onderkant van de aanhanger in de
bus van de borgpen zit. Door op de bovenste rechter knop
(B)
te drukken, wordt de vergrendelingspen
(4.3)
vergrendeld
.
SK
4. Spájanie/odpájanie
Zapnite nákladiak. Stláčajte ľavé horné tlačidlo
(A)
do
momentu, až kým sa odblokuje úchyt istiaceho čapu
(4.1)
.
Podíďte zadnou časťou nákladiaka k prívesu
(4.2)
do
momentu, až sa istiaci čap na spodku prívesu objaví
v zasúvacej časti istiaceho čapu. Stlačením pravého
horného tlačidla
(B)
spôsobíte zablokovanie úchyt
blokujúceho čapu
(4.3)
.
A
B
4.1
4.3
ungesichert
unsecured
sans bloquée
non assicurato
sin protegido
nezabezpečenou
niezabezpieczonych
gesichert
secured
bloquée
assicurato
protegido
zajištěné
zabezpieczone
Содержание 405148
Страница 11: ...11 ...


