PAGE
[
2
]
PAGE
[
13
]
PAGE
[
12
]
PAGE
[
3
]
SPYNET™ MISSION VIDEO WATCH
Disconnect the try-me battery pack and remove the battery tag when removing the watch
from packaging. Dispose of responsibly.
With the SpyNet™ Mission Video Watch, you’ll always have an indispensible number of
Spy tools on hand while out in the field. Maybe you’ll want to record video, pictures, and
audio files, then play them back from the comfort of your wrist, or even upload them to
the SpyNet™ website? Perhaps you’ll want to use the watch’s sneaky lie detector to
interrogate your friends and enemies? Or maybe you just want some mission
assignments from SpyNet™ Command, which may play on your watch at any time?
The possibilities are endless with the SpyNet™ Mission Video Watch!
CLOCK MODE
Pressing the Clock button displays current time and leads to
additional clock options.
– Displays Date screen
– Options
OPTIONS
Change settings for:
Alarm
Time Zone
Stop Watch
Timer
Watch Display
- Scroll up
- Confirm selection
– Scroll down
- Previous menu
START UP
Turn on the Start Up Menu by pressing key. Set current time, date and time zone.
TIME ZONE
- Change to next city
- Select City
- Change to previous city
TIME AND DATE
- Turn time forward
- Confirm blinking digit
- Turn time backward
- Previous field
My watch just turned off without me pressing anything! What happened?
The watch will automatically enter sleep mode after 10 seconds if no buttons
are pressed (unless you’re viewing a media clip or recording one). Hold down the
key for two seconds to wake the watch back up.
My watch isn’t turning on when I hold down the key
Your watch’s battery may be too low. Plug it in to your computer with the
included Mini-USB to USB dongle to recharge it.
My data looks like it may be corrupt or missing.
Save any recorded files you can on your computer, then select the “Memory
Restore” option in SETTINGS MODE to restore your watch to its original settings.
Is there an easier way to customize the settings on my watch? It takes forever!
If you’ve downloaded the SpyNet™ HQ Client application to your computer, you
can quickly set all the basic settings on your watch when it’s connected to your
computer by selecting the “Settings” tab in the MY FILES section.
FREQUENTLY ASKED QUESTIONS
CONNECTING TO THE SPYNET™ WEBSITE
Go to SpyNetHQ.com and download the SpyNet Client. Connect your
Mission Video Watch to your computer with the included Mini-USB to USB
dongle. In the “
My Files
” section of the SpyNet™ Client, you’ll see your
watch files in the bottom window and will be able to drag and drop them
into the
My Files
section above it to save on your computer. Existing
media files can also be dragged from the “My Files” section back onto the
watch to be saved there as well.
With the
Settings
tab in the “
My Files
” section, you can go down the
checklist and change the settings on your watch when it’s connected, as
well as change the language you’d like displayed on your watch.
Files can only be downloaded through SpyNetHQ.com.
VIDEO SETTINGS
Select between:
– Set video quality
– Choose playback filters
Video Quality
Select a quality setting for video recording. A lower setting gives
the user more space to record videos on their watch, but
diminishes the quality of the recording.
- Scroll up
– Select current quality setting
- Scroll down
Playback Filters
Select a color filter for the camera on the watch. All video
recorded while the selected filter is active will display with that
filter on while viewed in playback.
- Select previous filter
– Select current color filter
- Select next filter
MEMORY RESTORE
From this menu you’ll be able to restore the memory of your Mission Video
Watch to its original factory settings (WARNING: Doing this will delete all
of the current audio, picture, video, and mission files you have saved on
your watch).
- Reset Watch Memory
- Return to previous menu
SETTINGS (
CONTINUED
)
CONNECTING THE SNAKE CAM
(
SOLD SEPARATELY
)
The SpyNet™ Snake Cam can also be
connected with the watch and used as a
special attachment for doing covert tasks,
such as peeking around corners or
recording footage from over a fence.
Once you plug the Snake Cam’s Mini-USB
cable into the watch, the SURVEILLANCE
MODE menu on the watch will
automatically appear. You’ll also see the
text “SNAKE CAM” across the top of the
screen to indicate that your Snake Cam is
properly connected.
While in SURVEILLANCE MODE, you’ll be
able to use all the recording functions with
the watch that you normally can, except
that now you’ll be seeing your watch’s screen
displaying what the Snake
Cam is currently pointed at.
To return to using your normal watch camera,
simply unplug the Snake Cam from the Mini-USB
slot on your watch.
CAMERA
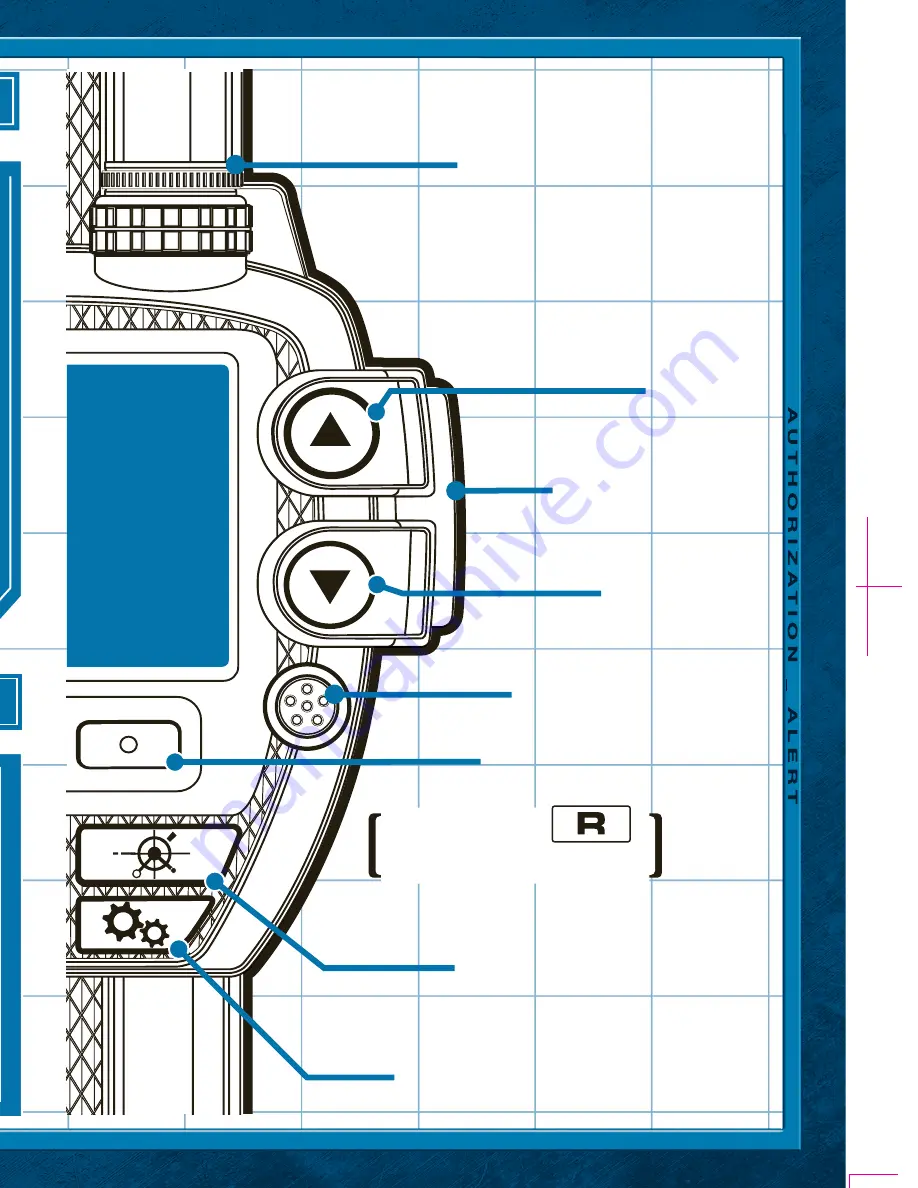
LENS
MINI USB
CONNECTOR
SCREEN
DOWN
BUTTON
SPY MODE
BUTTON
SETTINGS MODE
BUTTON
UP
BUTTON
RIGHT
BUTTON
Referred to as
in the rest of the instructions
CAMERA LENS
SPEAKER
USB
CONNECTOR
2.17.2010
SPYNET WATCH_ INST
©2010
2.17.2010
SPYNET WATCH_ INST
©2010
PMS 307 C & Black


