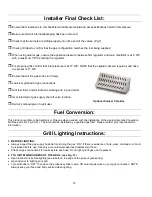
background image


Tools Required for Assembly:


Please use the proper tools to simplify installation and prevent injury or damage to your grill.


Assembly Tools Required:


1


x


Large Phillips Screwdriver


1


x


Medium Phillips Screwdriver


Assembly Tools Provided:


1


x


Hex Key for Control Knob removal


1


x


Hex Key for mounting wheels on cart


Assembling & Preparing your Grill:


CHECK BURNER FIT on ORIFICES:


1. 

Inspect burners to ensure that they are all inserted correctly onto 
the orifices (AKA the outlet of the valves; Fig 1)


2. 

If any burner is NOT correctly installed over the valve as shown in Fig 1, remove the 
burner retaining clip, remove the burner, and reinstall correctly.


3. 

Ensure each air shutter is set correctly – see correct flame characteristics on page 15 
to see if it needs adjusting.  Although we have pre-set the air shutters on the burners of 
this product, it may be necessary to adjust them for optimum performance. This is an 
outdoor appliance and geography and climate can necessitate an adjustment to the air shutters. The correct flame 
characteristics can be found on page 15 of your owner’s manual.


INSTALL FLAME DIFFUSERS & COOK GRIDS:


1. 

Remove the flame diffusers, grids & warming rack from the packaging.


2. 

Install each diffuser directly above each burner by setting them into the slotted ledges, 
in the front and rear of the firebox. (Fig. 2)


3. 

Once the flame diffusers have been installed, set the cooking grids on the upper 
ledges of the firebox in the grill, with the grill bars oriented front to rear.


4. 

Install the warming rack above cook grids, on the 2 brackets located on the left & right 
inner walls of the inner hood.


INITIAL CLEAN/WIPE DOWN:


Because we use high polish detailing, there may be some residue from the light oily cleaner we use to take off the 
protective plastic residue and masking.  These marks can be easily cleaned using a 3M or Sprayway stainless cleaner 
and a microfiber cloth, always cleaning in the direction of the stainless steel grain. This is a food safe cleaner that is 
non-abrasive and will leave your BBQ gleaming. This cleaner can be used for future regular cleaning.


INSTALL  FOLDING  SIDESHELVES  (JKS550  and  JKS700 
ONLY)


1. 

Install two brackets using two screws each on either side of the grill.


2. 

Install top bolt.


3. 

Hook on shelf and install bottom bolt (Fig. 3).


4. 

Install accessory hanging bolts.


5. 

Repeat on the other side.


Figure 2


Tip of brass orifice, on 
end of valve; correctly 
hidden inside burner.


Main burner 


Figure 1


Figure 3


Содержание Keystone Series

Страница 1: ...ropane JKS550 NG Natural Gas JKS700 LP Liquid Propane JKS700 NG Natural Gas OWNER S MANUAL for Keystone Series FIRE IT UP WITH JACKSON GRILLS www jacksongrills com Important Notice Please read ALL saf...

Страница 2: ...the US Department of transport DOT CFR 49 or the National Standards of Canada CAN CSA B339 Cylinders Spheres and Tubes for the Transportation of Dangerous Goods 11 For appliances designed to use a CG...

Страница 3: ...ding plug or use with an adapter of 2 prongs and 28 Use only extension cords with a 3 prong grounding plug rated for the power of the electrical equipment and approved for outdoor use with a W A marki...

Страница 4: ...sembling Preparing Your Grill 7 Clearance to Combustibles 8 Propane Gas Connection 8 9 Natural Gas Connection 10 Leak Testing 11 Installer Final Checklist 12 Fuel Conversion 12 Grill Lighting Instruct...

Страница 5: ...are still some items that must be unpacked and placed in the correct position in your barbecue For assembly instructions please refer to the next Section Parts Checklist PARTS CHECKLIST JKS400 LP JKS...

Страница 6: ...me at the number below Please have your model and serial number on hand Grill Model ______________________ Serial Number ___________________ Date of Purchase _________________ Place of Purchase ______...

Страница 7: ...DS 1 Remove the flame diffusers grids warming rack from the packaging 2 Install each diffuser directly above each burner by setting them into the slotted ledges in the front and rear of the firebox Fi...

Страница 8: ...Cover Fig 4 7 Place the Propane Tank into the Tank Mounting Hole in the pedestal of the grill Fig 5 Always install the propane cylinder in an upright position with the valve at the top to facilitate v...

Страница 9: ...on slowly HANDLING PROPANE CYLINDERS NOT Included with Grill 1 Government regulations prohibit shipping full Propane cylinders New cylinders not included must be taken to a Propane filling station fo...

Страница 10: ...et This turns the gas ON automatically To disconnect push sleeve back and pull out plug This automatically turns OFF the gas Fig 12 5 Check supply pressure to ensure that incoming pressure to the inle...

Страница 11: ...ATELY it indicates a heavy leak at the connection Call your gas dealer or fire department 4 Check every connection from the propane cylinder or natural gas quick release up to and including the connec...

Страница 12: ...off valve location Owner s manual given to grill user Fuel Conversion This grill is convertible to Natural Gas or Propane when needed with the installation of the appropriate Gas Conversion Kit See pa...

Страница 13: ...he desired spot Push and turn the main burner knob to the HI position then release Light burner by match at the front end of the burner tube Make sure the burner lights and stays lit If necessary call...

Страница 14: ...I heat setting for the entire cooking time When grilling large pieces of meat or poultry it may be necessary to turn the heat to a lower setting after the initial searing This allows the food to cook...

Страница 15: ...rease pan and the cup must be cleaned on a regular basis for the system to work as designed and prevent grease fires A small amount of sand or non clumping odorless kitty litter can be added to the gr...

Страница 16: ...with a stiff stainless steel grill brush Make sure all of the burner port holes are free of obstruction by using a large paperclip to poke the holes out This is extremely important to prolong the lif...

Страница 17: ...burner air shutters until flame characteristics are similar to pg 15 Burner s incorrectly installed and misaligned with valve orifice Re install burner s correctly so that the orifice is centered in t...

Страница 18: ...18 Exploded View Keystone JKS700 shown 46 47 48 45 44...

Страница 19: ...00XLU 2 3 4 11 Console Heat Shield JH 410 1 11 Console Heat Shield JH 411 1 11 Console Heat Shield JH 412 1 12 Jackson Logo JH 02 1 1 1 13 Control Panel Console Right JH 413 1 1 1 14 Control Panel As...

Страница 20: ...Cooking Grid JKS400 8 5 x 15 5 JG 51 2 32 Cooking Grid 15 75 x 15 5 JG 53 1 2 32 Cooking Grid 7 5 x 15 5 JG 52 1 33 Flame Diffusers JD 06 2 3 4 34 Grease Pan w handle JH0423 1 34 Grease Pan w handle J...

Страница 21: ...Natural Gas Conversion Kit option JF 306 1 47 Natural Gas Conversion Kit option JF 307 1 47 Natural Gas Conversion Kit option JF 308 1 48 LP Conversion Kit option JF 309 1 48 LP Conversion Kit option...

Страница 22: ...ures described in the included owner s manual Jackson Grills or its parties will not be responsible for the installation labor or any other costs or expenses related to the refitting of the warranted...

Страница 23: ...z naturel JKS700 LP Propane liquide JKS700 NG Gaz naturel MANUEL D UTILISATION pour mod le Keystone RAVIVEZ LA FLAMME AVEC JACKSON GRILLS www jacksongrills com Avis important Veuillez lire TOUTES les...

Страница 24: ...339 relatives aux cylindres sph res et tubes pour le transport des mati res dangereuses 11 Pour les appareils con us pour tre utilis s avec un raccord au gaz propane CGA 791 Placez le bouchon antipous...

Страница 25: ...prise de terre 3 broches qui correspond la puissance de l quipement lectrique et approuv pour une utilisation ext rieure avec un marquage W A 29 N utilisez pas ce barbecue jusqu ce qu il soit ENTI REM...

Страница 26: ...on du barbecue 29 30 D gagements par rapport aux combustibles 30 Raccord au gaz propane 30 32 Raccord au gaz naturel 32 33 Test de d tection des fuites 33 Liste de v rification finale de l installateu...

Страница 27: ...tre d ball s et plac s dans la position appropri e dans votre barbecue Pour les instructions de montage reportez vous la section suivante Liste de contr le des pi ces LISTE DE CONTR LE DES PI CES JKS...

Страница 28: ...de votre appareil port e de main Num ro de mod le du barbecue ______________________ Num ro de s rie ___________________ Date d achat _________________ Lieu de l achat ________________ Type de gaz GN...

Страница 29: ...er les caract ristiques exactes de la flamme la page 15 du manuel d utilisation INSTALLATION DES DIFFUSEURS DE FLAMME ET DES GRILLES DE CUISSON 5 Retirez les diffuseurs de flamme les grilles et les gr...

Страница 30: ...oivent tre fabriqu es et tiquet es conform ment aux normes nationales du Canada CAN CSA B339 relative aux cylindres sph res et tubes pour le transport des mati res dangereuses et commission Reportez v...

Страница 31: ...n est pas utilis INSTALLATION ET RACCORDEMENT D UNE BOUTEILLE DE PROPANE AU BARBECUE 1 Assurez vous que le robinet de la bouteille de propane est compl tement ferm tournez en sens horaire jusqu au bo...

Страница 32: ...ig 10 Le robinet d arr t de s curit du gaz doit se trouver dans un endroit facile d acc s voir Fig 11 NOTE De la p te joint ou du ruban Teflon Gas Rated doit tre utilis pour sceller le filetage cette...

Страница 33: ...z compl tement le robinet de la bouteille de propane en tournant LENTEMENT dans le sens contraire des aiguilles d une montre Si vous entendez un POP fermez le gaz IMM DIATEMENT car cela indique une fu...

Страница 34: ...te de v rification finale de l installateur Veillez ce que les d gagements par rapport aux combustibles soient maintenus selon les sp cifications indiqu es dans le pr sent manuel Assurez vous que tous...

Страница 35: ...z le couvercle avant d allumer votre barbecue Tournez tous les boutons la position ARR T OFF puis ouvrez le robinet de la bouteille de propane OU de gaz naturel de votre raccord de gaz REMARQUE Gardez...

Страница 36: ...ajust avant l exp dition Cependant les variations de l alimentation locale en gaz peuvent n cessiter des ajustements subtils Les flammes des br leurs doivent tre bleues et stables Il ne devrait pas y...

Страница 37: ...ISSON grilles de cuisson Pour griller les aliments on utilise des temp ratures lev es afin de bien les saisir et les dorer La plupart des aliments sont cuits au r glage HI pour toute la dur e de la cu...

Страница 38: ...le sens du grain dans l acier inoxydable Appliquez une finition en utilisant un poli en acier inoxydable et un chiffon doux et sec 9 SYST ME DE GESTION DES GRAISSES Le barbecue est con u pour permettr...

Страница 39: ...ou d un tampon nettoyeur Vaporisez l int rieur du foyer avec un d graissant pour four et laissez reposer 5 minutes Utilisez une brosse m tallique en acier inoxydable pour assouplir les r sidus de grai...

Страница 40: ...yau de gaz naturel et rangez le soigneusement sous votre barbecue 7 Entreposez toujours votre barbecue avec le couvercle install Entreposez le dans un endroit sec et v rifiez p riodiquement la pr senc...

Страница 41: ...cessaire La chaleur est inad quate Le r gulateur est d fectueux Remplacez le r gulateur NG OU le tuyau de propane et le r gulateur La pression d entr e est basse V rifiez la pression du gaz NG v rifi...

Страница 42: ...42 Vue clat e Mod le JKS 46 47 48 45 44...

Страница 43: ...LU 2 3 4 11 Bouclier thermique console JH 410 1 11 Bouclier thermique console JH 411 1 11 Bouclier thermique console JH 412 1 12 Insigne du logo Jackson JH 02 1 1 1 13 Panneau de configuration console...

Страница 44: ...2 1 32 Grille de cuisson JKS400 8 5 x 15 5 JG 51 2 32 Grille de cuisson 15 75 x 15 5 JG 53 1 2 32 Grille de cuisson 7 5 x 15 5 JG 52 1 33 Diffuseurs de flamme JD 06 2 3 4 34 Bac graisse avec poign e J...

Страница 45: ...au gaz naturel en option JF 306 1 47 Ensemble de conversion au gaz naturel en option JF 307 1 47 Ensemble de conversion au gaz naturel en option JF 308 1 48 Ensemble de conversion au propane en optio...

Страница 46: ...lisation un manque d entretien des environnements hostiles un accident des alt rations des abus ou de la n gligence y compris les rayures les bosses la corrosion la d coloration par la chaleur la d co...

Отзывы: