background image


29

 / 

51


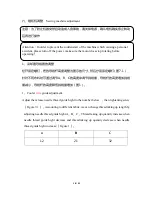
型号 

model 

喂针高度H 

Spreader height H 


喂针高度H   

Spreader height H   

K4-01GB×356 

7.8 

9.2 

K4-01GB×364 

7.8 

8.8 

K4-02BB×356 

7.8 

9.2 

K4-02BB×364 

7.8 

8.8 

K4-35AC×356 

7.8 

9.2 

K4-35AC×364 

7.8 

8.8 


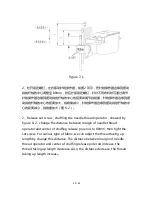
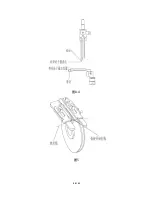
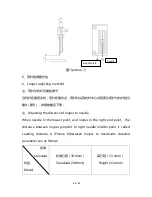
图13(Picture 13) 

喂针从右往左运动,松开螺钉1,调整喂针针尖与左针间隙调整喂0.5mm,喂针

继续向左运动到左极限,松开螺钉2,调整喂针与左针中心的间隙为4.5-5.0mm,

然后拧紧螺钉2。 

Spreader moving from right towards to left, loose screw 1,adjusting the 

distance  between  Spreader  pinpoint  and  left  needle  to  be  0.5mm,and 

Screw 2 

Screw 

Feedd needle 

Needle plate 

Содержание k4 Series

Страница 1: ...0 51 K4 K4 series use manual...

Страница 2: ...ap seam wrapping Sewing speed The maximum speed 5500RPM Factory speed 4000RPM Needle width 3 3Needle 5 6mm 6 4mm 2 2Needle 2 8mm 3 2mm 5 6mm 6 4mm Differential feed ratio 0 8 1 3 Stitch length 1 5mm 4...

Страница 3: ...ure2 1 K4 Operatio n panel Silicone oil reservoir Upper PLUG Oil sight window Needle bar guard Presser foot adjustment screw Thread take up guard Finger guard Indication plate Stitch adjustment knob T...

Страница 4: ...tegrated into machine head parameters can be adjusted on machine directly achieved interpersonal exchange easy and convenient to operate Third the installation method 1 1 table size and installation m...

Страница 5: ...above Fourth on the Lubrication oiling Note In order to prevent personal accident caused by the sudden start of the machine please turn off the power make sure the motor does stop turning and then op...

Страница 6: ...the first time It is 1 the factory refueling recommended to use the oil 22 When filling open the plug marked with OIL and add the oil between the upper and lower engraved lines Turn on the sewing mac...

Страница 7: ...or does stop turning and then operate 2 2 3 2 factory oiling When the machine is used for the first time in the factory or when the sewing machine is not used for a long time be sure to drop 2 3 drops...

Страница 8: ...ifth the use of sewing machines Note In order to prevent personal accident caused by the sudden start of the machine please turn off the power make sure the motor does stop turning and then operate 1...

Страница 9: ...into the needle clamp and the needle groove is to the inside 5 1 Note In order to prevent personal accident caused by the sudden start of the machine please turn off the power make sure the motor doe...

Страница 10: ...9 51 5 2 When the needle thread stretching in a larger amount figure5 3 When the needle thread stretching in a smaller amount 1...

Страница 11: ...3 3 stitch length adjustment 1 5mm 4 5mm Machine stitch length can be adjusted within the range of 1 5mm 4 5mm actual sewing stitch length depending on the type and thickness of the cloth The sewing m...

Страница 12: ...personal accident suddenly please turn off the power supply confirm the motor really stop running again then operate 4 Differential regulation 0 8 1 3 Within differential range of 0 8 1 3 loose and ad...

Страница 13: ...y confirm the motor really stop running again then operate 5 Adjust presser foot pressure It should be as light as possible yet be sufficient to obtain the proper stitch formation When adjust pressure...

Страница 14: ...onal accident suddenly please turn off the power supply confirm the motor really stop running again then operate 6 Thread tension adjustment Thread clamp device according to the different fabric threa...

Страница 15: ...om personal accident suddenly please turn off the power supply confirm the motor really stop running again then operate 7 Inspect and replace oil filter 6 There are dust on oil filter it couldn t norm...

Страница 16: ...15 51 Note if the oil in accordance with the provisions oil window spewing oil abnormal too weak the phenomenon such as bubbles please timely replace or clean oil filter 5 9 Figure 5 9...

Страница 17: ...1 1 Cooler wire guide adjustment Adjust the release needle thread guide hight to the number below then tightening screw Figure7 1 Accounting to different fabric we can change thread taking up length b...

Страница 18: ...and center of shuffing release pole rod to 80mm then tight the set screw For various type of fabric we can adjust the thread taking up length by change this distance The distance between margin of nee...

Страница 19: ...18 51 Figure8 2 3 8 3 3 Adjustment of spreader thread take up at the top point release set screw make the top of inner guide line fix to the bottom of guider slot then tight the set screw Figure 8 3...

Страница 20: ...51 Figure 8 3 4 8 4 1 Adjustment of thread cam and thread cam guider Hit thread cam adjustment When needle at the top Figure 8 4 adjust hit thread cam make it at the position that just start hit thre...

Страница 21: ...20 51 8 4 5...

Страница 22: ...djusting the base thread distance first loose screw and adjust dividing thread plate position If dividing thread plate moving up the thread distance get less while vice versa 6 Picture 6 5 H 7 H Divid...

Страница 23: ...en the needle run to the highest point the height of needle plate to left needle pinpoint is H Picture 7 and H parameter as follows standards Machine Model 30 8mm Standards 30 8mm 33 4mm Height 33 4mm...

Страница 24: ...e in the lowest point and looper in the right end point the distance between looper pinpoint to right needle middle point is called Leading distance A Picture 8 between looper to needle the detailed p...

Страница 25: ...needle K4 01GB 356 3 5 3 8 3 0 3 2 K4 01GB 364 3 1 3 4 2 6 2 8 K4 02BB 356 3 5 3 8 3 0 3 2 K4 01BB 364 3 1 3 4 2 6 2 8 K4 35AC 356 3 1 3 3 3 0 3 2 K4 35AC 364 2 7 2 9 2 6 2 8 8 Picture 8 0 0 05mm 9 0...

Страница 26: ...of left needle the distance of looper and left needle is 0 05 0 1mm picture 9 9 Picure 9 7 1 3 0 0 05mm 10 7 Adjusting rear guard needle When the needle bar is at the lowest point adjusting the rear g...

Страница 27: ...ust swing timing bar to adjust the size of thread loop if the thread loop is too large or too small that leads to needle skipping thread broken problems Making use of over thread bar to adjust 11 Loos...

Страница 28: ...op get larger 11 Picture 11 9 9 Adjusting feed teeth height 2 1 2mm 2 1 1 2mm 1 Adjusting feed teeth height when feed teeth get the maxmium point loose srew2 and adjusting the feed teeth height to 1 2...

Страница 29: ...1 13 H H Spreader height H is the distance between needle plate to needle adjusting Spreader height and loosing screw 1 then move Spreader up or down picture 13 to adjusting the height is H the speci...

Страница 30: ...02BB 356 7 8 9 2 K4 02BB 364 7 8 8 8 K4 35AC 356 7 8 9 2 K4 35AC 364 7 8 8 8 13 Picture 13 1 0 5mm 2 4 5 5 0mm 2 Spreader moving from right towards to left loose screw 1 adjusting the distance betwee...

Страница 31: ...moving towards left through the inside of all needles adjusting the distance between needle and front guard needle to be 0 3 0 5mm Checking thread is thick or thin to ensure the thread can be pass nee...

Страница 32: ...ght When you are adjusting presser height you should adjust the screw height to avoid presser touching other spare parts and then fix it withnut 16 Front guard needle Front guard needle protect device...

Страница 33: ...hrough the to make lower cutter component movement to the left figure 1 At the time of the moving cutter moves to the far left position nose position the point of moving cutter should be 0 5 1 0 mm be...

Страница 34: ...the above conditions can t meet at the same time then need to loosen nut 1 and nut 2 to adjust the process of shearing electromagnet by adjusting he process of shearing electromagnet to meet the requ...

Страница 35: ...34 51 3 4 set screw crank disk drive connecting rod nut 1 nut 2...

Страница 36: ...ents moves from the initial position to the left the moving blade moves to the place of looper roughly in the center width of the looper 1 2 position figure 5 we can by loosening set screw 2 then turn...

Страница 37: ...e install the lower blade we must check the relative position of the lower blade component and there is a card point or not 0 5 1mm 7 1 9 0 5 1mm 7 8 1 10 4 4mm 11 When moving blade moves to the far r...

Страница 38: ...between the moving blade and the fixed blade is 0 5 1 mm at that time the moving blade is parallel to the fixed blade figure 7 and figure 8 Loosen the screw 1 to adjust the before and back distance a...

Страница 39: ...38 51 8 9 Moving cutter is parallel to the fixed cutter Screw1 Screw3 Screw4 Screw2 Fixed cutter...

Страница 40: ...39 51 10 11 4 Adjust clip and pressure sheet 12 clip Pressure sheet clip is parallel to the fixed cutter...

Страница 41: ...use moving blade and the clip to steadily the bottom line lower looper to adjust the clamp force between the clip and moving blade it can be adjusted by rotating set screw clockwise for clamp force i...

Страница 42: ...nfirm the needle bar at the highest point the lower looper at the far right point and then can only manually push the lower cutter assembly to confirm the relevant position Second adjust the top cover...

Страница 43: ...to 0 5 1 0mm Figure 13 13 2 14 2 spring clamping force of up thread trimmer asms adjustment Trim the upper thread trimmed by the clamping spring to adjust the clamping force of the clamping spring an...

Страница 44: ...loosen the set screw The clamping force of the clamping spring decreases After the adjustment is completed tighten the set nut Figure 14 Note Please be able to clamp the upper decorative line range tr...

Страница 45: ...ew 4 Adjust the mounting plate to the left and right to adjust the angle of the upper knife set so that the knife is centered between the needle and the needle Figure 15 The tip of the knife is essent...

Страница 46: ...45 51 15...

Страница 47: ...46 51 16 17 1 18 1 19 2 1mm 18 2 3...

Страница 48: ...iper position adjustment When the wiper passes the presser foot the gap between the splinter and the presser foot is 1 mm Figure 18 and the front and rear position of the wiper can be adjusted by loos...

Страница 49: ...48 51 18 19...

Страница 50: ...een the safety switch and the solenoid valve The clearance between the safety switch and the solenoid valve is 0 5mm Adjust the clearance between the safety switch and the solenoid valve by loosening...

Страница 51: ...50 51 21...

Отзывы: