IVIEW Smart Vacuum Скачать руководство пользователя страница 2

2. Components

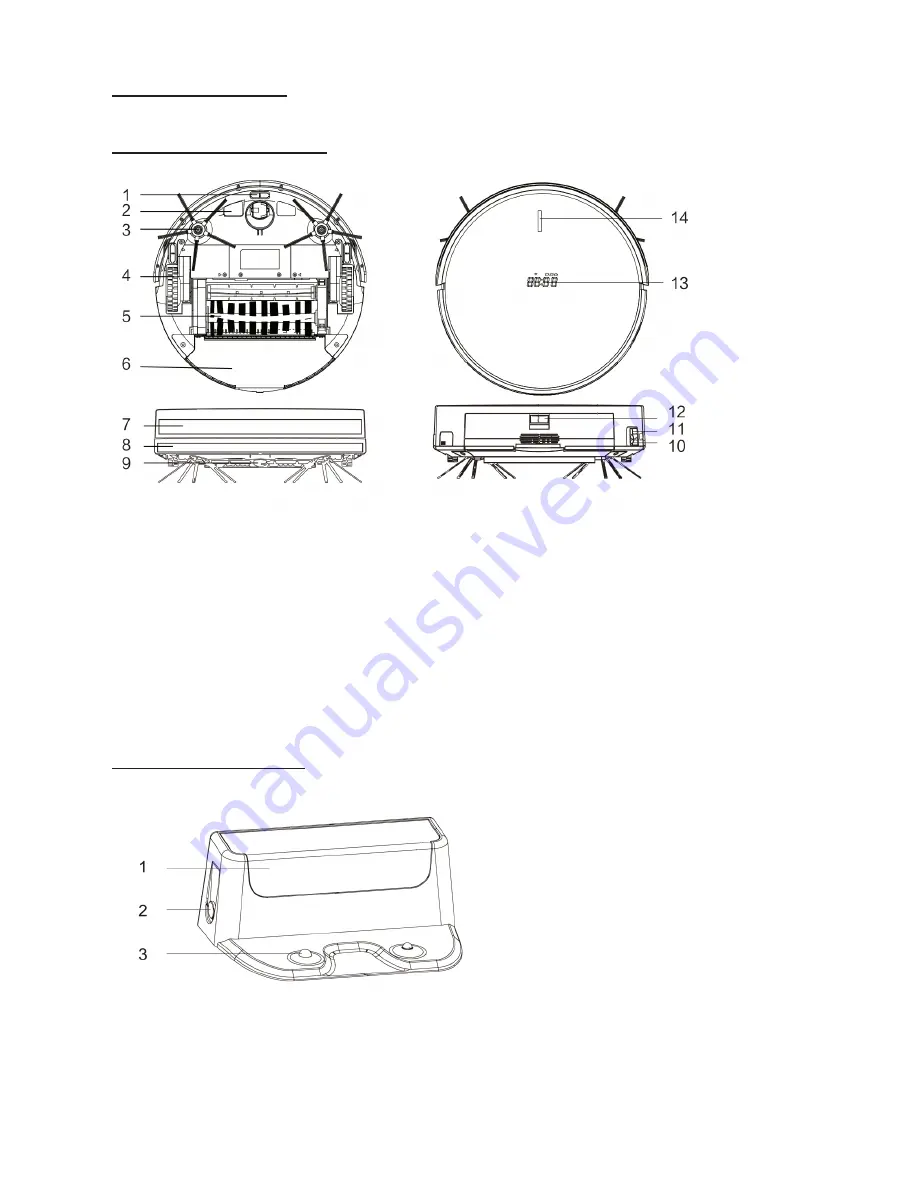
2.1 The main machine

2.2 Charging station

1 Anti-falling Sensor

2 Charging Pole

3 Side brush

4 Driving wheel

5 Main brush 

6 Dustbin and water 

tank

7 Anti-collision sensors


8 Tape

9 Universal wheel

10 Charging socket


11 

Power switch

12 Dust box and water 

tank assembly key

13 Display panel

14 Auto-cleaning 

button

1 Signal receiving window

2 DC Charging Socket

3 Charging Poles

Содержание Smart Vacuum

Страница 1: ...ric shock or personal injury Make sure the charger is firmly plugged into the socket Otherwise may cause electric shock short circuit smoke or fire Do not use the product to vacuum stones metals large...

Страница 2: ...Side brush 4 Driving wheel 5 Main brush 6 Dustbin and water tank 7 Anti collision sensors 8 Tape 9 Universal wheel 10 Charging socket 11 Power switch 12 Dust box and water tank assembly key 13 Display...

Страница 3: ...display Battery status Time Plan display 1 On Off button 2 Auto button 3 Ok button 4 Edge cleaning button 5 Clock button 6 Strong cleaning button 7 Plan button 8 Spot cleaning button 9 D mode button 1...

Страница 4: ...in unit 3 Disassemble of main brush Push the button on the main brush then take out the roller brush and fur brush 4 Dust and water tank 1 Press the button on dustbin pull out the dustbin 2 Push the d...

Страница 5: ...e robot or remote control to let the robot start finding charging station 3 Charging status 1 Please make sure the battery has been charged for 12 hours for the first charging While charging the charg...

Страница 6: ...ial Navigation an advanced navigation system that ucalculates the best path to efficiently clean your room When it is in Auto Clea ning Mode it will clean rooms automati cally and adjust its cleaning...

Страница 7: ...ill start cleaning automatically once fully charged 3 5 Plan mode Scheduling 1 Time Setting 1 Make sure the robot is on and not in charging 2 Point your remote control toward the display panel of the...

Страница 8: ...button When the robot is standbymode press this button to set the time on the robot 6 When the robot is cleaning press this button to start strong power cleaning Press again to stop 7 Plan button When...

Страница 9: ...Please clean it by using a soft brush 4 2 Main brush and side brush Clean them by using a soft brush 4 3 Other parts 1 Keep the universal wheel clean of hair animal dander and string 2 Clean all sens...

Отзывы: